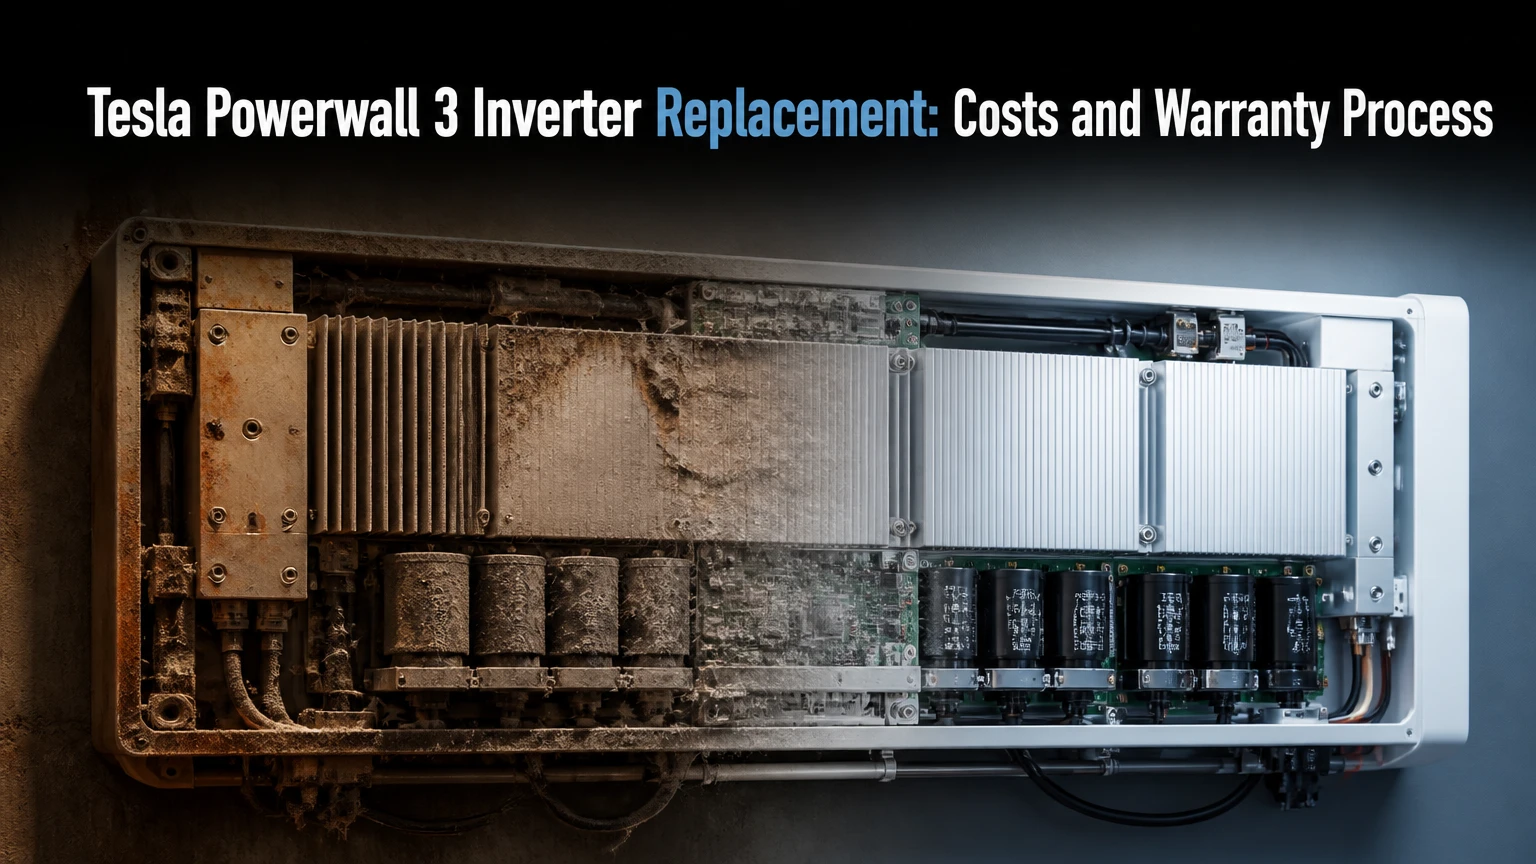
Tesla Powerwall 3 inverter replacement usually means replacing the complete Powerwall 3 unit rather than exchanging a small external inverter module. Under warranty, Tesla generally covers eligible hardware according to the applicable warranty, while labor, travel, permits, and workmanship depend on the installer agreement and local rules. Out-of-warranty replacement commonly requires a five-figure budget.
Key Facts at a Glance
- Tesla Powerwall 3 combines the battery, battery inverter, and solar inverter in one enclosure.
- A confirmed internal inverter failure commonly leads to a full Powerwall 3 unit swap.
- A typical out-of-warranty planning range is $11,300-$14,000 in the United States.
- Warranty hardware coverage does not automatically guarantee free installer labor or permit costs.
- A normal replacement visit may take 3-5 hours after the replacement unit reaches the installer.
- Homeowners should not open the Powerwall 3 enclosure or disconnect high-voltage conductors.
What Is the Powerwall 3 Inverter?
The Tesla Powerwall 3 inverter is an integrated hybrid power-conversion system that connects photovoltaic DC power, battery DC power, household AC loads, and the utility grid. Tesla lists the Powerwall 3 with a built-in solar inverter and six maximum power point tracking inputs, allowing the battery system to accept solar strings directly instead of requiring a separate solar inverter in the standard configuration.
The architecture differs from Powerwall 2. Powerwall 2 normally connects to an external solar inverter through an AC-coupled design, whereas Powerwall 3 can perform solar conversion inside the battery enclosure. That arrangement reduces separate equipment and conversion stages, but it places more functions inside one large service unit.
The inverter manages several energy paths:
- Solar-array DC enters the MPPT inputs.
- The solar inverter converts usable DC into AC for household loads or grid export.
- A bidirectional battery converter moves energy into and out of the battery.
- The Gateway coordinates backup isolation, load control, and grid interaction.
- System controls enforce voltage, frequency, temperature, and safety limits.
Tesla identifies the Powerwall 3 as an LFP battery product in its published specifications. The inverter and battery controls remain interdependent even though they perform different electrical functions.
Can Tesla Replace Only the Inverter?
Tesla Powerwall 3 inverter replacement is usually handled as a complete-unit exchange because the power electronics are integrated into the main chassis. The practical service question is therefore not “Which inverter board should be replaced?” but “Has Tesla authorized a Powerwall 3 replacement under the applicable failure diagnosis and warranty?”
A service technician may replace smaller external components, wiring, breakers, communication equipment, or sensors when those parts caused the symptom. A failed internal inverter assembly is different. A homeowner should request the diagnosis in writing and ask whether Tesla is authorizing a component repair, a head-unit exchange, or a system redesign.
The distinction matters financially. A communication fault may require a low-cost network or Gateway remedy, while a confirmed power-conversion failure can require heavy equipment handling, DC reconnection, commissioning, and replacement registration.
How Does Powerwall 3 Inverter Failure Work?
Powerwall 3 inverter failure can appear as lost solar production, unavailable battery charging, backup failure, repeated isolation alarms, or a persistent fault in the Tesla app. Those symptoms do not prove that the inverter itself has failed, because grid disturbances, firmware problems, open breakers, poor communications, overheating, and solar-array faults can produce similar messages.
Tesla’s Owner’s Manual directs owners to use the Tesla app and follow service instructions rather than access internal components. The manual also provides safety information for the Powerwall, Gateway, and system shutdown procedures.
Failure Modes That Look Similar
| Observed symptom | More likely first checks | Replacement implication |
|---|---|---|
| Solar production is zero | Solar breaker, rapid shutdown, daylight, inverter fault, string voltage | No unit swap until array and shutdown devices are tested |
| Battery will not charge | Grid status, reserve setting, temperature, firmware, utility restriction | Could be a control or grid condition |
| Backup power fails | Gateway breaker, backup loads panel, grid outage test, overload history | Gateway or wiring may be responsible |
| Red fault indication | App error code, isolation status, temperature, service logs | Persistent internal fault may support RMA |
| App shows offline | Router, Wi-Fi signal, cellular connection, Tesla service status | Usually a communications issue, not inverter failure |
| Repeated shutdowns | Thermal clearance, ambient temperature, fault history, installation wiring | Requires qualified diagnostic inspection |
A red or fault indication deserves prompt service, but LED color alone cannot identify a failed inverter. Tesla may need system logs, voltage measurements, event history, and installer testing before approving a replacement.
What Should a Homeowner Check Safely?
A homeowner can verify whether the Tesla app shows an active outage, whether the home internet connection works, whether a visible breaker has tripped, and whether the system reports a reserve or operating-mode setting that explains the behavior. A homeowner should not remove covers, probe DC terminals, or repeatedly cycle equipment during a fault.
Record the time of failure, weather conditions, utility status, app screenshots, LED behavior, recent electrical work, and whether solar, battery, or backup functions are affected. This evidence reduces diagnostic back-and-forth.
What Does Powerwall 3 Replacement Cost?
A typical United States out-of-warranty Powerwall 3 replacement budget is approximately $11,300-$14,000, including roughly $9,300-$10,500 for hardware and $2,000-$3,500 for labor, electrical work, permits, and commissioning. These are planning figures, not Tesla-published fixed prices; regional labor, availability, taxes, crane access, and system complexity can change the quote.
| Cost component | Typical planning range | Main price drivers |
|---|---|---|
| Replacement Powerwall 3 hardware | $9,300-$10,500 | Availability, distributor pricing, taxes |
| Electrical labor | $1,200-$2,400 | Crew size, conduit access, rewiring |
| Handling and removal | $400-$900 | Wall height, restricted access, lifting equipment |
| Permits and utility administration | $200-$900 | Jurisdiction, utility, inspection requirements |
| Commissioning and troubleshooting | $400-$1,000 | Gateway pairing, firmware, string testing |
| Typical total | $11,300-$14,000 | Combined local project conditions |
Under warranty, eligible Tesla hardware may cost the owner $0, but “hardware covered” does not automatically mean “every service cost covered.” A third-party installer contract may define separate workmanship, labor, travel, permitting, or diagnostic obligations. Tesla’s Limited Warranty is the controlling document for warranty scope, exclusions, duration, and remedy, while the installer agreement controls many installation-service questions.
Which Costs Are Often Missed?
Homeowners frequently budget for the replacement enclosure and overlook four secondary charges:
- A truck-roll or diagnostic fee after the original workmanship period ends.
- Permit revision or utility inspection charges.
- Extra labor when the replacement cannot use existing conduit or mounting hardware.
- Temporary generation, rental equipment, or electrician travel for remote properties.
Ask for a written quote with separate lines for equipment, removal, installation, permits, inspection, commissioning, taxes, and disposal. A quote that says “Powerwall replacement, $12,000” does not show which party carries each risk.
Does the Tesla Warranty Cover the Replacement?
The Tesla warranty may cover an eligible Powerwall 3 hardware defect during the stated warranty term, but eligibility depends on the governing regional warranty, installation conditions, exclusions, operating requirements, and Tesla’s diagnosis. The original purchase date, serial number, installer records, maintenance history, and connectivity history should be available before filing a claim.
Tesla publishes warranty terms separately from the Owner’s Manual. Do not rely on a sales brochure or an installer’s verbal promise when the documents conflict. Ask Tesla and the installer to identify the exact warranty section that covers the proposed remedy.
| Warranty question | Evidence to gather | Why it matters |
|---|---|---|
| Is the unit within term? | Invoice, commissioning date, serial number | Warranty periods usually run from a defined start date |
| Is the failure hardware-related? | Tesla logs, app codes, installer test report | Symptoms alone do not establish eligibility |
| Is labor included? | Installer agreement and workmanship warranty | Hardware and installation obligations may differ |
| Was installation compliant? | Permit, inspection, one-line diagram, photos | Wiring or installation exclusions can affect claims |
| Was connectivity maintained? | App history, router records, service notes | Remote monitoring and firmware conditions may apply |
| Who owns the removed unit? | RMA and replacement paperwork | Tesla may require return and control disposal |
Connectivity is important because Tesla uses remote diagnostics and firmware delivery, and some warranty language may impose operating or communication conditions. The exact effect of a prolonged offline period depends on the applicable warranty version and jurisdiction. Ask Tesla for a written determination instead of assuming that a disconnected system automatically loses all coverage.
How Do You Start a Warranty Replacement?
Start a Tesla Powerwall 3 warranty claim through the Tesla app or the support channel associated with the installation, then provide error codes, system history, installation documents, and a precise description of which functions have stopped working. The process normally moves through diagnosis, authorization, installer scheduling, physical exchange, commissioning, and post-repair verification.
Step 1: Capture the Failure Evidence
Save app screenshots showing the current operating state, error text, timestamps, battery percentage, solar output, grid status, and backup status. Photograph the exterior LED and equipment labels without opening the enclosure.
Include the installation address, Powerwall serial number, commissioning date, installer name, recent storms, utility outages, and any electrical work. State whether the system still powers household loads, charges from solar, discharges to the home, and provides backup.
Checkpoint: You have a dated evidence package that another technician can understand without asking basic follow-up questions.
Common mistake: Reporting only “Powerwall is broken,” which does not distinguish solar, battery, backup, or communications failure.
Step 2: Request Tesla Diagnostics
Open the Tesla app, choose the energy product support or service pathway available to your account, and submit the recorded fault information. Tesla may retrieve logs remotely, request a power cycle, or direct the certified installer to perform electrical tests.
Do not perform a shutdown procedure that conflicts with the app’s instructions or local emergency guidance. A qualified installer must handle high-voltage testing and conductor isolation.
Checkpoint: Tesla provides a case number and identifies the next diagnostic action.
Common mistake: Closing the service case after the app reconnects briefly, even when the fault returns under load.
Step 3: Obtain the RMA or Remedy Decision
If Tesla confirms an eligible internal hardware failure, request written confirmation of the remedy, replacement model, warranty status, shipping destination, and labor responsibility. Tesla may route the replacement through the original certified installer or another authorized service provider, depending on location and availability.
Ask whether the replacement retains the original warranty end date. A replacement unit normally does not restart the entire warranty term, although the exact treatment belongs in Tesla’s written documentation.
Checkpoint: The case records a confirmed replacement authorization or a specific reason for denial.
Common mistake: Ordering a third-party battery before Tesla decides whether the existing system remains under warranty.
Step 4: Schedule Safe Shutdown and Removal
The installer should isolate the Powerwall, Gateway, solar array, and applicable AC circuits according to Tesla’s installation documentation and local electrical rules. The Powerwall 3 weighs approximately 286 pounds, or about 130 kilograms, so removal requires suitable lifting equipment, a trained crew, and a safe route from the mounting location.
Homeowners should clear access, protect flooring, secure pets, and identify the main electrical panel, Gateway, solar disconnect, and backup loads panel. Do not attempt to move the unit or disconnect solar conductors.
Checkpoint: The crew confirms the site is electrically isolated and the replacement mounting location meets clearance requirements.
Common mistake: Assuming an apparently switched-off Powerwall has no hazardous voltage.
Step 5: Reconnect and Commission the Replacement
The installer reconnects AC conductors, solar strings, communication wiring, grounding, and Gateway controls, then tests polarity, torque, insulation, and operating status. The technician commissions the replacement through Tesla’s approved installer tools, pairs it with the Gateway, confirms the new serial number, and applies required firmware.
The installer should test grid-connected operation, solar charging, battery discharge, backup transition, app visibility, and any whole-home or backup-loads behavior. A replacement is incomplete until these functions have been demonstrated.
Checkpoint: The Tesla app shows the correct serial number and the system passes a documented commissioning test.
Common mistake: Leaving without verifying backup operation because the app displays “online.”
How Long Does Replacement Take?
A typical replacement involves 2-5 business days for initial remote diagnostics, 2-6 weeks for approval and equipment logistics, and 3-5 hours for a straightforward on-site exchange. Those ranges are typical planning figures rather than Tesla service guarantees; parts allocation, installer capacity, permits, inspections, weather, and utility requirements can extend the schedule.
| Stage | Typical duration | Owner action |
|---|---|---|
| App claim and initial response | 1-5 business days | Submit complete logs and photos |
| Remote diagnosis | 2-5 business days | Keep internet and system powered as instructed |
| RMA and shipping | 2-6 weeks | Confirm installer receipt and equipment model |
| Permit or utility coordination | 1-4 weeks | Ask who submits revisions |
| Physical replacement | 3-5 hours | Clear access and keep people away from equipment |
| Commissioning and verification | 1-3 hours | Test solar, battery, backup, and app status |
A failed Powerwall can leave a home with reduced solar use or no backup, depending on the failure and system topology. Ask Tesla whether the unit should remain powered, be isolated, or operate in a restricted mode while waiting.
Should You Replace the Whole Unit or Redesign the System?
A full factory unit swap is normally the cleanest solution when Tesla authorizes the replacement and the existing solar strings, Gateway, mounting structure, and permits remain compatible. A redesign becomes more reasonable when the unit is out of warranty, replacement logistics are poor, the solar inverter is independently serviceable, or the owner wants different backup capacity.
| Option | Typical cost position | Time position | Main benefit | Main limitation |
|---|---|---|---|---|
| Tesla Powerwall 3 unit swap | $0 hardware under eligible warranty; $11,300-$14,000 out of warranty | 2-6 weeks plus install | Preserves the intended architecture | Heavy enclosure replacement |
| External solar inverter redesign | $4,000-$12,000 added system work | 2-8 weeks | May restore solar conversion | Does not repair a failed battery control system |
| New battery system | $12,000-$25,000 installed | 3-10 weeks | Opportunity to change capacity and brand | New design, permits, and equipment |
| Powerwall 3 expansion or second unit | Project-specific, often $8,000-$15,000 installed | 2-8 weeks | Adds capacity and inverter redundancy | Does not eliminate failure risk |
| Repair Gateway or wiring fault | $300-$2,500 typical service range | 1-3 weeks | Avoids unnecessary battery replacement | Only works if diagnosis is external |
AC-coupling an external solar inverter can preserve solar production in some designs, but it does not automatically restore a dead Powerwall 3 battery inverter or battery-management function. The proposed design must satisfy Tesla compatibility requirements, utility interconnection rules, backup controls, and the third-party inverter manufacturer’s specifications.
When Is a Second Powerwall 3 Sensible?
A second Powerwall 3 can provide partial system availability if one unit fails, because each unit contains its own power-conversion hardware. The benefit is strongest for remote homes, medically dependent loads, or properties where a service visit may take weeks.
The trade-off is cost. A second unit increases capital expense, wall or floor space, installation complexity, and the number of systems exposed to common grid, communication, or Gateway faults. A second battery does not guarantee that every home load will remain powered when one unit is offline.
What Should an Installer Quote Include?
A replacement quote should identify the exact equipment, labor scope, electrical testing, permits, commissioning tests, warranty handling, and responsibility for the removed Powerwall 3. Written scope prevents a hardware-only warranty approval from becoming an unexpected homeowner invoice.
| Quote line | Required detail | Example value |
|---|---|---|
| Replacement equipment | Model, quantity, tax treatment | One Tesla Powerwall 3 |
| Removal | Labor and transport method | Two-person crew, lifting dolly |
| Electrical work | Conductors, terminals, conduit changes | Existing solar strings reused |
| Permitting | Authority and inspection responsibility | County electrical permit |
| Commissioning | Tests included | Backup transfer and app pairing |
| Warranty labor | Covered or excluded charges | Installer workmanship through 2030 |
| Disposal or return | Tesla RMA shipping responsibility | Failed unit returned to Tesla |
| Change orders | Conditions that trigger extra cost | Wall repair or conduit replacement |
A practical installer rule is to compare the existing one-line diagram with the proposed reconnection before the crew arrives. A replacement can become a redesign when the original array exceeds the new unit’s input limits, the conduit is damaged, or the installation no longer matches current code.
Integrated and Separate Inverters: Which Is Better?
Powerwall 3 is generally preferable when a homeowner wants a compact DC-coupled installation, while a separate inverter architecture is more serviceable when modular replacement and independent solar operation matter most. Neither design eliminates failure risk; each moves the cost and complexity to a different part of the system.
| Decision factor | Powerwall 3 integrated inverter | Powerwall 2 with separate solar inverter | Battery with separate hybrid inverter | Microinverter solar plus AC battery |
|---|---|---|---|---|
| Solar connection | Direct DC strings | AC from external PV inverter | DC or AC by design | AC from panel-level units |
| Failure isolation | Lower, shared power-conversion unit | Higher, separate solar and battery devices | Medium to high | High for panel-level failures |
| Service event | Potential full-unit exchange | Individual inverter replacement | Modular component replacement | Multiple device types |
| Conversion path | DC-coupled solar charging | AC-coupled battery charging | System-dependent | Usually AC-coupled |
| Installation footprint | One main battery enclosure plus Gateway | Battery, solar inverter, Gateway | Battery plus inverter and controls | Microinverters plus battery equipment |
| Best fit | New integrated solar-storage system | Existing working solar inverter | Serviceable custom design | Complex roofs and panel-level monitoring |
The integrated design can reduce equipment count and direct-current conversion losses during solar charging. Separate equipment can reduce the consequence of one failure because a working solar inverter may continue producing energy even when the battery system is unavailable.
Tesla’s published specifications and installation documents should control compatibility decisions, not a generic claim that every external inverter can be connected.
Common Mistakes and Recovery Actions
Mistake 1: Treating an Offline App as an Inverter Failure
Restore router power, inspect the network path, and ask Tesla whether recent logs show electrical operation. An offline app can hide a healthy battery, while an online app can still report a genuine hardware fault.
Mistake 2: Hiring an Unapproved Technician to Open the Enclosure
Do not allow a general electrician to open the Powerwall 3 unless the person is authorized and qualified for the equipment and local code. Unauthorized internal work can create safety exposure and complicate warranty review.
Mistake 3: Repeatedly Cycling the System
One directed restart may clear a transient condition. Repeated cycling can erase useful event context, create additional faults, or violate support instructions. Record the error first and follow Tesla’s prescribed sequence.
Mistake 4: Ignoring Solar String and Terminal Evidence
Incorrect conductor type, poor torque, damaged insulation, or an isolation fault can mimic inverter failure and can damage replacement equipment. The installer should document DC voltage, insulation results, terminal condition, and torque verification before reconnecting the replacement.
Mistake 5: Accepting a Hardware-Only Warranty Answer
Ask who pays for removal, labor, permits, travel, inspection, and the return shipment. Tesla’s warranty and the installer’s workmanship agreement may allocate those obligations differently.
Regional, Access, and Out-of-Warranty Scenarios
Location changes the final price more than the replacement hardware alone. Dense urban areas may increase labor and permit coordination costs, while rural locations may add travel, lodging, lifting equipment, and limited installer availability.
| Scenario | Likely complication | Planning response |
|---|---|---|
| Garage wall installation | Narrow access or vehicle obstruction | Reserve a clear 4-6 foot work path |
| Exterior wall installation | Weather and corrosion inspection | Schedule dry conditions and inspect conduit |
| Remote rural property | Travel and fewer certified crews | Ask about trip charges and regional stock |
| Coastal property | Salt exposure and enclosure condition | Photograph corrosion before removal |
| Utility export system | Interconnection records may need updating | Confirm permit and utility requirements |
| Medical backup loads | Outage risk during service | Arrange temporary backup generation |
An out-of-warranty decision should compare three numbers: replacement cost, redesign cost, and the value of retaining Tesla support. A $12,000 unit swap may be rational when the solar array, Gateway, and battery capacity remain suitable. A redesign may be better when the existing solar inverter is new, the Powerwall is near the end of its warranty, or the owner needs a different backup configuration.
What Happens After the Unit Is Installed?
After Tesla Powerwall 3 inverter replacement, the installer should verify electrical safety, Gateway communication, firmware status, solar input, battery charging, battery discharge, backup transfer, and app ownership. The homeowner should receive updated serial-number records, commissioning results, permit documents, and warranty confirmation.
Use this acceptance checklist:
- Tesla app displays the replacement serial number.
- All solar strings show expected production in daylight.
- Battery charges from solar under suitable conditions.
- Battery discharges to permitted household loads.
- Backup loads transfer during a controlled test.
- Gateway and Powerwall show normal status.
- No active isolation, temperature, communication, or grid faults remain.
- Installer provides the date and scope of the replacement.
- Tesla confirms the warranty end date in writing.
- Removed equipment is handled under the RMA instructions.
A counterintuitive service lesson is that the replacement unit can be healthy while the original fault remains in the solar array, Gateway, or AC wiring. Commissioning tests must therefore validate the complete energy path, not only whether the new enclosure powers up.
Frequently Asked Questions
Can I keep using solar while waiting for a replacement?
Possibly, but the answer depends on the failure mode and wiring topology. If the Powerwall 3 controls the solar strings and its inverter is disabled, solar production may stop even when the panels are healthy. Do not bypass the battery without a qualified design review, because an improvised connection can violate equipment ratings, utility rules, and warranty conditions.
Does a replacement Powerwall restart the 10-year warranty?
A replacement generally should not be assumed to restart the original warranty period. Tesla’s written warranty determination and RMA paperwork should state the applicable end date and remedy. Keep the original invoice, replacement serial number, service case, and commissioning record together for future claims.
Can a third-party electrician install a replacement Powerwall 3?
A third-party electrician should not install or commission the unit unless Tesla and local requirements expressly authorize that arrangement. Powerwall 3 work involves high-voltage battery circuits, solar DC inputs, Gateway controls, firmware, and utility compliance. Use an appropriately qualified Tesla service provider and obtain written authorization before work begins.
Is a Powerwall 3 replacement covered by home insurance?
Home insurance may cover damage from a named covered event, such as fire or certain storm damage, but it usually does not cover ordinary mechanical failure or wear. The policy, deductible, cause of loss, and equipment endorsement control the result. Ask the insurer whether labor, permits, temporary power, and code upgrades are included.
Should I repair the solar inverter instead of replacing Powerwall 3?
Repairing or replacing an external solar inverter can make sense when solar conversion failed but the Powerwall 3 battery and controls remain healthy. It is not a substitute for a failed internal Powerwall 3 battery inverter. Tesla, the installer, and the third-party inverter manufacturer must approve the electrical architecture before AC-coupling changes are made.
The Bottom Line
Tesla Powerwall 3 inverter replacement is usually a complete-unit service event because the hybrid inverter is integrated into the battery enclosure. Start with Tesla app diagnostics, preserve evidence, obtain a written warranty and labor decision, and use an authorized installer for shutdown, lifting, reconnection, and commissioning. Eligible warranty hardware may cost $0, while an out-of-warranty project commonly requires an $11,300-$14,000 budget. Confirm the exact warranty terms, because Tesla’s coverage and the installer’s workmanship obligations are separate questions.