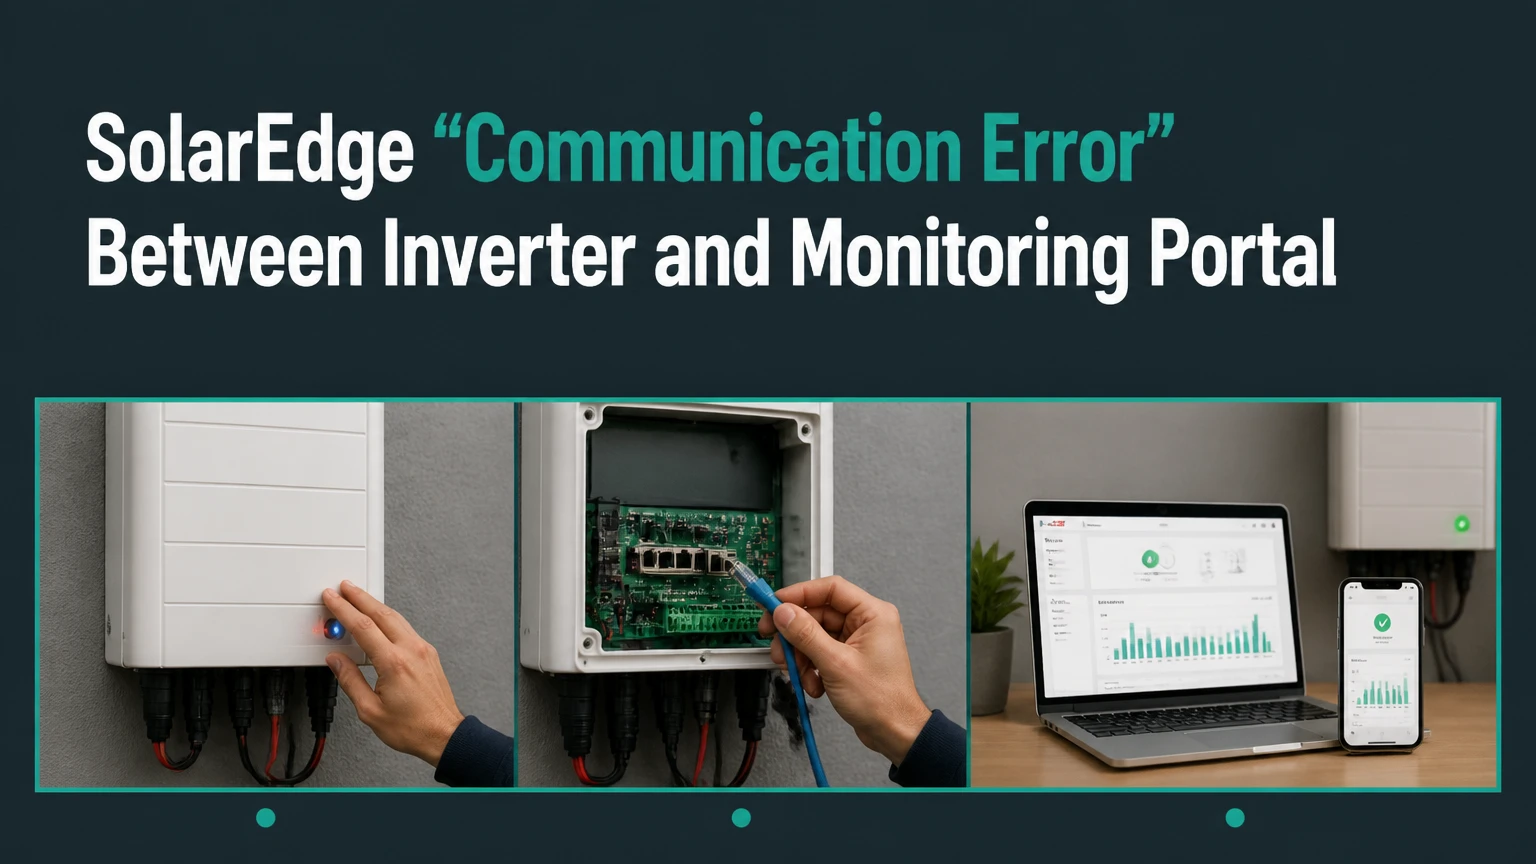
A SolarEdge "Communication Error" between the inverter and Monitoring Portal means the inverter is not successfully uploading telemetry to SolarEdge cloud services. The inverter may continue producing power when the production indicator is normal, but live charts, battery status, alerts, and optimizer-level data can remain unavailable until the connection returns.
Key facts
A portal communication failure does not automatically mean that the solar inverter has stopped producing electricity.
SolarEdge communication must pass through several layers: inverter, local network or cellular link, internet service, and SolarEdge servers.
A router replacement, changed Wi-Fi password, disabled 2.4 GHz network, DHCP failure, or legacy cellular modem commonly causes the alert.
Homeowners can inspect LEDs, router status, cables, and app diagnostics without opening the inverter enclosure.
SolarEdge SetApp models use local Bluetooth or Wi-Fi commissioning tools, while older models may use an LCD screen.
Do not change firewall ports or internal wiring based on a generic online instruction. SolarEdge model, region, firmware, and installer settings determine the correct configuration.
What Does a SolarEdge Communication Error Mean?
A SolarEdge communication error identifies a failed data path, not one single component failure. The inverter can be generating DC power and converting it to AC while its monitoring interface is offline, because electricity production and internet telemetry use different functions.
SolarEdge describes monitoring communication as a connection between the inverter and the SolarEdge Monitoring Server. The path can use Ethernet, Wi-Fi, cellular communication, or a dedicated wireless gateway, depending on the installed hardware. The portal then presents site, inverter, meter, battery, and optimizer information through web and mobile interfaces.
The alert has three practical consequences:
- Production visibility decreases. The owner may lose current watts, daily yield, battery state of charge, and panel-level status.
- Remote diagnosis becomes limited. An installer cannot see fresh inverter events until the device reconnects.
- Historical recovery may occur later. Many SolarEdge systems store some readings locally and upload them after reconnection, but retention depends on model, firmware, memory, and outage duration. Treat claims of a universal 21-day buffer as unsafe unless the applicable SolarEdge documentation confirms it.
Can the system still generate electricity?
A SolarEdge system can continue generating electricity during a monitoring outage if the inverter has normal production status and no active electrical fault. A communication error alone does not prove a failed inverter, optimizer, or solar array.
The green production indicator is useful but not conclusive. A red fault indicator, tripped AC breaker, nighttime shutdown, grid fault, abnormal inverter noise, or zero production on a sunny day requires a separate production investigation. Monitoring data may be stale, so compare the inverter status with utility consumption, a revenue-grade meter, or an installer diagnostic where available.
SolarEdge warns system owners to follow the applicable inverter manual and avoid unsafe electrical work. Never remove covers, probe terminals, or operate internal disconnects to restore an internet connection.
How Does SolarEdge Monitoring Communication Work?
SolarEdge monitoring follows a layered path: optimizers communicate with the inverter over the power line, then the inverter sends system data through a network interface to SolarEdge cloud services. A fault at any layer can create an apparent portal communication error.
| Communication layer | Typical technology | What failure looks like | Safe check |
|---|---|---|---|
| Panel to optimizer | DC power and optimizer signaling | One panel or optimizer missing | Review portal history or installer diagnostics |
| Optimizer to inverter | Power line communication, PLC | Optimizer pairing or production alerts | Do not open equipment; request installer testing |
| Inverter to local network | Ethernet, Wi-Fi, Zigbee gateway | LAN disconnected, DHCP failed | Check cable, router, SSID, and gateway power |
| Network to cloud | Internet, DNS, outbound TCP | Ping or server connection failure | Test internet and firewall policy |
| Cloud to portal | SolarEdge Monitoring Server | Stale charts or site offline | Check portal timestamp and service status |
The most efficient diagnosis tests these layers in order. If the inverter cannot obtain a local IP address, investigating SolarEdge cloud servers is premature. If the inverter has an IP address and can reach the internet but the portal remains stale, the likely causes shift toward firewall rules, server access, authentication, firmware, or a SolarEdge-side incident.
Which Inverter Communication Method Is Installed?
The installed communication method determines the correct repair. Ethernet uses a physical cable, Wi-Fi uses a compatible local wireless network, cellular bypasses the home router, and Zigbee uses a separate gateway that itself needs power and router access.
| Method | Technical requirement | Typical range or limit | Typical repair cost |
|---|---|---|---|
| Ethernet | Cat5e or Cat6 cable to router or network switch | 100 m maximum channel length under structured-cabling limits | $50-$500 installed |
| Wi-Fi | SolarEdge Wi-Fi hardware and compatible 2.4 GHz network | Usually strongest below approximately -67 dBm; -70 dBm is a practical weak-signal threshold | $0-$300 for setup or hardware |
| Cellular | Compatible SolarEdge modem, antenna, carrier service | Depends on regional LTE coverage and antenna placement | $200-$800 plus service |
| Zigbee gateway | Matched inverter module and gateway connected to router | Typically 15-30 m indoors, depending on walls and interference | $150-$500 for replacement equipment and labor |
The costs are typical homeowner-market ranges, not SolarEdge price guarantees. Labor, roof access, travel, country, tax, inverter generation, and communication-card availability can change the final invoice substantially.
Ethernet is usually the most predictable option where cable routing is practical. Cellular is often simpler for a homeowner who changes routers frequently, but it introduces carrier coverage and subscription dependence. Wi-Fi avoids cable installation, yet it is sensitive to signal strength, access-point changes, and network security settings.
How Do You Troubleshoot a SolarEdge Communication Error?
Use a five-step sequence: confirm production status, restart only the permitted equipment, inspect the network path, run the SolarEdge communication test, and verify portal recovery. A basic check takes 15-30 minutes; a cable run, cellular replacement, or installer repair can take 30 minutes to several hours.
Before you start
| Item | Typical requirement | Why it matters |
|---|---|---|
| Time | 15-30 minutes | Covers checks, reboot, and portal verification |
| Tools | Smartphone, flashlight, router login | Supports app diagnostics and physical inspection |
| Cost | $0 for checks | Replacement hardware and labor cost extra |
| Access | Inverter exterior and router | Avoids opening the enclosure |
| Prerequisite | Daylight production status if possible | Separates communication from production faults |
Step 1: Record the inverter status
Read the exterior LEDs or LCD without removing any cover. Record the inverter model, serial number, exact alert text, LED colors, and the time of the last portal update.
SolarEdge LED meanings vary by product family, but a green production indication generally means that the inverter is operating or has production status, while communication indicators identify network activity. Red alerts can indicate a fault unrelated to internet access. SolarEdge manuals remain the controlling reference for the specific model.
Success checkpoint: You have a photograph or written record of the display and portal timestamp.
Common mistake: Treating a blue or red indicator as universal across every SolarEdge inverter generation.
Step 2: Check power and the local network
Confirm that the home router has internet access by testing a phone or computer on the same network. Inspect the Ethernet plug for a complete latch, verify that the router port link light is active, and check whether a Wi-Fi access point has recently changed.
For Wi-Fi systems, confirm that the configured SSID still exists and that the password has not changed. Many SolarEdge Wi-Fi installations require 2.4 GHz connectivity, so a 5 GHz-only network cannot provide the necessary radio link. Guest networks, captive portals, MAC filtering, client isolation, and aggressive mesh roaming can also block an inverter.
Success checkpoint: The router has internet access, the inverter cable or access point is present, and the network settings match the inverter configuration.
Common mistake: Assuming a phone connected to a combined SSID proves that an older inverter can join the same wireless band.
Step 3: Test communication locally with SetApp
SetApp-compatible SolarEdge inverters can be accessed locally using the mySolarEdge or SetApp workflow specified for the installer and model. The QR code identifies the inverter, and moving the external switch briefly to the P position can initiate local communication on supported models. The exact app menu and authorization requirements vary by firmware and user role.
Use the local communication screen to identify the failed layer. Common diagnostic states include local network disconnected, DHCP failure, ping failure, and server connection failure. Do not use a generic table as proof that a particular port or setting must be changed.
Success checkpoint: The local screen reports an IP address and identifies whether the failure occurs before or after internet access.
Common mistake: Holding the switch in the P position or attempting commissioning functions without the installer permissions required by the model.
Step 4: Reconnect Wi-Fi or Ethernet
For Ethernet, connect the inverter communication cable to a known working router or switch port, then confirm link activity. Avoid powerline adapters as a first choice because they can introduce a second failure point, although a properly configured adapter can help where direct cable routing is impossible.
For Wi-Fi, use the SolarEdge-supported reconnection process rather than changing router security settings broadly. Create a dedicated 2.4 GHz test SSID if the router supports it, keep the network name and password simple during testing, and place a temporary access point closer to the inverter when signal strength is uncertain.
Success checkpoint: The inverter obtains a local IP address and passes the local network test.
Common mistake: Changing several router settings simultaneously, which makes it impossible to identify the setting that fixed or caused the failure.
Step 5: Restart equipment in a controlled sequence
Restart the home router first if other devices also lack internet access. If the inverter itself requires a power cycle, follow the model-specific SolarEdge shutdown and startup procedure, including the AC, DC, and external switch order stated in the manual.
Some installer guides use a sequence involving the inverter switch, DC disconnect, and dedicated AC breaker, followed by a waiting period before restart. The homeowner should operate only clearly labeled external disconnects and breakers. A qualified installer must handle internal terminals, communication boards, fuses, and exposed conductors.
Success checkpoint: The inverter returns to normal status, the network test passes, and the portal begins receiving a newer timestamp.
Common mistake: Judging success immediately after restart. Portal charts can require several minutes to refresh, and a delayed timestamp is more reliable than a single app screen.
What Do SolarEdge Diagnostic Results Indicate?
SolarEdge diagnostic results identify the first failed communication layer, but status labels differ among firmware versions and inverter families. Use the result to choose the next test, not to infer a hardware replacement automatically.
| Diagnostic result | Likely failed layer | Next action | Escalation trigger |
|---|---|---|---|
| S_OK or connected | Inverter and server path | Wait 10-30 minutes and refresh portal | Portal remains stale after 30 minutes |
| LAN or Wi-Fi disconnected | Cable, radio, SSID, or module | Check cable, 2.4 GHz SSID, signal, and module | Hardware is absent or repeatedly drops |
| DHCP failed | Router IP assignment | Restart router, inspect DHCP pool, remove isolation | Other devices work and inverter still receives no lease |
| Ping failed | Local network or internet route | Test router internet, DNS, VLAN, and firewall | Inverter has IP but cannot reach required services |
| Server connection failed | Outbound access, service, or authentication | Check firewall policy and SolarEdge service status | Failure persists across a known-good network |
| Meter communication failed | RS485 meter wiring or configuration | Installer checks wiring, termination, and meter ID | Production is normal but consumption or battery data is wrong |
The phrase “server connection failed” does not necessarily mean that SolarEdge uses one universally fixed port in every installation. SolarEdge documentation and installer guides should take precedence over forum advice, particularly because communication requirements can vary by product, region, firmware, and network design.
Why Did the Error Start After a Router Change?
A router change commonly causes a SolarEdge communication error because the inverter retains the old SSID, password, DHCP behavior, or security profile. The inverter may remain electrically healthy while the new router rejects its connection.
| Recent change | Resulting failure | Diagnostic clue | Correct response |
|---|---|---|---|
| New Wi-Fi password | Authentication failure | SSID appears but connection fails | Reconfigure the inverter |
| New SSID | Stored network no longer exists | Wi-Fi disconnected | Join the replacement SSID |
| 5 GHz-only setup | Unsupported radio band | No compatible network appears | Enable a 2.4 GHz SSID |
| Guest network enabled | Client isolation or blocked routing | IP exists, cloud fails | Use the main trusted LAN |
| DHCP disabled or exhausted | No local address | DHCP failed | Restore DHCP or reserve an address |
| New firewall or VLAN | Outbound cloud traffic blocked | Ping or server failure | Permit required outbound traffic per current guidance |
A DHCP reservation is often preferable to a manually assigned static IP because it keeps address management inside the router. Static addressing can work, but an incorrect gateway, DNS server, subnet mask, or duplicate address creates a second fault.
Does a Legacy SolarEdge Cellular Module Need Replacement?
A legacy cellular module may require replacement when its carrier network has retired the technology it uses. The 2G and 3G shutdown has affected older connected equipment, but the exact timing and replacement path vary by country and mobile carrier.
Check the communication hardware label, installer records, SIM status, signal indication, and SolarEdge support guidance before purchasing a module. A modern LTE-compatible replacement can also fail if the antenna is damaged, the subscription has expired, the device lacks coverage, or the replacement is not compatible with the inverter model.
| Cellular symptom | More likely cause | Owner check | Installer action |
|---|---|---|---|
| Offline after carrier shutdown | 2G or 3G modem retirement | Identify module generation | Fit approved LTE hardware |
| Intermittent connection | Weak signal or antenna issue | Note time and signal pattern | Relocate or replace antenna |
| No connection after module swap | Provisioning or compatibility | Confirm serial and plan | Activate and configure module |
| Connection stops after plan expiry | Subscription interruption | Check account or invoice | Renew supported data service |
Cellular is not automatically the best replacement. A reliable Ethernet run can cost less over the system’s remaining life and avoids recurring cellular fees.
Which SolarEdge Connection Method Should You Choose?
Ethernet is the strongest default for a stationary inverter with an accessible network route; cellular is the better choice when home-network changes are frequent or the inverter is far from the router. Wi-Fi is acceptable with stable 2.4 GHz coverage, while Zigbee is useful only when the installed gateway and radio path remain dependable.
| Decision factor | Ethernet | Wi-Fi | Cellular | Zigbee gateway |
|---|---|---|---|---|
| Recurring fee | $0 monthly | $0 monthly | Often annual plan | $0 monthly |
| Main dependency | Cable and router port | 2.4 GHz SSID and signal | LTE coverage and plan | Gateway power and router |
| Typical setup time | 1-4 hours | 15-45 minutes | 30-90 minutes | 30-60 minutes |
| Failure after password change | No | Yes | No | Gateway may remain connected |
| Best location | Homes with cable access | Strong nearby access point | Remote or isolated network | Existing matched equipment |
| Main limitation | Installation labor | RF interference and range | Subscription and coverage | Additional pairing hardware |
The practitioner rule is simple: choose the least complicated path that removes the dominant failure. Do not replace a communication card when a changed Wi-Fi password caused the outage, and do not keep resetting Wi-Fi when a discontinued cellular modem is the actual constraint.
Why Is the Inverter Online but the Meter Offline?
A meter communication failure is usually an RS485 wiring, termination, address, or configuration problem, not an internet communication problem. The inverter can upload data to the portal while a consumption meter, battery meter, or export meter remains unavailable.
SolarEdge meter troubleshooting documentation identifies wiring and configuration checks such as conductor polarity, RS485 connections, termination, and device identification. These checks occur inside or near electrical equipment and should be performed by a qualified installer.
The distinction matters operationally. A meter fault can make consumption, import, export, or battery-flow figures inaccurate while solar production remains visible. An installer should compare inverter production, utility meter readings, and portal meter channels before changing settings.
When Should You Call a SolarEdge Installer?
Call a qualified SolarEdge installer when the red fault indicator is active, production is abnormal, the inverter repeatedly reboots, a communication card appears defective, internal wiring requires inspection, or a known-good network does not restore cloud communication.
Escalate immediately when the inverter shows smoke, burning odor, water ingress, damaged conduit, exposed wiring, arcing, or unusual heat. Turn away from the equipment and follow local emergency and installer procedures rather than attempting a reset.
Provide the installer with:
- Inverter model and serial number
- Exact alert wording and error code
- LED or LCD photographs
- Last successful portal timestamp
- Communication method
- Router or cellular changes
- Local diagnostic result
- Whether production appears normal
- Utility meter comparison
- Dates and duration of every outage
This evidence reduces a diagnostic visit because the installer can distinguish a network configuration problem from a communication-board, meter, optimizer, or inverter fault before arriving.
How Much Does SolarEdge Communication Repair Cost?
A homeowner communication reset usually costs nothing, while typical installed repairs range from $50 for a simple Ethernet or configuration visit to $800 or more for cellular hardware, antenna work, or difficult cable routing. Regional labor, equipment generation, travel, and subscription terms determine the actual price.
| Repair scenario | Typical parts cost | Typical labor time | Typical total |
|---|---|---|---|
| Wi-Fi reconnection | $0-$50 | 15-45 minutes | $0-$200 |
| Ethernet cable installation | $20-$200 | 1-4 hours | $50-$500 |
| Wi-Fi communication card | $100-$300 | 30-90 minutes | $200-$600 |
| LTE cellular replacement | $200-$600 | 30-90 minutes | $300-$900 |
| RS485 meter diagnosis | $0-$100 | 1-2 hours | $100-$400 |
These are planning ranges, not quotations. Ask whether the estimate includes configuration, travel, tax, cellular activation, a warranty, and portal verification. A low hardware price can conceal a recurring data-plan charge or an incompatible communication module.
What Happens After Communication Is Restored?
The SolarEdge Monitoring Portal should show a newer “last communication” timestamp after the inverter reconnects, often within 10-30 minutes, although delayed cloud processing can take longer. Historical data may backfill after reconnection, but missing intervals are not guaranteed to recover on every model.
Verify restoration in four places:
- The inverter’s local communication test reports a successful connection.
- The router or cellular equipment shows the inverter as connected.
- The portal timestamp advances beyond the outage timestamp.
- Production and meter channels show plausible new readings.
Do not rely only on a green app icon. A portal may display a cached site status while the inverter remains offline, and a successful local network connection does not prove successful cloud authentication.
Frequently Asked Questions
Will a power outage create a SolarEdge communication error?
A power outage can create a temporary communication error because the inverter, router, gateway, or cellular equipment loses power. After grid power returns, the inverter may restart before the router or cloud session is ready. Allow 10-30 minutes, then check the portal timestamp and local communication status.
Can I fix SolarEdge monitoring without an installer?
You can safely check router internet access, Ethernet connections, Wi-Fi availability, exterior LEDs, portal timestamps, and supported app diagnostics. An installer should handle inverter covers, communication-board replacement, RS485 wiring, meter configuration, exposed conductors, and any fault that affects production or electrical safety.
Why does the SolarEdge app show old production data?
Old production data usually means the portal has not received a current upload from the inverter. The inverter may still be producing electricity, but the communication path is interrupted. Compare the displayed timestamp with the inverter status and check whether the router, Wi-Fi credentials, cellular plan, or gateway changed.
Does SolarEdge monitoring require internet all the time?
SolarEdge cloud monitoring requires an active communication path to upload current data, but the inverter does not necessarily require internet access to perform its local power-conversion function. Internet loss removes remote visibility and alerts; it does not by itself establish that the array has stopped producing.
Can changing the Wi-Fi password fix the error?
Changing the Wi-Fi password fixes the error only when the stored inverter credential is wrong or the router credential was recently changed. Reconfigure the SolarEdge communication interface with the new password. Do not change the password repeatedly when diagnostics show DHCP, DNS, firewall, cellular, or hardware failure.
How long can SolarEdge operate without portal communication?
SolarEdge can continue local power conversion during a communication outage if no independent inverter or grid fault exists. The exact period for locally retained telemetry varies by inverter and firmware, so do not promise a universal retention duration. Restore communication promptly to preserve remote diagnosis and complete historical records.
Conclusion
A SolarEdge "Communication Error" between the inverter and Monitoring Portal is usually a telemetry-path failure involving Wi-Fi, Ethernet, cellular service, gateway hardware, router configuration, or cloud access. Start with status and production checks, test the communication layer with SetApp or the model-specific interface, and escalate internal electrical or hardware work to a qualified installer.