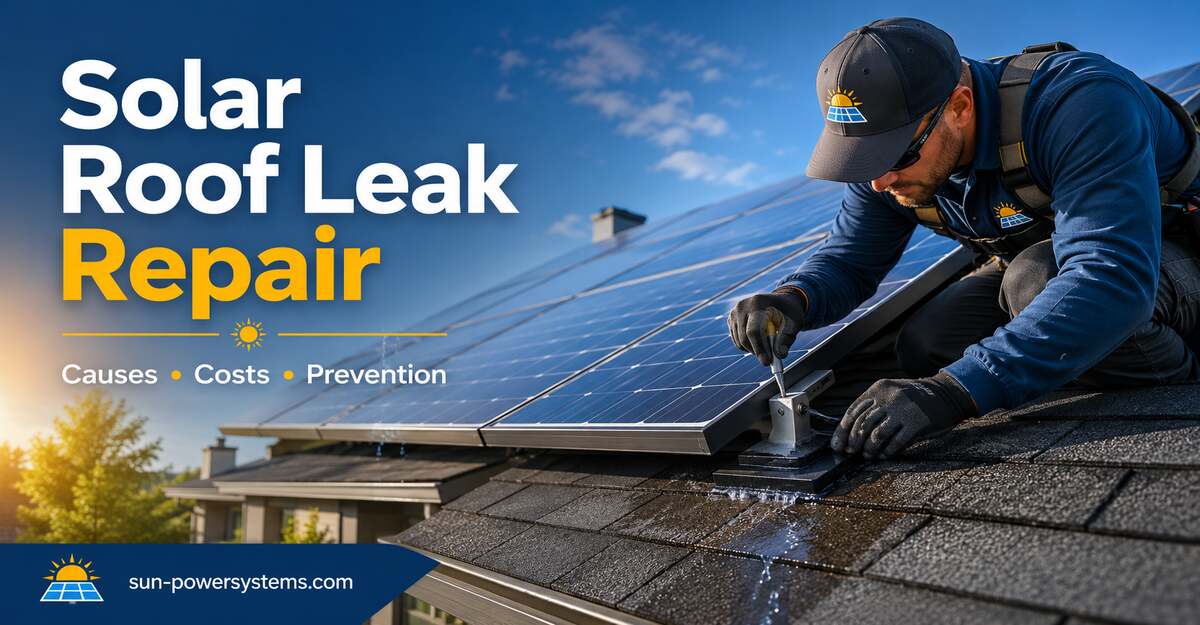
Solar panel roof leak repair involves locating the actual water-entry point, safely removing enough of the photovoltaic array to expose the roof, repairing damaged roofing materials, and reinstalling the mounts with compatible flashing. Typical costs range from several hundred dollars for an isolated mount repair to several thousand dollars for panel removal, structural repairs, and full-array reinstallation.
Key Facts at a Glance
- Solar panels do not normally cause roof leaks when mounts and flashing are installed correctly.
- The ceiling stain may appear several feet downhill from the actual roof penetration.
- Failed flashing, missed rafters, damaged tiles, and conduit penetrations are common solar-related leak sources.
- Applying exposed caulk over a leaking mount is rarely a durable repair.
- Repair costs rise sharply when panels must be removed or roof decking has rotted.
- Solar electrical disconnection, panel removal, and mount replacement should be performed by qualified professionals.
What Is a Solar Panel Roof Leak?
A solar panel roof leak is water intrusion associated with the roof area occupied or altered by a photovoltaic system. The leak may originate from a mounting penetration, damaged roofing material, electrical conduit entry, displaced flashing, or a pre-existing roof defect hidden beneath the array.
Solar equipment is not automatically the cause merely because water appears below the panels. Skylights, plumbing vents, valleys, ridge caps, deteriorated underlayment, wind-damaged shingles, and older repairs can release water that travels along rafters before becoming visible inside.
A reliable diagnosis therefore answers two separate questions:
- Where is water entering the roof assembly?
- Did the solar installation create, worsen, or merely cover that defect?
How Does Water Get Under Solar Panels?
Water usually enters when a roof’s water-shedding layers are interrupted or damaged. Solar mounts must transfer wind and structural loads into rafters or another approved substrate while preserving the roof covering’s drainage path.
On an asphalt-shingle roof, a typical mounting assembly includes a lag fastener, attachment foot, metal flashing or certified sealing system, rail, and module clamps. Proper flashing directs water around the attachment instead of relying solely on exposed sealant.
Once water enters, gravity and surface tension can carry it:
- Down a lag bolt or fastener
- Along the underside of roof decking
- Across an underlayment seam
- Down a rafter or truss
- Along electrical conduit
- Into insulation before reaching drywall
This movement explains why the visible ceiling drip is often not directly below the failed mount.
What Causes Solar Panel Roof Leaks?
Solar-related roof leaks most often result from installation errors, incompatible mounting details, damaged roofing, or materials that have deteriorated over time.
Missed or Poorly Secured Rafters
A missed rafter occurs when an installer drills through the roof covering and decking without engaging the intended structural member. The abandoned pilot hole may remain concealed under flashing, shingles, tiles, or mounting hardware.
A fastener secured only to thin decking can also move under wind loading. Repeated movement enlarges the opening, stresses the seal, and creates a route for water.
Incorrect Flashing Installation
Flashing must be integrated with the roof’s water-shedding layers. On asphalt shingles, the upper section normally extends beneath the appropriate shingle course so rain flows over the metal.
Leaks can develop when flashing is:
- Installed on top of shingles without an approved system
- Buckled by hidden roofing nails
- Cut too short
- Positioned at the wrong angle
- Installed over damaged or brittle shingles
- Sealed with incompatible products
- Fastened where water naturally collects
Mechanical water management should perform most of the waterproofing. Sealant is a secondary defence, not a substitute for properly integrated flashing.
Degraded Sealant or Butyl Pads
Sealants can crack, shrink, separate, or lose adhesion because of ultraviolet exposure, temperature changes, dirt, moisture, and incompatible surfaces. Service life varies considerably by product, roof temperature, joint movement, installation thickness, and surface preparation.
Butyl-based attachment systems can provide durable compression sealing when installed according to the manufacturer’s torque, temperature, and surface requirements. They are less reliable when placed over debris, wrinkled shingles, damaged granules, or uneven roofing.
Cracked Clay or Concrete Tiles
Tile roofs can leak when installers walk on unsupported tile sections, drill through tiles unnecessarily, or reinstall cracked pieces around hooks and mounts. Small fractures may remain unnoticed until wind-driven rain or thermal movement enlarges them.
Replacement flashing tiles or properly configured tile hooks usually reduce the need to drill through exposed tile surfaces.
Damaged Asphalt Shingles
Old, brittle, curled, or delaminated shingles may crack when lifted for flashing installation. Solar work can also expose weaknesses in a roof that was already approaching the end of its service life.
Installing a 25- to 30-year solar array over a roof with limited remaining life may create a predictable future removal-and-reinstallation expense.
Leaking Conduit Penetrations
The penetration where solar wiring enters the attic can leak independently of the module mounts. Common problems include failed roof jacks, poorly shaped conduit flashing, loose fittings, cracked sealant, uphill openings, and conduit that directs rainwater toward the penetration.
Water stains following a cable, conduit, or junction box should be treated as a possible electrical hazard.
Debris and Drainage Obstruction
Leaves, pine needles, nests, and windblown debris can accumulate beneath low-clearance arrays. Debris does not always create a leak by itself, but it can slow drainage, retain moisture, block roof valleys, accelerate roofing deterioration, and push water sideways beneath overlapping materials.
Thermal and Structural Movement
Metal racks, fasteners, roofing materials, and wood framing expand and contract at different rates. Correctly engineered mounts accommodate ordinary movement, but improperly torqued fasteners, inadequate flashing, poor attachment placement, or flexible decking can allow the waterproofing detail to separate.
Flat-Roof Membrane Damage
TPO, PVC, modified bitumen, and EPDM roofs can be damaged by sharp rack components, dragged equipment, unsupported cable trays, concentrated ballast, and repeated foot traffic. A leak may occur at a membrane puncture rather than at an intentional attachment.
Ballasted arrays reduce penetrations but are not automatically risk-free. They must account for structural loading, wind uplift, drainage, membrane protection, roof warranty requirements, and equipment movement.
Condensation Mistaken for a Roof Leak
Condensation can resemble rainwater intrusion. Warm, humid interior air may condense on cold conduit, metal components, fasteners, or poorly insulated roof surfaces.
A stain that appears during temperature swings but not during rainfall may require an insulation, ventilation, or air-sealing assessment rather than a flashing repair.
How Can You Tell Whether Solar Panels Caused the Leak?
The strongest evidence is a documented water path connecting a solar-related penetration or damaged roof area to the interior moisture. Timing alone is not proof.
Solar involvement becomes more likely when:
- The leak began shortly after installation
- The stain aligns with an attachment or conduit entry
- Water appears only during wind-driven rain from a particular direction
- A mount is visibly loose or displaced
- Flashing is lifted, buckled, or absent
- Tiles around attachment points are broken
- Moisture follows solar wiring or conduit
- The inverter reports a ground or insulation-related fault during wet weather
Solar involvement becomes less likely when the source is uphill from the array, near a chimney or valley, or associated with widespread roof deterioration.
What Should You Do When a Leak Appears?
Protect the building interior, document the problem, and contact both the solar installer and an experienced roofing professional. Do not climb onto a wet roof or dismantle solar equipment.
Take Immediate Interior Precautions
Move furniture, electronics, and valuables away from the affected area. Use a container to collect dripping water and photograph the ceiling, walls, attic surfaces, and damaged property.
If water is near an electrical panel, outlet, light fixture, inverter, battery, or solar wiring, keep people away and contact an electrician or emergency service provider appropriate to the situation.
Review Your Solar Monitoring System
Check the inverter or monitoring application for warnings such as ground faults, insulation resistance errors, arc-fault events, or reduced production. An alert does not identify the roof leak by itself, but it may indicate moisture in electrical equipment.
Do not repeatedly reset a system that reports a fault during rain.
Contact the Original Installer
Request an inspection under the workmanship or roof-penetration warranty. Provide the installation date, system address, photographs, monitoring alerts, and the weather conditions associated with the leak.
Ask whether the company will coordinate panel removal with a licensed roofer and whether unauthorized work could affect the solar warranty.
Notify the Roofer or Roof Manufacturer
A solar installer may understand the array but may not be qualified to repair widespread decking, underlayment, tile, membrane, or structural damage. A roofer can determine whether the source is solar-related, pre-existing, or part of a broader roof failure.
Warranty rules may require an approved contractor and specified materials.
How Is a Solar Roof Leak Diagnosed?
A professional diagnosis progresses from interior moisture evidence to attic inspection, roof-surface assessment, and controlled confirmation. Randomly applying sealant can conceal symptoms without identifying the water path.
1. Document the Interior Leak Location
Measure the stain from fixed reference points such as exterior walls, plumbing penetrations, ridge lines, or attic framing. Record whether the leak occurs during light rain, heavy rain, wind-driven rain, or after prolonged storms.
The duration and wind direction help distinguish direct penetration leaks from drainage or flashing failures.
2. Inspect the Attic
The inspector looks for:
- Wet decking
- Darkened fasteners
- Water tracks on rafters
- Compressed or stained insulation
- Mould-like growth
- Rusted metal connectors
- Moisture around conduit
- Previous repair materials
A moisture meter can identify damp materials beyond the visible stain. Thermal imaging may help map temperature differences, but it cannot independently prove the exact entry point.
3. Inspect the Roof and Solar Attachments
The roof inspection should include the area uphill and sideways from the interior stain. Water rarely travels uphill, but it can move laterally along underlayment, flashing, decking seams, and framing.
The technician checks mounts, flashing, shingles, tiles, membrane seams, conduit entries, valleys, vents, wire management, debris accumulation, and signs of animal damage.
4. Remove Panels When Necessary
Some defects cannot be seen while the array is in place. Qualified solar technicians may need to isolate the system and remove selected modules to inspect mounts, flashing, roof coverings, and hidden water tracks.
Partial-array removal is often sufficient when the suspected area is accurately mapped.
5. Perform Controlled Water Testing
A controlled water test applies water to small roof sections in a deliberate sequence while an observer checks the attic. Each section must be tested long enough to distinguish delayed water migration from an immediate penetration.
Water testing should not be performed near damaged electrical components or in a way that floods the roof unnecessarily.
What Is the Professional Repair Process?
A durable repair removes the failed materials, restores the roof’s drainage layers, and reinstalls the solar attachment according to the roof and mounting manufacturers’ requirements.
Step 1: Isolate the Solar Equipment
A qualified technician follows the applicable shutdown procedure, including AC and DC isolation where provided. Photovoltaic modules can continue producing DC voltage whenever exposed to sufficient light, so opening a disconnect does not make every module conductor harmless.
Only trained personnel should disconnect modules, optimizers, microinverters, rapid-shutdown equipment, or rooftop wiring.
Step 2: Remove the Required Modules and Racking
The technician removes enough modules and rail components to expose the suspected failure without causing unnecessary disturbance to the rest of the array. Components should be labelled so wiring, bonding, clamps, and module positions can be restored correctly.
Modules must be stored securely and protected from impact, moisture at connectors, and unauthorised access.
Step 3: Remove Failed Mounts and Roofing
The roofer removes damaged shingles, tiles, membrane, flashing, sealant, and compromised fasteners. Covering an existing failure with additional caulk leaves deteriorated material and hidden moisture in place.
The exposed roof is inspected for rot, delamination, corrosion, mould-like growth, and enlarged fastener holes.
Step 4: Repair Decking and Underlayment
Soft or rotted decking must be removed to structurally sound boundaries and replaced with material compatible with the existing roof assembly. Underlayment or self-adhered membrane is then restored with proper laps.
A small interior stain can correspond to a much larger damp area when insulation has held moisture against the decking.
Step 5: Install Compatible Flashing and Mounts
Replacement attachments must match the roof type, structural design, mounting manufacturer’s instructions, and local requirements. Fasteners should engage the specified structural member or approved engineered substrate.
The installer should not reuse deformed flashing, corroded hardware, compressed single-use sealing pads, or damaged roofing.
Step 6: Reinstall and Recommission the Array
The solar contractor reinstalls rails, grounding or bonding hardware, modules, clamps, wire management, and electrical connectors. Required torque values and module clamp zones should be verified against current manufacturer instructions.
The system is then recommissioned and checked for production, communication, ground-fault warnings, abnormal voltage, and visible wiring defects.
Step 7: Confirm the Repair
The repaired area should be inspected after water testing or the next suitable rainfall. Interior moisture readings should decline rather than remain elevated.
Photographs of the exposed defect, completed roof repair, replacement flashing, and reinstalled array provide useful warranty documentation.
How Much Does Solar Panel Roof Leak Repair Cost?
Solar panel roof leak repair commonly costs $400 to $1,200 for an isolated accessible repair, $1,500 to $3,500 when several panels and limited decking must be removed, and $4,000 to $8,000 or more for a full detach-and-reset project. These are typical planning ranges, not fixed quotations.
| Repair scope | Typical cost range | Typical duration |
| Inspection and leak diagnosis | $200–$750 | 1–4 hours |
| Single mount or flashing repair | $400–$1,200 | 3–6 hours |
| Conduit penetration repair | $500–$1,500 | Half day to 1 day |
| Partial panel removal and roof repair | $1,500–$3,500 | 1–2 days |
| Decking and underlayment repair | $2,000–$5,000+ | 1–3 days |
| Full residential detach and reset | $4,000–$8,000+ | 2–5 days |
| Interior drywall, insulation, or paint | $300–$3,000+ | Varies |
Costs depend on:
- Array size and layout
- Number of modules that must be removed
- Roof pitch and access
- Asphalt, tile, metal, or membrane roofing
- Height and fall-protection requirements
- Extent of hidden decking damage
- Electrical equipment that must be disconnected
- Permit or inspection requirements
- Local labour rates
- Module, mount, or roof warranty restrictions
- Availability of matching tiles or roofing materials
Steep roofs, fragile tile, discontinued hardware, battery-connected systems, and large multi-plane arrays generally cost more to service.
Which Repair Strategy Is Best?
The best strategy depends on whether the failure is isolated or systemic. A confirmed single damaged flashing detail may justify a spot repair, while repeated workmanship defects usually justify broader removal and inspection.
| Strategy | Best application | Main advantage | Main limitation |
| Spot repair | One confirmed mount or conduit defect | Lowest cost and downtime | Can miss nearby failures |
| Partial-array removal | Localised leak with uncertain hidden damage | Exposes the affected roof section | Requires accurate leak mapping |
| Full detach and reset | Multiple failures or roof replacement | Allows complete roof access | Highest cost and coordination |
| Roof replacement before reinstall | Roof near end of service life | Avoids repeated removal costs | Larger immediate project |
When Is a Spot Repair Appropriate?
A spot repair is appropriate when the leak source is conclusively identified, surrounding roofing is sound, adjacent mounts are correctly installed, and there is no evidence of widespread moisture.
The contractor should still inspect nearby attachments because repeated errors often occur when the same crew, layout, hardware, and installation method were used across the array.
When Should Part of the Array Be Removed?
Partial removal is suitable when the leak is limited to one roof plane or cluster of mounts but cannot be accessed beneath installed modules. It provides better inspection access than surface caulking without incurring the cost of removing the complete system.
The limitation is diagnostic accuracy. Removing the wrong section increases labour without exposing the source.
When Is a Full Detach and Reset Necessary?
A full detach and reset is usually justified when the roof requires replacement, multiple attachments are leaking, mounting hardware is incompatible, workmanship defects are repeated, or decking damage extends beneath much of the array.
Full removal improves access but does not guarantee permanent leak elimination. Success still depends on correct roof repair, compatible mounting details, proper electrical reinstallation, and quality control.
How Do Repair Methods Differ by Roof Type?
Solar roof leak repair must follow the drainage and structural behaviour of the specific roofing system. A method designed for asphalt shingles may damage tile, metal, or membrane roofing.
Asphalt Shingle Roofs
Common failures include lifted shingles, poorly inserted flashing, missed rafters, exposed fasteners, cracked sealant, and brittle roofing around mounts.
Repairs normally require removing affected shingles, restoring underlayment, replacing flashing or an approved direct-to-deck mount, and installing new compatible shingles.
Clay and Concrete Tile Roofs
Common failures include cracked tiles, drilled tile surfaces, misaligned hooks, undersized replacement flashing, and water entering around tile transitions.
Repair may require replacement tiles, tile-specific flashing, hook adjustment, foam or mortar restoration where appropriate, and careful load distribution during access.
Metal Roofs
Standing-seam systems may use seam clamps that avoid penetrating the metal panels. Exposed-fastener metal roofs commonly use attachments with engineered gaskets or flashing details.
Leaks may result from overtightened fasteners, damaged coatings, incorrect clamp placement, loose seams, or incompatible metals that accelerate corrosion.
TPO, PVC, EPDM, and Flat Roofs
Flat-roof leaks may originate from membrane punctures, failed welded boots, attachment penetrations, cable-tray abrasion, blocked drains, or ballast movement.
Repairs should be performed by a contractor approved for the specific membrane system, particularly when a manufacturer warranty remains active.
Which Sealant and Flashing Materials Are Used?
Material selection depends on the mounting system and roof type. No sealant is universally best, and exposed sealant should not be treated as the primary water-diversion system unless the attachment has been specifically tested and approved for that configuration.
| Material | Common application | Important limitation |
| Metal flashing | Shingle, tile, and some metal roofs | Must be integrated with drainage layers |
| Butyl sealing material | Compression mounts and laps | Requires clean surfaces and correct compression |
| Polyurethane sealant | Compatible flashing joints and penetrations | Can be difficult to remove during later service |
| Roofing-grade silicone | Selected conduit and enclosure details | May have limited adhesion to dirty or incompatible surfaces |
| Self-adhered membrane | Underlayment repairs and vulnerable transitions | Must be covered and lapped correctly |
| Heat-welded membrane boot | TPO or PVC penetrations | Requires membrane-specific tools and training |
Using more sealant does not necessarily produce a better repair. Excess material can trap water, hide movement, obstruct drainage, and complicate future inspection.
Who Is Responsible for a Solar-Related Roof Leak?
Responsibility depends on the cause, contract, warranty language, installation date, roof condition, and work performed by other contractors. The solar company may be responsible for defective penetrations, while the roofer may be responsible for unrelated roof failure or improper roofing work around an existing array.
Review these documents:
- Solar installation contract
- Workmanship warranty
- Roof-penetration warranty
- Roofing contractor warranty
- Roof manufacturer warranty
- Home insurance policy
- Building permits and inspection records
- Installation photographs
- Change orders and repair records
Roof-penetration warranties commonly have shorter terms than solar module warranties. A 25-year panel performance warranty does not mean the installer provides 25 years of roof-leak coverage.
Will Homeowners Insurance Pay for the Damage?
Home insurance may cover sudden water damage caused by a covered event, but it often excludes gradual deterioration, defective workmanship, neglected maintenance, or the cost of correcting the faulty installation itself. Policy language and local insurance rules control the outcome.
Document the date of discovery, rainfall conditions, damaged property, contractor findings, and emergency mitigation expenses. Avoid permanently altering the suspected source before the insurer or responsible contractor has an opportunity to inspect it, unless immediate work is required to prevent further damage.
Can You Repair a Solar Roof Leak Yourself?
Homeowners should limit DIY activity to safe observations and interior damage control. Solar module removal, rooftop electrical work, attachment replacement, and wet-roof access involve fall, fire, shock, arc, and property-damage risks.
Safer homeowner actions include:
- Photographing visible damage from the ground
- Recording weather conditions
- Checking monitoring alerts
- Inspecting the attic from a safe platform
- Moving belongings away from the leak
- Contacting the installer, roofer, and insurer
- Clearing accessible gutters from the ground with suitable tools
Do not disconnect rooftop connectors, loosen module clamps, drill new holes, walk on wet tiles, or assume that opening the inverter disconnect removes all DC voltage.
How Can Solar Panel Roof Leaks Be Prevented?
Solar panel roof leaks are best prevented through pre-installation roof assessment, compatible mounting hardware, qualified workmanship, and periodic inspection. Prevention begins before the first roof penetration is made.
Evaluate the Roof Before Installation
The roof should have enough remaining service life to support the planned solar ownership period. Age alone is not an absolute pass-or-fail rule because material quality, climate, ventilation, installation, storm exposure, and maintenance affect deterioration.
Replace or repair the roof first when it has:
- Widespread granule loss
- Curling or brittle shingles
- Repeated previous leaks
- Soft decking
- Broken or slipping tiles
- Failed membrane seams
- Significant ponding water
- Limited remaining warranty
- Insufficient structural capacity
Use Roof-Specific Mounting Hardware
Require mounting components approved for the roof covering and structural design. The installation proposal should identify the mounting manufacturer, attachment method, flashing system, fastener type, and roof-sealing procedure.
Generic descriptions such as “industry-standard mounts” provide little protection if a dispute occurs.
Verify Rafter and Attachment Placement
Installers may use measurements, attic access, stud-finding methods, exploratory confirmation, or engineered deck attachments depending on the mounting system. Abandoned pilot holes must be repaired correctly rather than merely hidden.
Attachment documentation is especially valuable in high-wind regions.
Protect Roofing During Installation
Installers should use suitable walk pads, roof ladders, staging methods, and material-handling procedures. Tiles should be replaced when cracked, and dropped tools should not be allowed to puncture membrane roofing.
Cable trays and conductors should be supported so they cannot rub against roofing surfaces.
Inspect the Array Periodically
A visual inspection every year and after severe storms can identify:
- Loose or displaced modules
- Sagging rails
- Broken tiles
- Lifted flashing
- Exposed fasteners
- Hanging wires
- Debris dams
- Animal nests
- Membrane abrasion
- Corrosion
- Blocked drainage routes
Ground-based binoculars, pole cameras, or professional drones reduce the need for homeowners to access the roof.
Maintain Clear Drainage
Keep gutters, scuppers, valleys, and roof drains clear. Debris beneath an array should be removed using methods that do not damage modules, wiring, roofing, or wildlife barriers.
Repeated debris buildup may indicate inadequate clearance, nearby vegetation, or missing pest protection.
Preserve Installation Records
Keep contracts, warranties, permits, equipment schedules, photographs, serial numbers, engineering documents, and shutdown instructions. These records reduce diagnostic time and help contractors reinstall the array correctly after roof work.
Common Solar Roof Leak Repair Mistakes
Applying Caulk Over the Mount
Surface caulking may slow water temporarily but rarely repairs displaced flashing, deteriorated roofing, loose attachments, or wet decking. The failed assembly usually needs to be exposed.
Assuming the Nearest Mount Is the Source
Water can travel along rafters, underlayment, fasteners, and conduit. Repairing the mount directly above the ceiling stain may leave the actual uphill defect untouched.
Allowing an Unqualified Roofer to Remove Panels
A roofer may be qualified for roofing but not for photovoltaic disconnection, rapid-shutdown equipment, bonding, module clamping, or system recommissioning. Trade coordination is safer than asking one contractor to work outside its competence.
Reusing Damaged Flashing and Sealing Materials
Bent flashing, compressed butyl pads, corroded fasteners, damaged gaskets, and cracked tiles should not be reinstalled merely to reduce material costs.
Ignoring Wet Insulation and Decking
Stopping the visible drip is not the end of the project. Trapped moisture can damage decking, insulation, drywall, paint, fasteners, and interior finishes.
Reinstalling Solar on an Failing Roof
A low-cost repair becomes poor value when the roof will need replacement within a few years. Repeated detach-and-reset labour can cost more than coordinating roof replacement during the first repair.
How Do You Choose a Repair Contractor?
Choose a contractor or coordinated team with demonstrated experience in both the relevant roof system and solar detach-and-reset work. Ask for a written scope that separates diagnosis, removal, roof repair, solar reinstallation, testing, and warranty responsibility.
Request answers to these questions:
- Who will electrically isolate and reconnect the array?
- Who is responsible for roof repair?
- Will damaged decking and underlayment be photographed?
- Which mounting and flashing products will be installed?
- Will single-use seals and damaged fasteners be replaced?
- How will removed modules be stored?
- Will clamp and fastener torque be verified?
- Who handles permits or inspections?
- What workmanship warranty covers the repair?
- What happens if the first suspected location is not the source?
Avoid proposals that promise to stop the leak by applying sealant without removing enough equipment to inspect the roof assembly.
Solar Panel Roof Leak Repair Checklist
Before approving work, confirm that the scope includes:
- Interior and attic moisture inspection
- Identification of the probable entry point
- Solar shutdown and electrical safety procedures
- Required module and rack removal
- Roof-covering removal around the defect
- Decking and underlayment assessment
- Replacement of failed flashing and mounts
- Compatible roofing materials
- Solar equipment reinstallation
- Wire management and bonding checks
- System recommissioning
- Water testing or post-rain verification
- Photographic documentation
- Written roof and solar workmanship warranties
The Bottom Line
Solar Panel Roof Leak Repair: Causes, Costs, and Prevention requires more than sealing the visible bracket. A durable solution identifies the true water path, removes enough of the array to expose the defect, repairs damaged roofing and decking, installs roof-compatible flashing, and safely recommissions the photovoltaic system.
An isolated leak may cost a few hundred dollars, while widespread damage or full panel removal can cost several thousand dollars. Early diagnosis, coordinated roofing and solar expertise, clear warranty documentation, and annual visual inspection reduce both repair costs and the chance of recurring water damage.
Frequently Asked Questions
Do solar panels make a roof more likely to leak?
Solar panels do not inherently make a sound roof leak. Risk increases when installers use incorrect flashing, miss structural attachment points, break roofing materials, create poorly sealed conduit penetrations, or install an array over a deteriorated roof. Correctly designed attachments preserve drainage while securing the system against wind and structural loads.
Can a roofer fix a leak without removing solar panels?
A roofer may fix an unrelated defect that is accessible outside the array, but leaks beneath modules often require partial removal. Working around panels can prevent proper flashing replacement and conceal damaged roofing. A qualified solar contractor should handle module disconnection and reinstallation while the roofer restores the roof assembly.
How long can solar panels remain off during roof repairs?
The necessary downtime ranges from one day for a local repair to several days or longer for full roof replacement, inspections, weather delays, and recommissioning. The system produces little or no electricity while required modules are disconnected, so the owner should account for temporary grid consumption during the project.
Should every roof be replaced before installing solar?
No. A roof should be replaced before solar when its condition, remaining service life, structural capacity, or warranty makes future failure likely. A relatively old but well-performing roof may still be suitable after professional inspection, while a younger roof with poor installation or storm damage may require replacement.
Can thermal imaging locate a solar roof leak?
Thermal imaging can reveal temperature patterns associated with damp insulation or roofing, but it does not prove the exact entry point. Sun exposure, insulation gaps, air leakage, roof materials, and indoor temperature can produce similar patterns. Thermal findings should be confirmed through attic inspection, moisture readings, roof examination, or controlled water testing.
What happens if the original solar installer is out of business?
A specialised solar service or detach-and-reset contractor can inspect and remove the array, while a qualified roofer repairs the roof. Gather the original plans, permits, equipment records, warranties, and monitoring credentials. Verify that the new contractor can service the installed equipment and provide written responsibility for reinstallation workmanship.