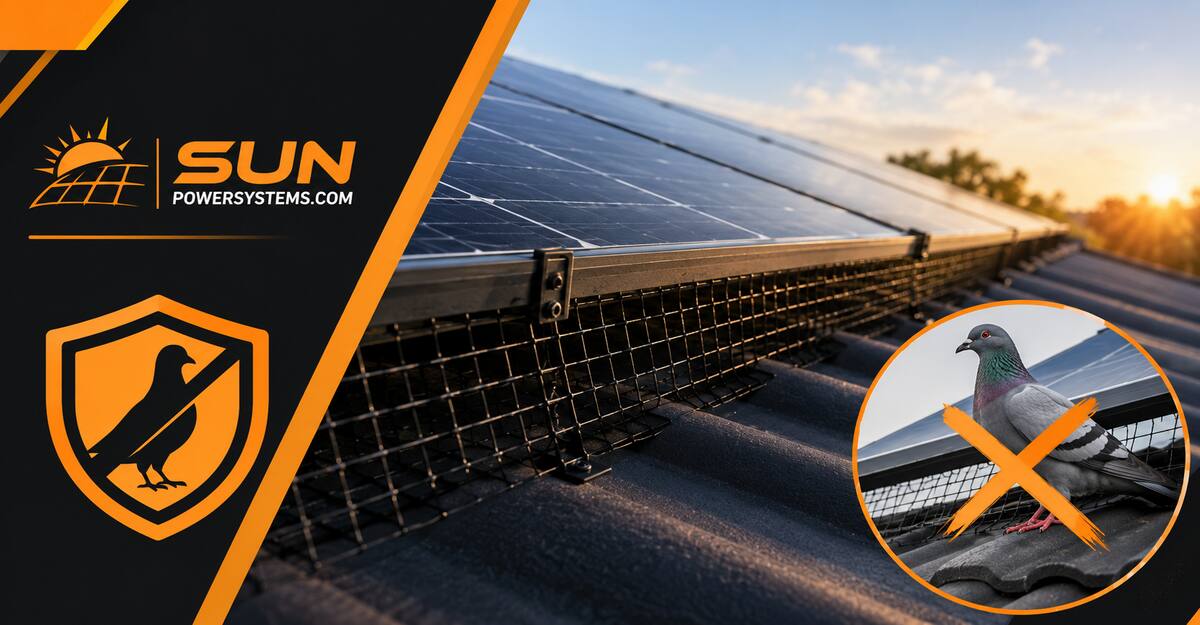
Solar panel pigeon proofing is the structural installation of a continuous, non-penetrating mechanical barrier around the lower perimeter of a rooftop photovoltaic array. This process permanently eliminates nesting microclimates, forces pests to relocate, and protects the system from highly corrosive bird guano without restricting essential thermal airflow.
Key Facts / At a Glance
- Clearance Gap: Target arrays typically feature a 3- to 6-inch gap between panel frames and roof tiles, creating an ideal nesting microclimate.
- Corrosion Risk: Pigeon droppings carry a highly acidic pH level of 3.0 to 4.5, which can rapidly corrode aluminum panel frames and degrade wiring insulation.
- Warranty Standard: Industry-standard proofing relies exclusively on specialized flange clips; drilling into the frame instantly voids manufacturer warranties.
- Cost Expectation: In 2026, professional installation averages $10 to $16 per linear foot, totaling roughly $350 to $950 for a standard 4kW residential system.
- Material Lifespan: Marine-grade (316) stainless steel mesh offers a 20+ year lifespan and prevents galvanic corrosion when touching aluminum frames.
How Does Solar Panel Pigeon Proofing Work?
Pigeon proofing works by physically blocking the entry points to the void beneath your solar panels without trapping birds inside. Solar arrays naturally trap heat, block wind, and ward off large predators, creating a highly sought-after environment for nesting. By installing a breathable, physical mesh barrier, you eliminate this microclimate. This forces the pest populations to look elsewhere for nesting sites while maintaining the 100% open area cross-ventilation required to keep the photovoltaic cells cool and operating at peak efficiency.
Which Material Is Best for Solar Array Protection?
Choosing the right material dictates both the lifespan of the barrier and the thermal performance of your array. Stainless steel mesh is the definitive winner for most residential arrays due to its durability and airflow preservation.
| Protection Option | Technical Specifications | Material Composition | Expected Lifespan | Ideal Use Case |
| Stainless Steel Mesh | 1/2″ x 1/2″ mesh; 316 marine-grade | Chromium-nickel alloyed steel | 20+ Years | Standard & coastal residential roofs |
| Galvanized Steel Mesh | 1/2″ x 1/2″ mesh; 14-gauge thick | Zinc-coated carbon steel | 10 to 15 Years | Budget-conscious inland DIY projects |
| Solid Aluminum Skirting | Structural solid profile panels | Black anodized structural aluminum | 15 to 20 Years | Modern aesthetics, high wind zones |
| Anti-Roosting Spikes | Multi-point needle strips | UV polycarbonate + SS needles | 5 to 10 Years | Flat commercial roofs, parapet edges |
The 6-Step Pigeon Proofing Process
Installing a mechanical barrier is a rigid sequence. Proceeding out of order—specifically sealing the array before proper sanitation—traps dangerous pathogens and debris against your roof deck.
Before You Start
- Outcome: A fully sealed, ventilated solar array free of pests and biological hazards.
- Total Time: 4 to 6 hours for a standard 16-24 panel residential array.
- Difficulty: Advanced DIY to Professional (requires high-angle roof work and electrical isolation).
- Cost: $1.50 to $3.50 per linear foot (DIY) or $10 to $16 per linear foot (Professional).
- Tools/Materials: 100ft roll of 316-grade mesh, specialized non-penetrating nylon clips, UV-stabilized cable ties, heavy-duty wire cutters, bending brake (or 2×4 lumber), professional-grade biocide, soft roof rake, and an OSHA-compliant fall-arrest harness.
- Crucial Factor: Absolute avoidance of drilling into the solar panel frames.
Step 1: System Isolation and Safety
Turn off the solar inverter and isolate the main DC/AC breakers to remove any risk of electrical shock. Roofs covered in bird guano are incredibly slippery. Crews must tie off using certified roof anchors, harnesses, and fall-arrest systems before walking the pitch.
- Checkpoint: You’ll know it’s safe when the inverter display is dead and AC disconnects are locked out.
- Common Mistake: Relying on the sun going down rather than physically isolating the DC circuits. Panels still generate dangerous voltage under moonlight or streetlights.
Step 2: Mechanical Debris Extraction
Use specialized long-reach rake tools to pull out nested debris, twigs, dead birds, and accumulated guano from beneath the panels. During this phase, inspect the PV wires and micro-inverter cables with a flashlight. Pigeons and squirrels frequently chew through wiring insulation when nesting.
- Checkpoint: The roof tiles beneath the array should be completely visible and free of bulk material.
- Common Mistake: Using rigid metal poles to clear debris, which can scratch the panel backsheets and cause ground faults.
Step 3: Biocide Cleanse and Sanitation
Thoroughly spray the under-panel area with a professional-grade, broad-spectrum biocide (typically a quaternary ammonium compound). This treatment neutralizes dangerous pathogens like Salmonella, E. coli, and fungal spores (Histoplasmosis) found in pigeon droppings. Allow a 15- to 30-minute curing window, then pressure-wash the roof tiles to remove remaining pheromones and scents that attract other birds.
- Checkpoint: The area smells chemically clean, and no visible biological matter remains.
- Common Mistake: Skipping the biocide and washing with plain water, which fails to neutralize pheromones and encourages birds to stubbornly attempt re-entry.
Step 4: Material Contouring and Pre-Bending
Measure the precise vertical distance from the upper edge of the panel frame down to the roof tiles. Cut the chosen mesh into workable 5-foot lengths. Use a bending brake or a 2×4 timber plank to fold the bottom 2 to 3 inches of the mesh to a 45-degree angle. This bend allows the mesh to flex and adapt smoothly to the curves of terracotta or concrete roof tiles.
- Checkpoint: The mesh should sit flush against the roof without requiring excessive downward force.
- Common Mistake: Leaving the mesh perfectly flat, which creates gaps in the valleys of undulating roof tiles.
Step 5: High-Tension Clip Fixation
Slide specialized nylon or aluminum clips onto the interior lip of the solar panel frame, spacing them roughly 15 to 18 inches apart. Push the pre-bent mesh over the serrated posts of the clips, keeping it tight against the roof. Secure the mesh in place by sliding on one-way locking speed washers. Use heavy-duty wire cutters to trim away any excess clip rods for a clean, flush finish.
- Checkpoint: Pushing firmly on the mesh should not move it inward by more than a quarter inch.
- Common Mistake: Spacing clips too far apart (24+ inches), leading to sagging mesh when the metal expands in summer heat.
Step 6: Corner Mitering and Final Inspection
For outside corners, cut the bottom flange at a 45-degree angle to create a clean, overlapping joint. Secure the corners tightly using UV-stabilized cable ties or stainless steel hog rings. Walk the perimeter to verify that there are zero gaps larger than 0.5 inches, checking that all PV cables are tied up off the roof tiles.
- Checkpoint: A visual perimeter sweep confirms a continuous, impenetrable barrier with no exposed wiring.
- Common Mistake: Using standard indoor nylon zip ties, which degrade and snap within 12 months of UV exposure.
What Are the Most Common Installation Mistakes?
The most expensive mistakes in bird proofing do not involve the birds; they involve damaging the solar array itself.
- Drilling into Panel Frames: Never use self-tapping screws or drill holes directly into the aluminum panel frames. This practice immediately breaks the structural engineering certification, voids the manufacturer’s 25-year performance warranty, and creates ingress points for water.
- Using Dissimilar Metals: Avoid pairing bare carbon steel or copper wire with aluminum frames. Direct contact between these metals causes galvanic corrosion. In humid environments, the aluminum frame will act as an anode and literally dissolve over time.
- Using Solid Skirting in Hot Climates: While solid aluminum skirting (like SolaSkirts) looks highly modern, it can trap heat beneath panels in extreme southern climates. Restricted airflow can raise panel temperatures and drop summer energy output by 1% to 3%.
How Do You Troubleshoot a Sagging or Noisy Barrier?
A properly installed system should be completely silent and rigid. If issues arise, address them immediately to prevent pests from re-establishing a foothold.
- Symptom: Scraping or Scratching Noises After Installation.
- Root Cause: A bird was trapped inside during sealing, or a small gap is allowing re-entry.
- Remedy: Inspect the mesh perimeter for open gaps around roof mounting brackets. Check for loose lock washers on the clips and push them flush. If a bird is trapped, remove one 5-foot section of mesh at dusk to allow it to escape, then reseal.
- Symptom: Sagging or Wavy Mesh Borders.
- Root Cause: The spacing between the frame clips is too wide, or thermal expansion has bowed the metal.
- Remedy: Add additional high-tension clips to reduce spacing down to 12 inches. Interlock any overlapping mesh panels using heavy-duty, stainless-steel-core zip ties.
- Symptom: Debris Build-up Along the Upper Array Edge.
- Root Cause: Autumn leaves are sliding down the roof and piling up against the newly installed barrier mesh.
- Remedy: Clear out the blockages annually using a soft roof rake or leaf blower to maintain open ventilation channels and prevent water pooling.
FAQ
Can pigeons damage solar panels?
Yes. Pigeon guano is highly acidic and will corrode the anodized aluminum frames and degrade the protective backsheet of the solar panels. Additionally, nesting birds frequently peck at and expose the live copper within the PV wires, creating severe fire hazards and ground faults.
Will bird netting void my solar warranty?
Using specialized non-penetrating clips and wire mesh will completely preserve your solar warranty. However, using screws, drills, or harsh chemical adhesives directly on the panel frames will void the equipment warranty from manufacturers like Enphase, SolarEdge, and REC.
Do fake owls or sonic devices keep birds away from solar panels?
No. Visual and acoustic deterrents have a very low long-term success rate. Pigeons are highly adaptable urban scavengers; they quickly realize stationary plastic owls and repeating ultrasonic emitters pose no physical threat, and will return to the nesting site within days.
Can I use chicken wire for solar panels?
No. Standard hexagonal chicken wire is too thin, rusts quickly, and its wide apertures (often 1-inch or larger) allow smaller nuisance birds like sparrows or starlings to enter the array. Always use 1/2-inch square, 14-gauge or thicker welded wire mesh.
How long does solar panel mesh last?
High-quality, PVC-coated marine-grade (316) stainless steel mesh will last 20 to 25 years, matching or exceeding the lifespan of the solar panels themselves. Standard uncoated galvanized steel typically begins to rust and degrade after 10 to 15 years.