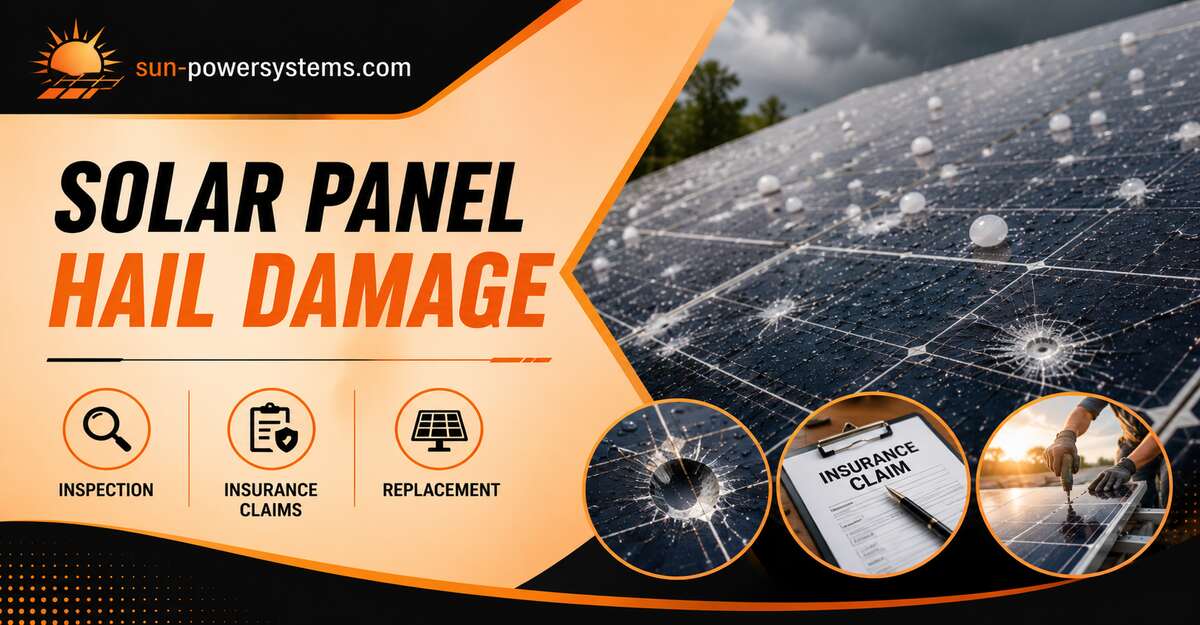
Solar panel hail damage may involve broken glass, invisible cell cracks, damaged seals, bent frames, or electrical faults. After a severe storm, keep people away from visibly damaged equipment, preserve monitoring and weather evidence, obtain a qualified solar inspection, notify the responsible insurer, and replace every module that cannot be shown to remain electrically and mechanically safe.
Key Facts at a Glance
- A solar panel can contain hail-induced cell cracks even when its front glass looks intact.
- The basic IEC 61215 hail test uses 25 mm ice balls weighing 7.54 grams at 23 meters per second.
- A monitoring app can reveal abnormal production, but normal production does not rule out hidden damage.
- Electroluminescence imaging is generally more sensitive to cell cracks than aerial infrared imaging.
- Manufacturer product warranties normally address defects, not storm damage caused by an external event.
- Insurance responsibility depends on whether the solar system is owned, financed, leased, or operated under a power purchase agreement.
What Is Solar Panel Hail Damage?
Solar panel hail damage is physical or electrical degradation caused when hail impact exceeds the resistance of a module, frame, seal, mounting component, or electrical connection. Damage ranges from obvious shattered glass to microscopic cell fractures that produce no immediate visual evidence.
A photovoltaic module is a layered assembly rather than a single sheet of glass. A typical crystalline-silicon module contains front glass, encapsulant, interconnected solar cells, a backsheet or rear glass layer, edge seals, an aluminum frame, a junction box, bypass diodes, and electrical leads. Hail can affect one or several of these components.
How Does Hail Damage a Solar Module?
Hail transfers kinetic energy into the module at impact. The resulting stress can crack the front glass, flex the laminate, fracture silicon cells, deform the frame, weaken seals, or damage conductors.
Impact severity depends on:
- Hailstone diameter, density, hardness, and shape
- Impact speed and wind-driven horizontal velocity
- Angle between the hail path and module surface
- Glass thickness and tempering
- Module dimensions and frame stiffness
- Rear support and clamp placement
- Existing manufacturing or installation stress
- Repeated impacts rather than one isolated strike
Large hail is not the only concern. The U.S. Department of Energy notes that hail can crack cells at sizes and speeds below those required to break the module glass. It also reports that significant module damage has occurred during events involving hail larger than approximately 44 mm, or 1.75 inches.
What Types of Damage Should You Look For?
Hail damage should be classified by the component affected because appearance alone does not determine electrical safety or repairability.
| Damage type | Typical evidence | Main consequence |
| Front-glass fracture | Star break, web fracture, crushed area, missing glass | Moisture entry, insulation failure, reduced mechanical protection |
| Cell microcracking | Often invisible without EL imaging | Disconnected cell areas, gradual power loss, local heating |
| Encapsulant separation | Bubbles, whitening, internal separation | Moisture pathway and reduced electrical insulation |
| Edge-seal damage | Open seam, displaced laminate, frame separation | Water and contaminant entry |
| Frame deformation | Bent corner, bowed rail, open joint | Glass stress, poor clamping, grounding concerns |
| Backsheet damage | Puncture, split, abrasion, exposed layer | Shock, arc, ground-fault, and moisture risk |
| Junction-box damage | Cracked box, loose lid, displaced cable | Open circuit, ground fault, water intrusion |
| Connector or cable damage | Crushed insulation, loose connector, unsupported cable | Resistance heating, intermittent output, arcing |
| Racking displacement | Shifted clamps, rail movement, loose hardware | Structural instability and continuing module stress |
Can Solar Panels Be Damaged Without Visible Cracks?
Yes. Silicon cells can develop fractures while the front glass remains visually intact, and those fractures may initially cause little measurable production loss.
Cell cracks can electrically isolate part of a cell immediately or propagate through thermal cycling, wind loading, snow loading, and routine expansion and contraction. A damaged module may therefore pass a quick visual review and appear to produce normally before its condition worsens.
The Department of Energy recommends post-event infrared, ultraviolet fluorescence, or electroluminescence assessment when hidden damage is suspected. EL imaging is described as the most revealing of these methods for cell cracks, although it costs more and takes longer than broad aerial screening.
How Hail-Resistance Testing Actually Works
Photovoltaic qualification testing provides a repeatable laboratory benchmark, but it does not guarantee survival in every real storm. Real hailstones vary in shape, hardness, wind speed, impact direction, temperature, and number of strikes.
What Is the Standard Solar Panel Hail Test?
The baseline IEC 61215 hail test uses 25 mm ice balls with a mass of 7.54 grams and an impact velocity of 23 m/s, approximately 51 mph. A module must remain visually acceptable within the test criteria and stay within the permitted power-loss threshold.
The optional IEC test levels increase both hail diameter and velocity:
| Ice-ball diameter | Approximate mass | Test velocity |
| 25 mm | 7.54 g | 23.0 m/s |
| 35 mm | 20.7 g | 27.2 m/s |
| 45 mm | 43.9 g | 30.7 m/s |
| 55 mm | 80.2 g | 33.9 m/s |
| 65 mm | 132 g | 36.7 m/s |
| 76 mm | 203 g | 39.5 m/s |
Passing the 25 mm level should not be described as proof that a module will survive golf-ball-sized or larger hail. DOE guidance specifically states that the basic qualification level may be insufficient in severe and very severe hail regions and recommends requesting proof of testing above the minimum requirement.
Are “Severe Hail” Ratings Universal?
No. Terms such as “severe hail,” “Class SH,” proprietary durability rankings, regional classifications, and insurer approvals may represent different test methods.
A buyer should request the underlying report rather than rely on a marketing label. The documentation should identify:
- The testing organization
- The standard or protocol used
- Hail-ball diameter and mass
- Impact velocity
- Number and location of impacts
- Module operating condition during testing
- Post-impact visual, insulation, wet-leakage, and power results
- Any environmental aging performed before or after impact
Advanced protocols may include RETC’s Hail Durability Test, PVEL’s Hail Stress Sequence, FM 4478 testing, or project-specific engineering tests. These protocols are useful because some combine larger hail with mechanical, thermal, humidity, or electrical stress instead of treating impact as an isolated event.
Does Thicker Glass Always Mean Better Protection?
Thicker, fully tempered front glass generally improves impact resistance, but glass thickness alone does not determine hail performance. Frame stiffness, module size, cell architecture, mounting support, glass treatment, and stress concentration also matter.
DOE guidance recommends at least 3.2 mm front glass in hail-prone locations and identifies 4.0 mm glass as preferable where available. It also notes that smaller framed modules and stronger rear support can reduce susceptibility.
What Should You Do Immediately After a Hailstorm?
After a hailstorm, prevent access to damaged equipment, collect evidence from a safe location, check the monitoring system, and arrange professional testing before touching or repowering visibly damaged modules.
1. Keep People Away From the Array
Do not climb onto a wet, icy, steep, or visibly damaged roof. Broken modules can expose energized conductors during daylight, and opening an AC disconnect does not necessarily remove DC voltage from the array.
Keep children, pets, occupants, and maintenance workers away from:
- Fallen glass
- Hanging cables
- Displaced panels
- Damaged carports
- Ground-mounted arrays with open fencing
- Water collecting around electrical equipment
Call emergency services when a module, conductor, or rack has fallen into an occupied area or created an immediate fire or electrical hazard.
2. Shut Down Only When It Is Safe to Do So
Follow the system’s posted shutdown procedure only when the disconnects are accessible, dry, undamaged, and familiar to the operator. Do not improvise a shutdown by opening connectors, removing fuses, lifting panels, or touching conductors.
DOE guidance states that systems with visible hail damage should remain shut down until visual and electrical inspections have been completed. Electrical faults should be tested before the system is returned to service.
3. Preserve Monitoring Data
Export or screenshot monitoring information before alerts disappear or daily values are overwritten. Record:
- Date and approximate time of the storm
- Production before, during, and after the event
- Inverter, optimizer, or microinverter alerts
- String-level or module-level differences
- Ground-fault, isolation, arc-fault, or communication codes
- Grid outages that may explain zero production
- Weather conditions that affect expected output
Compare production with similar clear days, not merely with the previous day. Cloud cover, temperature, utility outages, shading, and snow can create drops unrelated to physical damage.
4. Photograph the Property From the Ground
Use a zoom camera, binoculars, or a drone operated by a qualified person. Photograph both the solar system and other hail indicators, including damaged shingles, vents, gutters, siding, skylights, outdoor equipment, vehicles, and vegetation.
Capture wide views to establish location and close views to document detail. Preserve original files with metadata rather than relying only on compressed images sent through messaging apps.
How Do You Inspect Solar Panels for Hail Damage?
A defensible inspection moves from non-invasive evidence to detailed electrical and imaging tests. The goal is to determine safety, extent, causation, repairability, and the appropriate scope of work.
Step 1: Review the System’s Digital Performance
The inspector should compare array, inverter, string, and module-level performance where the monitoring architecture permits it. A single underperforming string may indicate one damaged module, a connector problem, a tripped protection device, or unrelated pre-existing degradation.
Useful data include:
- DC voltage and current by string
- AC output by inverter
- Module-level optimizer or microinverter production
- Insulation-resistance or ground-fault alerts
- Arc-fault records
- Communication failures
- Historical degradation trend
- Weather-adjusted expected output
A normal dashboard does not prove that every cell is intact. Bypass diodes and parallel electrical paths can conceal localized damage.
Step 2: Complete a Detailed Visual Examination
A qualified inspector should map every module and record serial numbers where accessible. Inspection should cover the front glass, frame, backsheet, junction box, leads, connectors, clamps, rails, grounding or bonding hardware, roof attachments, conduit, inverter, combiner equipment, and rapid-shutdown components.
Useful findings include:
- Impact marks aligned with cell cracks
- Cracks beginning at frame edges or clamp zones
- Bent frame corners
- Displaced mid-clamps or end-clamps
- Moisture under the glass
- Junction-box separation
- Backsheet cuts
- Loose conductors
- Roof damage beneath or beside the array
The inspector should distinguish hail-related impact damage from thermal cracking, installation stress, transport damage, manufacturing defects, animal damage, and foot traffic.
Step 3: Perform Electrical Safety Tests
Test selection depends on system architecture and local requirements. Common post-storm procedures include:
- Open-circuit voltage testing
- Operating-current comparison
- String isolation
- Insulation-resistance testing
- Grounding and bonding verification
- Polarity testing
- Connector examination
- Bypass-diode assessment
- I-V curve tracing
- Inverter fault review
IEC 62446 provides a framework for PV system documentation, commissioning tests, array testing, and whole-system performance verification. DOE recommends applying the current version of this framework to commercial, industrial, and utility-scale commissioning work.
Step 4: Use Infrared Imaging for Screening
Infrared thermography identifies abnormal temperature patterns while modules are operating under suitable irradiance. Hot cells, substrings, bypass-diode regions, connectors, and junction boxes may indicate electrical problems.
Infrared testing has important limits:
- Low irradiance reduces useful thermal contrast.
- Wind cools the module and can hide anomalies.
- Reflections can look like hot areas.
- A crack that has not isolated current may produce no thermal signature.
- A hot area identifies abnormal behavior but not necessarily its cause.
Aerial infrared inspection is efficient for locating suspect modules across a large array. It should not be treated as conclusive proof that every unflagged module is undamaged.
Step 5: Use EL Imaging for Hidden Cell Cracks
Electroluminescence imaging applies electrical current to a module and photographs the resulting near-infrared emission. Cracks and electrically inactive cell areas appear as dark lines or regions.
EL imaging is particularly valuable when:
- Large hail struck the site
- Glass remains intact
- Production loss is small or inconsistent
- An insurer disputes invisible damage
- A commercial owner needs a module-by-module loss map
- Baseline EL images are available for comparison
NREL research uses electroluminescence imaging to evaluate cell-level hail damage, while DOE guidance identifies EL as the most revealing method for many cell defects.
Step 6: Produce an Insurance-Grade Report
A useful report should be written so an adjuster, engineer, installer, and system owner can reach the same factual understanding.
The report should include:
- Property and system identification
- Ownership or financing structure
- Storm date and available weather evidence
- Equipment manufacturer, model, age, and quantity
- Module location map
- Serial numbers where obtainable
- Pre-loss and post-loss monitoring evidence
- Inspection methods and test conditions
- Photographs tied to module locations
- Electrical and imaging results
- Safety classification
- Probable cause
- Repairable and non-repairable quantities
- Replacement compatibility analysis
- Code, permit, and interconnection implications
- Itemized scope and cost estimate
- Limitations of the inspection
A report that merely says “hail damage observed” is rarely sufficient for a disputed or technically complex claim.
Does Insurance Cover Solar Panel Hail Damage?
Property insurance often covers sudden hail damage to owned solar equipment, but coverage depends on the policy language, system ownership, location, deductible, exclusions, valuation method, and reporting requirements.
Who Is Responsible for the Claim?
| System arrangement | Likely claim responsibility | Documents to check |
| Homeowner-owned rooftop system | Property owner and homeowners insurer | Declarations, dwelling coverage, endorsements |
| Financed system owned by homeowner | Property owner, insurer, and lender where required | Loan agreement and insurance policy |
| Solar lease | Leasing company or system owner, with homeowner coordination | Lease, maintenance, and insurance clauses |
| Power purchase agreement | PPA provider or asset owner | PPA and site-access agreement |
| Commercial owner-operated system | Building or asset owner | Commercial-property and equipment coverage |
| Third-party commercial asset | Asset owner, host, operator, and insurer | Site lease, O&M contract, insurance schedule |
| Community or condominium system | Association or designated asset owner | Governing documents and master policy |
Do not authorize disposal, permanent disconnection, or major repair until the party that owns the equipment and the applicable insurer have approved the process.
Does the Manufacturer’s Warranty Cover Hail?
Usually not. A product warranty generally covers defects in materials or workmanship, while a performance warranty addresses specified long-term power retention. Hail is normally treated as an external weather event rather than a manufacturing defect.
However, the manufacturer should still be contacted when:
- The module failed during an event it was specifically warranted to withstand
- The failure suggests defective glass, lamination, framing, or manufacturing
- Warranty approval is needed before a replacement contractor touches the array
- Original modules or approved substitutes are needed
- The manufacturer requires destructive analysis or return of the damaged module
How Soon Should You File a Claim?
Notify the insurer or system owner promptly, but do not assume that every policy uses a 30-day, 60-day, or 90-day deadline. Notice requirements and legal limitation periods vary by policy and jurisdiction.
Record the notification date, claim number, representative’s name, and all document requests. Ask the insurer in writing about:
- Notice deadline
- Proof-of-loss deadline
- Inspection requirements
- Emergency mitigation authority
- Contractor-estimate requirements
- Depreciation
- Matching coverage
- Ordinance or law coverage
- Deductible type
- Appraisal or dispute procedures
What Evidence Strengthens a Solar Hail Claim?
The strongest claim file connects the storm, affected equipment, diagnostic findings, and proposed remedy without gaps.
Include:
- Policy and ownership documents
- Original installation contract
- Equipment invoices and specification sheets
- Permits and interconnection approval
- Monitoring records
- Date-stamped photographs
- Local weather or hail reports
- Independent inspection report
- Module map and test results
- Repair and replacement estimates
- Manufacturer compatibility statements
- Roof inspection when applicable
- Communications with installer, manufacturer, and insurer
Weather data proves that hail occurred near the property. It does not, by itself, prove that each claimed module was damaged.
How Should You Handle the Adjuster Inspection?
Provide the adjuster with organized evidence and arrange for a qualified solar professional to attend when the loss is substantial, hidden damage is disputed, or electrical matching is complex.
During the inspection:
- Identify the system owner and responsible insurer.
- Explain the shutdown status and known safety concerns.
- Provide module and string maps.
- Show monitoring changes and preserved fault codes.
- Identify visible damage without stepping on modules.
- Explain which tests have and have not been completed.
- Request written acknowledgment of damaged quantities.
- Ask whether destructive testing or retained samples are required.
- Confirm whether estimates must include permits, engineering, utility work, removal, disposal, and recommissioning.
An adjuster may understand property damage but lack specialized knowledge of cell cracks, string matching, rapid shutdown, inverter operating windows, or module substitution. Technical questions should be answered by documented testing rather than assumption.
What If the Initial Estimate Is Too Low?
Request a written explanation of the insurer’s scope and submit a line-by-line supplement supported by technical evidence.
Common omissions include:
- Array removal and safe storage
- Roof access equipment
- New clamps or attachment hardware
- Electrical testing
- EL or infrared imaging
- Engineering review
- Permit fees
- Utility or interconnection work
- Rapid-shutdown modifications
- Module shipping
- Disposal or recycling
- Reinstallation and commissioning
- Monitoring reconfiguration
- Sales tax
- Matching or full-string replacement
Coverage disputes are policy and jurisdiction specific. A licensed public adjuster, insurance attorney, engineer, or independent solar expert may be appropriate when the amount is substantial, but each professional has a different role.
Should Damaged Panels Be Repaired or Replaced?
A module with broken glass, compromised insulation, backsheet penetration, severe frame deformation, junction-box damage, or electrically significant cell cracking should normally be replaced rather than field-repaired.
Sealants, tapes, coatings, or replacement glass rarely restore the module’s original certification, insulation system, structural rating, moisture barrier, or manufacturer warranty.
Can You Replace Only One Solar Panel?
Yes, one module can often be replaced when the rest of the system passes inspection and a technically compatible replacement is available. Physical fit alone is not enough.
The replacement review should compare:
- Rated power
- Open-circuit voltage
- Maximum-power voltage
- Short-circuit current
- Maximum-power current
- Temperature coefficients
- Module dimensions
- Frame thickness
- Clamp zones
- Connector type
- Maximum system voltage
- Fuse rating
- Fire classification
- Inverter or optimizer compatibility
- Rapid-shutdown requirements
In a series string, the lowest-current module can limit string performance. A higher-wattage panel is not automatically a safe or productive substitute for an older lower-wattage panel.
When Is Partial Module Replacement Best?
Partial replacement is usually best when damage is isolated, the roof and racking remain serviceable, replacement modules are compatible, and testing confirms that unaffected modules remain safe.
Advantages
- Lowest material scope
- Shorter installation time
- Less waste
- Existing inverter and interconnection may remain unchanged
Limitations
- Original models may be unavailable
- Appearance may not match
- New and aged modules may perform differently
- Connectors may require approved adaptation
- Repeated removal can damage clamps, wires, or roof components
- Affected modules may be scattered rather than adjacent
When Should the Whole Array Be Replaced?
Full array replacement becomes more reasonable when damage is widespread, the original module is obsolete, electrical matching cannot be achieved, the roof needs replacement, racking is compromised, or labor to test and rebuild the old system approaches the cost of a new array.
A full replacement can also resolve:
- Unsupported legacy inverters
- Failed proprietary optimizers
- Obsolete rapid-shutdown equipment
- Poor wire management
- Recurring roof leaks
- Inadequate attachment design
- Low-density layouts
- Multiple generations of mismatched modules
Full replacement is not automatically justified because several panels are cracked. The scope should follow test evidence, compatibility, code requirements, and total lifecycle cost.
When Is Full System Re-Engineering Necessary?
System re-engineering is appropriate when the loss affects structural design, electrical architecture, roof layout, interconnection capacity, fire access, racking, or code compliance.
Possible changes include:
- New module layout
- New racking and attachments
- Structural reinforcement
- String redesign
- New inverter or microinverters
- New rapid-shutdown equipment
- Updated grounding and bonding
- Relocated conduit
- Battery integration
- Revised service equipment
- New utility export settings
DOE notes that current commissioning should include system documentation, array testing, and whole-system performance testing. Replacement should end with documented recommissioning rather than simple confirmation that the inverter turns on.
Replacement Options Compared
| Option | Best suited to | Main advantage | Main risk |
| Replace individual modules | Isolated, proven damage | Lowest scope and disruption | Electrical or physical mismatch |
| Replace one string or roof plane | Clustered damage or matching limitation | Better electrical consistency | Healthy modules may also be removed |
| Replace all modules | Widespread damage or obsolete equipment | Uniform array and new module warranties | Higher cost and possible permitting changes |
| Rebuild modules and inverter | Legacy inverter or architecture problem | Modernized electrical system | Greater engineering and interconnection scope |
| Re-engineer the complete system | Structural, roof, code, or layout issues | Resolves systemic deficiencies | Longest and most complex project |
How Much Does Hail Inspection and Replacement Cost?
Solar hail-damage costs vary by system size, roof access, testing method, labor market, equipment availability, electrical architecture, permitting, and insurance requirements. Universal national figures should be treated as planning estimates rather than guaranteed prices.
Typical planning categories include:
| Service | Typical cost driver |
| Basic site inspection | Travel, roof access, system size, report detail |
| Drone visual survey | Flight access, imagery resolution, site restrictions |
| Aerial infrared scan | Array size, weather window, analysis requirements |
| EL imaging | Number of modules, field setup, removal needs |
| Electrical diagnostic testing | String count, inverter type, fault complexity |
| Individual module replacement | Module availability, labor, roof access, hardware |
| Array removal and reinstallation | Module count, storage, roof coordination |
| Full array replacement | Equipment, engineering, permits, utility work |
| System redesign | Structural, electrical, code, and interconnection changes |
A single-module service visit can be disproportionately expensive because mobilization, fall protection, permitting, testing, and recommissioning costs do not decrease in proportion to module count. Obtain itemized local estimates before deciding whether a claim is economically sensible.
Should You File a Claim Below the Deductible?
Usually not without first calculating the total covered scope. A visibly cracked module may represent only part of the loss, but a small repair below the deductible may produce no payment.
Before filing, estimate:
- Complete diagnostic cost
- Total damaged quantity
- Roof damage
- Removal and reinstallation
- Permit and utility expenses
- Code-required upgrades
- Deductible
- Depreciation
- Possible premium or underwriting consequences
Do not delay notice while waiting indefinitely for perfect estimates. Ask the insurer how to provide initial notice without making unsupported statements about the final damage amount.
How Long Does Inspection and Replacement Take?
An initial safety assessment may occur within days, while a complete claim and replacement project may take several weeks or months. Equipment availability, insurer approval, roof work, permits, engineering, and utility requirements usually control the schedule.
A typical sequence is:
- Emergency safety response: Same day to several days
- Detailed inspection and testing: Several days to several weeks
- Report and estimate preparation: Approximately one to three weeks
- Adjuster review and supplements: Several weeks or longer
- Engineering and permitting: Several days to multiple months
- Equipment procurement: Stock items to extended lead times
- On-site replacement: One day for a small repair to several days for a residential rebuild
- Inspection, utility approval, and recommissioning: Days to weeks
The physical panel work may be the shortest part of the project.
Common Mistakes and How to Avoid Them
Climbing Onto the Roof Immediately
A wet or damaged roof combines fall, glass, structural, and electrical hazards. Inspect from the ground and use a qualified professional for roof access.
Assuming Intact Glass Means No Damage
Hail can crack cells without breaking the front glass. Use performance analysis and appropriate imaging when hail severity or surrounding property damage indicates a meaningful risk.
Relying Only on Infrared Imaging
Infrared imaging detects active thermal anomalies, not every crack. Use EL imaging when cell-level evidence is needed and conditions justify the additional cost.
Discarding Panels Before the Claim Is Documented
Removed modules may be critical evidence. Photograph, map, label, and preserve them until the insurer, owner, manufacturer, and relevant experts release them.
Installing Any Panel With Similar Wattage
Voltage, current, dimensions, connectors, clamp zones, temperature behavior, and electronics compatibility all matter. Require a written engineering or manufacturer-based matching analysis.
Letting an Unapproved Contractor Alter the System
Unauthorized work can complicate warranties, ownership agreements, insurance evidence, and electrical certification. Confirm approval requirements before repair.
Treating All Production Loss as Hail Damage
Clouds, grid outages, inverter failures, shading, snow, communication faults, and pre-existing degradation can mimic storm-related underperformance. Establish causation using historical and test data.
Accepting a Cosmetic-Only Classification Without Testing
Cell fractures and insulation damage may be invisible. A cosmetic conclusion should identify which electrical and imaging tests support it.
How Can Future Hail Damage Be Reduced?
Hail risk is reduced most effectively during module procurement and system design. Retrofitting an existing fixed array provides fewer options.
Choose Verified Hail-Tested Modules
Request actual reports showing performance above the basic IEC level. Favor modules with suitable front-glass thickness, strong frames, appropriate dimensions, robust support, and demonstrated post-impact electrical performance.
DOE recommends modules with at least 3.2 mm front glass, stronger framing, and advanced hail testing in high-risk regions.
Consider Module Angle Carefully
A steeper module angle reduces the perpendicular component of many hail impacts, but it can increase wind loading and may affect annual energy production.
DOE reports that higher tilt angles are generally less susceptible to hail and that angles up to 60 degrees can improve hail and snow shedding. The final angle must balance hail, wind, structural, energy, appearance, and roof constraints.
A homeowner should not change the angle of an existing rooftop system without structural and electrical review.
Use Hail Stow on Tracker Systems
Utility-scale and large commercial trackers can move modules toward a steep protective position when severe hail is forecast. An effective hail-stow plan defines:
- Forecast source
- Trigger threshold
- Lead time
- Target angle
- Automatic and manual commands
- Communication redundancy
- Wind conflict rules
- Return-to-service conditions
- Testing and maintenance schedule
Hail stow reduces exposure but does not make a project hailproof. A position that reduces hail impact may increase wind loading, so the control strategy must consider both hazards. DOE recommends tracker hail-stow functions and identifies automatic engagement as preferable where properly engineered.
Create a Baseline Inspection Record
Baseline photographs, infrared scans, EL images, electrical test results, and module maps make post-storm causation easier to establish. Without a baseline, an insurer or owner may dispute whether cracks existed before the hail event.
DOE recommends baseline imaging and comparison with post-event results for this reason.
Expert Rules for Solar Hail Claims
- Inspect the system, not only the broken panels. Hail paths are irregular, and visibly intact modules may contain cell or insulation damage.
- Separate screening from diagnosis. Monitoring and infrared imaging identify suspicious areas. EL and electrical tests determine the condition more precisely.
- Do not let availability determine engineering. A replacement panel should be selected because it is compatible, not merely because a distributor has it in stock.
- Include the roof in the scope. Solar repair cannot be planned correctly when damaged roofing, flashing, attachments, or under-array areas have not been evaluated.
- Preserve causation evidence before dismantling. Once modules are mixed, discarded, or disconnected without mapping, a technically valid claim becomes harder to prove.
- Commission the repaired system as a system. Successful startup does not confirm proper insulation, string balance, grounding, rapid shutdown, monitoring, or long-term safety.
Limitations of Hail Inspection
No single inspection method proves every aspect of module condition. Visual inspection cannot reveal all cell cracks, infrared imaging may miss electrically inactive damage under poor test conditions, EL imaging does not by itself quantify future degradation, and short-term production data cannot predict every long-term failure.
Inspection conclusions should therefore state the methods used, test conditions, inaccessible areas, uncertainty, and whether follow-up monitoring is recommended.
Frequently Asked Questions
Can hail-damaged solar panels cause a fire?
Hail damage can increase fire risk when it compromises insulation, connectors, backsheets, junction boxes, conductors, or cells that later develop hot spots. Fire is not the inevitable outcome of a cracked module, but visibly damaged equipment should remain out of service until electrical faults and insulation integrity have been evaluated.
Will a solar monitoring app identify every damaged panel?
No. Monitoring detects measurable performance or communication changes, but some cell cracks cause little immediate power loss. String inverters also combine the output of multiple modules, which can hide an individual defect. Module-level electronics improve resolution but still cannot replace physical, electrical, infrared, or EL inspection.
Can a cracked solar panel be sealed instead of replaced?
Surface sealants generally do not restore the module’s tested electrical insulation, structural strength, moisture barrier, impact resistance, or warranty status. A broken-glass module is normally replaced. Temporary weather protection may be used only under a qualified professional’s safety procedure while permanent replacement is arranged.
What happens when the original panel model is discontinued?
The contractor must identify a replacement with compatible electrical characteristics, dimensions, mounting zones, connectors, fire classification, and inverter requirements. Depending on string design and available equipment, the practical solution may be one replacement module, several matched modules, a full string, or a broader array redesign.
Does the roof need inspection after a solar hail loss?
Yes. Hail may damage roofing, flashing, vents, under-array surfaces, attachments, and drainage components even when the modules receive most of the visible impacts. Coordinating roof and solar assessments prevents a repaired array from being installed over roofing that soon requires removal.
Should solar panels be inspected after every small hailstorm?
A detailed professional inspection is not necessary after every minor event when no property damage, fault, or production change is present. Review monitoring and conduct a safe ground-level check. Arrange professional testing after large hail, visible impact evidence, inverter faults, unexplained production loss, or damage to surrounding roofs and vehicles.
Conclusion
Solar panel hail damage should be managed as an evidence-based electrical and property loss, not merely as a search for shattered glass. Safe isolation, preserved monitoring data, qualified inspection, appropriate imaging, complete insurance documentation, and technically compatible replacement are the steps that determine whether a damaged array returns to reliable service.
The correct scope may range from replacing one module to rebuilding the entire system. The decision should be based on verified damage, electrical matching, roof condition, current codes, equipment availability, insurance terms, and lifecycle cost rather than appearance alone.