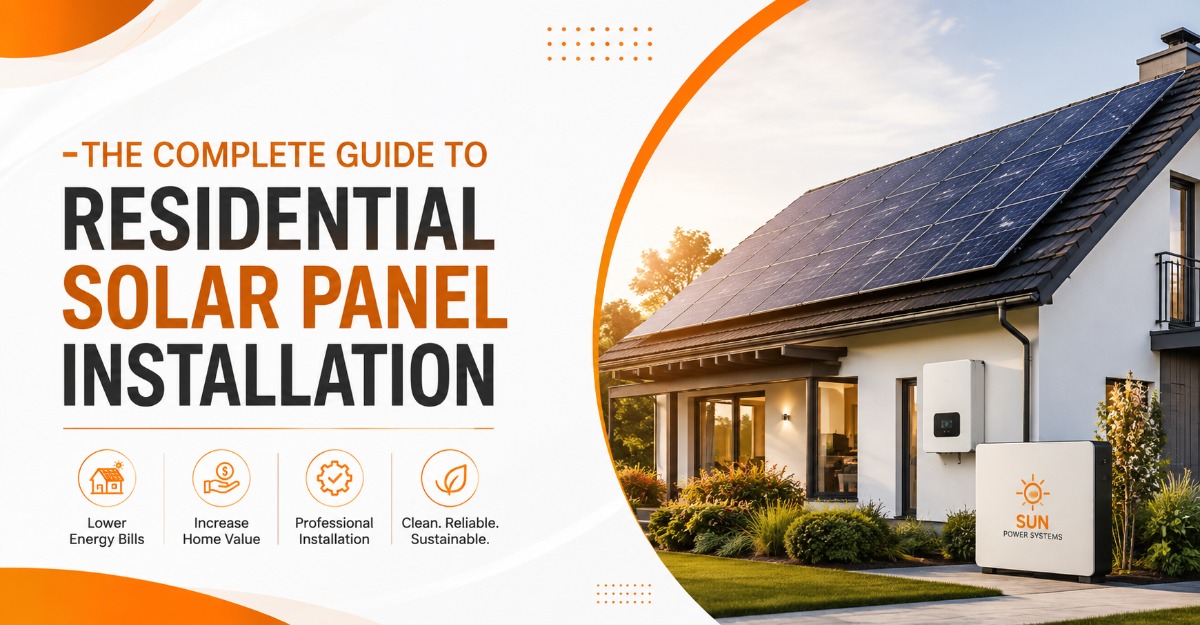
Residential solar panel installation is the engineering and construction process that securely mounts photovoltaic modules onto a home to capture sunlight and convert it into usable household electricity. This system integrates racking hardware, electrical inverters, and utility meters to generate localized power and reduce grid dependency.
Planning your residential solar panel installation
Properly planning your residential solar panel installation establishes the foundation for decades of uninterrupted energy production. The planning stage dictates the physical layout, electrical sizing, and financial viability of the entire array. Homeowners must align their historical energy consumption with the usable square footage of their roof while accounting for local utility net-metering policies.
Engineers rely on a home’s previous 12 months of utility bills to calculate the baseline kilowatt-hour (kWh) consumption. This data determines the required kilowatt (kW) capacity of the solar array. An undersized system fails to offset utility costs adequately. An oversized system generates excess power that many modern utility companies will only compensate at heavily reduced wholesale rates. Balancing capacity against consumption ensures the shortest possible amortization horizon.
The Energy Conversion Sequence
The energy conversion sequence transforms raw solar radiation into the standardized alternating current required by modern home appliances. This multi-step physical process occurs instantly and continuously while the sun is visible.
First, photons from sunlight strike the silicon cells inside the photovoltaic panels. This interaction knocks electrons loose from their atomic structures. The resulting flow of electrons generates direct current (DC) electricity. The DC power travels through heavy-duty conduit wiring from the roof down to a centralized string inverter or is processed immediately by microinverters attached to the back of each panel.
Homes and municipal grids operate exclusively on alternating current (AC). The inverter translates the incoming DC voltage (often ranging from 300 to 600 volts) into standard 120/240-volt single-phase AC electricity. This usable power flows directly into the home’s main breaker panel. The breaker box prioritizes routing this electricity to active household loads like refrigerators, HVAC units, and lighting. Any surplus energy generated beyond the home’s immediate consumption flows backward through a bidirectional utility meter into the local grid or feeds into an on-site battery storage system.
What are the phases of home solar installation?
The phases of home solar installation involve precise sequential steps ranging from preliminary engineering assessments to final utility grid activation. The physical labor accounts for a surprisingly small fraction of the total project timeline. Bureaucratic approvals and safety inspections dominate the schedule.
- Site Audit and Assessment: An initial evaluation of the physical property.
- System Engineering and Design: Creation of electrical single-line diagrams.
- Permitting and Approvals: Submission to municipal building departments.
- Physical Roof Mounting: The actual construction phase on the property.
- Inspection and Commissioning: Final safety verification by local authorities.
- Utility Activation: Receiving Permission to Operate (PTO) from the power company.
Site Audit and System Engineering
Site audit and system engineering evaluate the structural and environmental realities of the property to produce a viable blueprint. A technician measures the roof pitch, inspects the structural integrity of the underlying rafters, and assesses the condition of the electrical service panel.
Designers use digital mapping software like Aurora Solar to calculate exact shade profiles caused by nearby trees, chimneys, and adjacent buildings. They factor in local wind load requirements mandated by building codes (such as ASCE 7-16 standards in the United States). The resulting engineering dossier includes structural blueprints detailing exact array positioning, standoff attachments, and electrical schematics mapping the series or parallel DC routing.
Permitting and Interconnection Approvals
Permitting and interconnection approvals legally authorize the construction and grid connection of the solar system. The solar contractor submits the completed engineering designs to the local Authority Having Jurisdiction (AHJ) for structural and electrical building permits.
Simultaneously, the installation company files an interconnection application with the local electric utility. The utility provider must verify that the neighborhood transformers can safely accommodate the projected electrical feedback without overloading. This administrative phase is the most variable part of the project timeline. Depending on municipal backlog and utility efficiency, permitting can take anywhere from two weeks to three months.
Physical Roof Mounting and Wiring
Physical roof mounting and wiring represent the active construction phase where crews secure the hardware and establish electrical continuity. Installers locate the roof rafters and secure heavy-duty flashing and standoff brackets directly into the structural timber. The flashing is sealed with specialized roofing caulk to eliminate water penetration risks.
Aluminum racking rails are bolted to these foundational standoffs. Crews hoist the photovoltaic modules onto the roof and mechanically fasten them to the rails using mid-clamps and end-clamps torqued to specific manufacturer standards (typically 14 to 16 Newton-meters). Electricians route high-voltage DC conduit along the exterior walls and integrate mandatory safety mechanisms. The National Electrical Code (NEC) 690.12 mandates the installation of rapid-shutdown devices (RSD) to immediately de-energize the roof array during emergency responder situations.
Inspection and Utility Commissioning
Inspection and utility commissioning serve as the final safety checks before a solar system can legally generate active power. A field inspector from the local municipality visits the property to verify that the physical installation matches the approved electrical blueprints. They check conduit sizing, grounding connections, and structural torque marks.
Once the municipal inspector signs off, the utility company steps in. The utility verifies the safety disconnect switches to ensure the system will not back-feed electricity into the grid during a local blackout. Back-feeding poses a lethal risk to line technicians repairing downed wires. Upon clearing this final hurdle, the utility swaps the standard electrical meter for a bidirectional net meter and issues the formal Permission to Operate (PTO).
How much does a home solar system cost?
A home solar system costs between $18,000 and $25,000 for a standard residential property before applied tax incentives. Pricing is calculated primarily on a per-watt basis. System costs fluctuate based on geographic location, equipment quality, and the complexity of the roof structure.
According to the Lawrence Berkeley National Laboratory (LBNL) 2023 “Tracking the Sun” report, the median national cost for residential solar sits at approximately $3.30 per watt. Hardware (panels, inverters, racking) accounts for roughly 40 percent of the total price. Soft costs, including permitting, labor, supply chain logistics, and customer acquisition, make up the remaining 60 percent. The implementation of battery storage adds significant capital expenditure.
| Array Capacity | Estimated House Size | Pre-Incentive Cost Range | Post-Tax Credit (30%) Cost |
| 5 kW (Small) | Under 1,500 sq ft | $14,000 – $17,000 | $9,800 – $11,900 |
| 8 kW (Standard) | 1,500 – 2,500 sq ft | $22,000 – $26,500 | $15,400 – $18,550 |
| 12 kW (Large) | Over 2,500 sq ft | $33,000 – $39,500 | $23,100 – $27,650 |
| 10 kWh Battery | Backup Storage | $9,500 – $14,000 | $6,650 – $9,800 |
Cost data represents typical 2024-2025 baseline market averages and excludes local state-level rebates.
Which solar equipment is best for houses?
The best solar equipment for houses balances high-efficiency power generation with long-term reliability in harsh weather environments. Homeowners must select the physical photovoltaic cell material and the electrical inverter architecture.
Photovoltaic Cell Materials
Photovoltaic cell materials determine the efficiency, physical footprint, and heat tolerance of the entire array. The market is dominated by varying grades of crystalline silicon. Monocrystalline panels represent the modern standard for residential properties because they generate the most power per square foot.
Within the monocrystalline category, newer N-Type technologies (like TOPCon and Heterojunction) suffer less degradation over time compared to older P-Type PERC cells. According to the National Renewable Energy Laboratory (NREL), standard high-quality photovoltaic modules experience a median degradation rate of just 0.5 percent per year. Polycrystalline panels are cheaper but require more roof space, rendering them largely obsolete for urban residential applications. Thin-film panels offer flexibility but lack the efficiency required for home roofs.
| Cell Technology | Base Material | Average Efficiency | Temperature Tolerance | Best Residential Use Case |
| Monocrystalline (N-Type) | Single pure silicon crystal | 22% – 24% | Excellent | Space-constrained roofs, hot climates |
| Monocrystalline (P-Type) | Single pure silicon crystal | 19% – 21% | Good | Standard suburban installations |
| Polycrystalline | Melted silicon fragments | 15% – 17% | Moderate | Large rural ground mounts |
| Thin-Film (CIGS/CdTe) | Photovoltaic chemical layers | 11% – 14% | Excellent | Niche curved surfaces (rare for homes) |
Inverter Architectures Explained
Inverter architectures dictate how the system manages shade and converts electricity. The choice between a string inverter and microinverters fundamentally alters the wiring design on the roof.
String inverters link multiple solar panels together in a series circuit. This is the most cost-effective solution. However, in a standard string configuration, the total output of the circuit drops to the level of the weakest producing panel. If shade from a chimney covers one panel, the entire string suffers. Microinverters eliminate this bottleneck by placing a miniature inverter under every single panel, allowing each module to operate independently. Power optimizers offer a middle ground, conditioning the DC power at the panel level before sending it to a central string inverter.
| Inverter Architecture | Placement | Shade Mitigation | Upfront Cost | Optimal Application |
| String Inverter | Garage / Exterior Wall | Poor | Lowest | Unshaded, simple south-facing roofs |
| Microinverters | Under every panel | Excellent | Highest | Complex roofs with multiple angles and shade |
| Power Optimizers | Under every panel | Excellent | Moderate | Partially shaded roofs requiring central conversion |
Grid-Tied vs Off-Grid vs Hybrid Systems
System architecture defines how a home interacts with the municipal power utility. The vast majority of urban and suburban installations operate as grid-tied setups, relying on the utility company as a virtual battery to store excess daytime production.
Grid-tied systems automatically shut down during neighborhood blackouts to protect utility line workers. Off-grid systems sever all physical connections to the utility. They require massive, expensive battery banks to supply power through the night and during prolonged cloudy weather. Hybrid systems bridge the gap. They remain connected to the utility for net metering benefits but utilize a localized battery (typically Lithium Iron Phosphate, or LFP) and an automatic transfer switch to keep critical home appliances running seamlessly during grid failures.
| Feature | Grid-Tied System | Hybrid System | Off-Grid System |
| Utility Connection | Yes | Yes | No |
| Battery Requirement | None | Moderate (Backup only) | Large (Total daily load) |
| Outage Performance | Shuts down immediately | Powers critical loads | Unaffected |
| Regulatory Barrier | Moderate permitting | Complex permitting | Strict local zoning rules |
| Relative Expense | Baseline cost | Baseline + 40% | Baseline + 100% |
What are the primary financing methods?
The primary financing methods dictate the long-term return on investment and tax credit eligibility for the homeowner. Purchasing the system with cash yields the highest lifetime financial return but requires substantial upfront liquidity.
Financing via a solar loan allows homeowners to spread the cost over 10 to 25 years. Because the homeowner legally owns the equipment in a loan scenario, they remain fully eligible to claim the Federal Residential Clean Energy Credit (Section 25D of the IRA), which currently covers 30 percent of the installation cost. Solar leases and Power Purchase Agreements (PPAs) operate differently. In a lease or PPA, a third-party company owns the hardware on the roof. The homeowner simply agrees to buy the generated power at a locked-in rate. While this eliminates upfront costs and maintenance responsibilities, the third-party company retains all tax incentives.
| Financing Method | Ownership Status | Tax Credit Eligibility | Upfront Capital Required | Long-Term ROI |
| Cash Purchase | Homeowner | Yes (30% Federal) | Highest ($15k – $30k) | Maximum |
| Solar Loan | Homeowner | Yes (30% Federal) | Low or Zero | High |
| Solar Lease | Third-Party Company | No | Zero | Low to Moderate |
| Power Purchase Agreement | Third-Party Company | No | Zero | Low to Moderate |
How do roof materials affect the mounting process?
Roof materials dictate the required structural hardware, the complexity of the installation labor, and the overall watertight integrity of the final array. Standard asphalt composite shingles present the easiest installation environment. Installers can easily locate rafters, slide metal flashing under the top layer of shingles, and secure the lag bolts with minimal friction.
Metal standing seam roofs offer an even better scenario. Installers use specialized clamps (like S-5! clips) that grip the raised metal seams directly. This completely eliminates the need to drill penetration holes into the roof deck. Conversely, concrete, clay, or Spanish tile roofs require intensive labor. Installers must carefully remove individual fragile tiles, install specialized replacement mounts, and carefully grind surrounding tiles to ensure a flush fit. Installing solar on flat rubber or TPO roofs requires ballasted racking systems held down by heavy concrete blocks rather than penetrations to preserve the roof membrane.
What are common solar installation mistakes?
Common solar installation mistakes severely degrade long-term energy production and inflate system payback periods. The most frequent error involves falling for oversized financial deals packed with hidden dealer fees. Many zero-down, low-interest solar loans quietly bake 20 to 30 percent markups directly into the principal system balance. Always demand a cash-equivalent price quote to compare against the financed quote.
Another critical mistake is misunderstanding local net metering policy changes. The Solar Energy Industries Association (SEIA) notes that policies evolve rapidly. For example, California’s transition from NEM 2.0 to NEM 3.0 drastically reduced the compensation rate for surplus power exported to the grid. Installing a standard grid-tied system without a battery under a policy like NEM 3.0 results in severe financial underperformance. Finally, homeowners frequently fail to account for winter solar angles. A tree that casts no shade in July might entirely cover the array in December when the sun tracks much lower in the sky.
How to troubleshoot a solar energy system?
Troubleshooting a solar energy system involves isolating electrical faults between the photovoltaic modules, the inverter, and the internet monitoring gateway. Most modern setups include a dedicated mobile application that flags exact component failures.
Begin by checking the physical AC and DC disconnect switches located near the main utility panel. Extreme grid voltage spikes can occasionally trip these breakers. If a system shows zero production on a clear day, the monitoring gateway may have simply lost connection to the home Wi-Fi router, even though the panels are actively producing power. Resetting the router and reconnecting the inverter usually resolves data blackouts.
| Recognized Symptom | Most Likely Root Cause | Targeted Corrective Action |
| System output plummets sharply on one string | Localized shading, heavy dirt, or a failed bypass diode in one panel. | Clear physical obstructions or contact the installer to run a string voltage test. |
| Inverter displays a red fault light / shuts off | Grid voltage irregularities, thermal overheating, or ground fault. | Check inverter airflow clearance. If clear, an electrician must perform a resistance check. |
| Application shows zero daily production | Tripped AC/DC disconnect breakers or lost Wi-Fi communication link. | Inspect the physical breaker board. Re-sync the monitoring gateway to the home network. |
| Hybrid battery storage drains unusually fast | Cold ambient temperatures, outdated firmware, or high phantom loads. | Insulate the battery location and push the latest firmware update via the manufacturer app. |
Frequently Asked Questions About residential solar panel installation
Does a home solar system work during a power outage?
Standard grid-tied solar systems automatically shut down during a utility blackout. This is a mandatory safety feature to prevent the system from back-feeding live electricity into the grid and injuring line repair workers. To maintain power during an outage, the installation must include a hybrid inverter, an isolation switch, and a battery storage unit.
Do solar panels damage your roof?
Properly installed solar panels do not damage a roof. They actually protect the covered shingles from ultraviolet degradation and harsh weather. However, poor workmanship during installation, such as failing to use proper flashing or inadequate sealant around lag bolt penetrations, can lead to severe water leaks and rotting rafters.
How long do photovoltaic modules last?
High-quality monocrystalline photovoltaic modules routinely last 25 to 30 years. They do not abruptly stop working after this period. Instead, they experience a slow degradation in efficiency, typically losing roughly 0.5 percent of their generation capacity per year. A 25-year-old panel will still produce power, operating at approximately 85 percent of its original factory rating.
Will solar arrays generate electricity in the winter?
Solar arrays absolutely generate electricity during the winter. Photovoltaic cells require sunlight, not ambient heat, to produce power. Cold temperatures actually improve the electrical conductivity of the silicon cells. However, total daily production decreases during winter months due to shorter daylight hours and the lower angle of the sun in the sky.
Do I need to clean my rooftop array?
Most residential arrays require very little manual cleaning. In standard climates, regular rainfall effectively washes away accumulated dust and pollen. However, in arid regions, near agricultural operations, or areas with heavy wildfire ash, a physical layer of dirt can reduce system output by 5 to 10 percent. In these specific environments, an annual gentle wash with a hose is recommended.