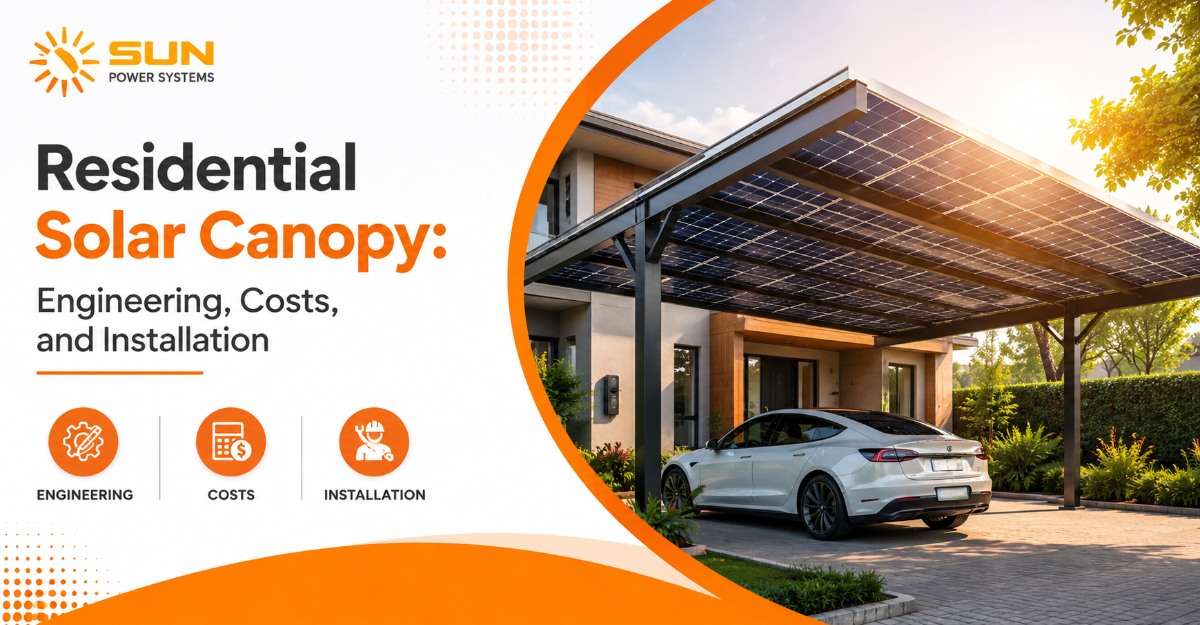
A residential solar canopy is an elevated structural framework designed to support photovoltaic panels while creating usable, shaded space underneath. Unlike standard rooftop installations, this independent array maximizes energy production by bypassing roof orientation limits while providing dual-purpose shelter for vehicles, patios, or outdoor living areas.
How Does a Residential Solar Canopy Work?
Solar canopies capture sunlight through overhead photovoltaic modules and convert that radiation into Direct Current power. A localized inverter system transforms this energy into Alternating Current, which travels through an underground conduit to the main electrical panel of the property. The home consumes the generated power instantly, pushing any excess capacity back to the local utility grid or storing it in a residential battery bank.
This independent energy structure relies on heavy-duty architectural engineering to replace the structural support normally provided by a house roof. Roofs natively distribute weight across dozens of trusses. Elevated arrays must concentrate extreme static weight and dynamic wind forces down through just four to eight vertical columns. This requires deep foundation footings anchored below the local frost line to prevent winter heaving.
Water management separates premium installations from basic agricultural mounts. Standard solar racking leaves tiny gaps between panels. A dedicated canopy uses integrated EPDM rubber gaskets or specialized aluminum gutter rails positioned between the modules. This creates a completely waterproof roof plane, redirecting rain to perimeter downspouts and keeping the usable space underneath completely dry.
What Are the Main Types of Solar Structures?
Property owners deploy freestanding arrays based on the functional requirements of the ground space below. Each variant demands different clearance heights, span distances, and aesthetic finishing.
| Canopy Type | Primary Use Case | Standard Clearance Height | Typical System Size |
| Solar Carport | Vehicle parking and EV charging | 9 to 11 feet | 6 kW to 12 kW |
| Patio Pergola | Outdoor dining and entertainment | 8 to 10 feet | 4 kW to 8 kW |
| Deck Extension | Shading elevated home attachments | Matches roof eaves | 3 kW to 6 kW |
| Garden Pavilion | Poolside seating or equipment housing | 7 to 9 feet | 4 kW to 7 kW |
The EV Carport Array
The cantilevered steel carport provides the highest utility for electric vehicle owners. Engineers place massive steel posts at the rear of the parking pad, allowing the roof to project forward without front columns blocking car doors. Level 2 electric vehicle chargers often mount directly to these steel uprights. This setup allows daytime generation to flow directly into the vehicle battery, bypassing grid transmission losses entirely.
The Patio Pergola
Outdoor entertainers favor the pergola model for its aesthetic integration with backyard landscaping. Builders construct these using extruded aluminum, architectural steel, or heavy glulam timber. Instead of opaque panels, these structures heavily feature semi-transparent or bifacial modules. This allows dappled sunlight to reach the patio floor while blocking 100% of harmful ultraviolet radiation.
The Attached Deck Canopy
Homeowners with heavily shaded front roofs often extend their rear decking to capture southern sun exposure. The deck canopy ties directly into the home’s primary structure using a ledger board, functioning like a standard awning. This requires less raw steel than a freestanding unit but triggers stricter building code inspections because it physically connects to the primary dwelling.
Comparing Framing Materials and Foundation Options
The skeleton of your array dictates its lifespan, visual appeal, and total cost. You must match the framing material to your local climate conditions and soil composition.
| Framing Material | Corrosion Resistance | Maximum Post Span | Estimated Material Cost |
| Heavy-Duty Steel | Excellent (if galvanized) | 20 to 30 feet | $1.20 to $1.80 / Watt |
| Extruded Aluminum | Superior (naturally rust-proof) | 12 to 18 feet | $1.50 to $2.10 / Watt |
| Glulam Timber | Moderate (requires sealing) | 15 to 20 feet | $1.80 to $2.50 / Watt |
| Thin-Gauge Steel | Poor (susceptible to rust) | 8 to 12 feet | $0.80 to $1.10 / Watt |
Steel offers the longest spanning capabilities, making it mandatory for multi-car carports where interior columns would impede parking. Aluminum costs slightly more but permanently resists oxidation in coastal environments with high salt content in the air. Timber provides a warm, organic appearance for patios but requires periodic re-staining to prevent rot and moisture intrusion.
Foundations anchor the entire system. Installers use standard concrete piers for predictable, stable soils. The crew drills a 24-inch diameter hole down to 48 inches, inserts a rebar cage, and pours wet concrete around a structural anchor bolt. In areas with high water tables or unstable sandy loam, engineers mandate helical piles. Machinery drives these giant steel screws deep into the earth until they hit refusal pressure, offering immediate load-bearing capacity without waiting for concrete to cure.
Panel Technology: Monocrystalline vs. Bifacial
The modules you select alter the lighting conditions underneath the structure. Most rooftop arrays use opaque monocrystalline panels with black backsheets. These absorb sunlight highly efficiently from the top down, but they cast a dark, absolute shadow below.
Bifacial glass-on-glass panels replace the standard plastic backsheet with a second layer of tempered glass. The active silicon cells sit suspended between the two transparent layers. This configuration allows 10% to 15% of ambient light to pass completely through the canopy, creating a pleasant, glowing ambiance for outdoor living spaces.
Bifacial technology also absorbs reflected sunlight hitting the underside of the array. Light-colored concrete driveways or white patio pavers reflect substantial solar radiation upward. The underside of the bifacial panel captures this albedo effect, increasing total system energy production by 8% to 25% depending on seasonal sun angles and ground surface reflectivity.
How Much Do Freestanding Arrays Cost?
Financial planning requires separating the structural building costs from the solar technology costs. A standard rooftop array averages $2.80 to $3.20 per watt. Elevated arrays carry a premium, averaging $3.50 to $5.50 per watt due to the heavy construction requirements.
| Component Category | Expected Cost Range (10 kW System) | Percentage of Total |
| PV Panels & Inverters | $12,000 to $16,000 | 35% |
| Structural Framing & Hardware | $8,000 to $14,000 | 30% |
| Labor, Trenching & Concrete | $6,000 to $10,000 | 25% |
| Engineering & Permits | $2,000 to $4,000 | 10% |
The federal Residential Clean Energy Credit (Section 25D) provides a 30% tax credit for solar installations. The IRS allows taxpayers to apply this 30% credit to the entire structural framing cost of a carport or pergola, provided the structure serves primarily as the mounting apparatus for the solar array. Consult a certified public accountant to verify eligibility based on your specific architectural plans.
Step-by-Step Installation Process
Building a freestanding array bridges the gap between traditional electrical work and heavy commercial construction. The entire process takes four to six months, though the physical labor happens in a tight window.
Step 1: Geotechnical and Structural Engineering (Weeks 1-4)
Surveyors assess the site for daily solar access and identify underground utility lines. Structural engineers calculate the regional snow weight and specify column sizes to withstand local wind uplift. The final deliverable is a stamped blueprint detailing concrete footing depths, steel thicknesses, and electrical conduit routes.
Step 2: Permitting and HOA Approval (Weeks 5-12)
Administrators submit the stamped blueprints to the local building department. Simultaneously, the installation team files interconnection applications with the utility company to secure permission for net metering. Homeowners living in deed-restricted communities must present aesthetic renderings to their Homeowners Association architectural review board.
Step 3: Excavation and Foundations (Weeks 13-14)
Heavy machinery arrives to drill the foundation holes. Workers trench a path from the structure site to the home’s main electrical panel. Code requires this trench to sit 18 to 24 inches below grade to protect the PVC conduit from future landscaping tools. The team pours the concrete piers and lets them cure for several days.
Step 4: Framing Assembly (Week 15)
The crew erects the main support columns using a crane or heavy lifting equipment. They bolt the primary crossbeams into place, followed by the secondary purlins. Installers then lay down the specialized waterproof racking channels and secure the EPDM rubber gaskets between the rails.
Step 5: Electrical Commissioning (Week 16)
Technicians mount the solar panels and connect the microinverters or DC optimizers. They run the final copper wiring through the underground conduit, terminating the connection at a new breaker in the main panel. The municipal inspector verifies structural integrity and electrical safety. Finally, the utility company grants Permission to Operate (PTO).
How Do You Avoid Common System Failures?
Elevated arrays face environmental exposure from 360 degrees, introducing unique maintenance challenges that roof mounts avoid. Identifying failure modes early prevents minor issues from compounding into expensive repairs.
Water dripping between panels usually indicates improper seating of the EPDM rubber gaskets. Gaskets expand and contract with seasonal temperature swings. If installers stretch the rubber too tightly during assembly, cold weather will cause the material to shrink and pull away from the panel edges. The fix involves cleaning out accumulated debris from the channel and replacing the compressed sections of the gasket strip with properly sized lengths.
A sudden voltage drop in a single panel string often points to rodent damage. Squirrels and birds seek shelter in the elevated steel framing and chew on the exposed wiring underneath the modules. Unlike a roof array, the underside of a canopy is fully exposed. Installers must secure all wiring tight against the rails using UV-rated zip ties and install heavy-duty metal critter guards around exposed junction boxes.
Winter underperformance happens when low-tilt arrays fail to shed snow. Roof panels often sit at steep 30-degree pitches, allowing snow to slide off. Canopies frequently sit at flatter 5-degree to 10-degree tilts for aesthetic reasons. Owners should use a soft-bristled, non-abrasive solar roof rake to safely drag snow off the perimeter without scratching the tempered glass surface.
Pros and Cons of Elevating Your Array
Moving your energy generation off your roof introduces distinct operational advantages, but it requires significantly more upfront capital.
| Attribute | Traditional Roof Mount | Elevated Solar Canopy | Winner |
| Orientation Flexibility | Locked to existing roof azimuth | Can face true south at ideal tilt | Elevated Canopy |
| Thermal Efficiency | Traps heat against shingles | Open air cooling underneath | Elevated Canopy |
| Initial Capital Cost | Lower ($15,000 to $25,000) | Higher ($25,000 to $45,000) | Roof Mount |
| Property Alteration | Temporary aesthetic change | Permanent architectural addition | Tie |
| Roof Lifecycle Impact | Requires removal for re-roofing | Zero impact on home roofing | Elevated Canopy |
The thermal efficiency of an open-air frame provides a measurable performance boost. Solar cells lose voltage as they heat up. Panels mounted three inches above hot asphalt shingles bake in the summer sun, losing up to 15% of their rated output on a 95-degree day. A freestanding structure enjoys continuous updrafts of cool air across the underside of the modules, keeping the silicon cooler and yielding 5% to 10% more total energy during peak summer months.
The primary drawback remains strict zoning constraints. Municipalities enforce rigid height limits on accessory structures, often capping them at 12 feet. If your driveway requires a steep grade, achieving a level canopy while respecting local height limits becomes an engineering nightmare. Furthermore, neighbors frequently oppose large steel structures near property lines, triggering lengthy variance hearings at the local zoning board.
Are Zoning Laws a Barrier for Your Project?
Navigating municipal codes presents the highest hurdle for property owners. Local building departments treat freestanding arrays as permanent accessory structures, subjecting them to the exact same rules as detached garages or storage sheds.
You must identify your local setback requirements before ordering materials. A setback dictates the minimum distance an accessory structure must sit from the property line. Many suburbs mandate a 10-foot side setback. If your driveway sits 2 feet from your neighbor’s fence, a standard solar carport is legally impossible to build. Some townships grant variances for clean energy projects, but this adds months to the timeline.
Historical districts and coastal zones impose additional rules. Properties near the coast must upgrade from standard framing to heavy-duty steel engineered for 150 mph hurricane wind loads. Homes in historical preservation districts often face total bans on front-facing arrays, forcing owners to locate the structure entirely in the rear yard.
Frequently Asked Questions
Can I build a solar structure over an existing concrete patio?
Yes, but engineers cannot bolt the structure directly to a standard 4-inch concrete patio slab. The crew must cut holes in the existing patio, dig past the frost line, pour dedicated structural concrete footings, and then patch the surface concrete around the new steel columns.
Will I still have electricity during a grid power outage?
Standard grid-tied arrays shut down automatically during an outage to prevent back-feeding electricity onto lines being repaired by utility workers. To maintain power, you must pair the array with a hybrid inverter and a localized battery backup system.
How do you clean the panels on a 10-foot tall structure?
Owners clean elevated arrays using a standard garden hose and an extension pole fitted with a squeegee and soft microfiber pad. You only need to clean them once or twice a year in dry, dusty climates; regular rainfall handles the cleaning naturally in most regions.
Do I need microinverters or a string inverter for a freestanding frame?
Microinverters attach directly to the underside of each panel, optimizing performance if trees cast partial shade across the array. However, a centrally located string inverter keeps the sensitive electronics out of the weather and makes long-term maintenance easier, provided the site has full, unshaded sun exposure.
Is a permit required if I build a small off-grid canopy?
Yes. Regardless of whether the system connects to the utility grid, any structure bearing heavy static weight and acting as a roof requires a municipal structural building permit to ensure it will not collapse under snow or wind loads.