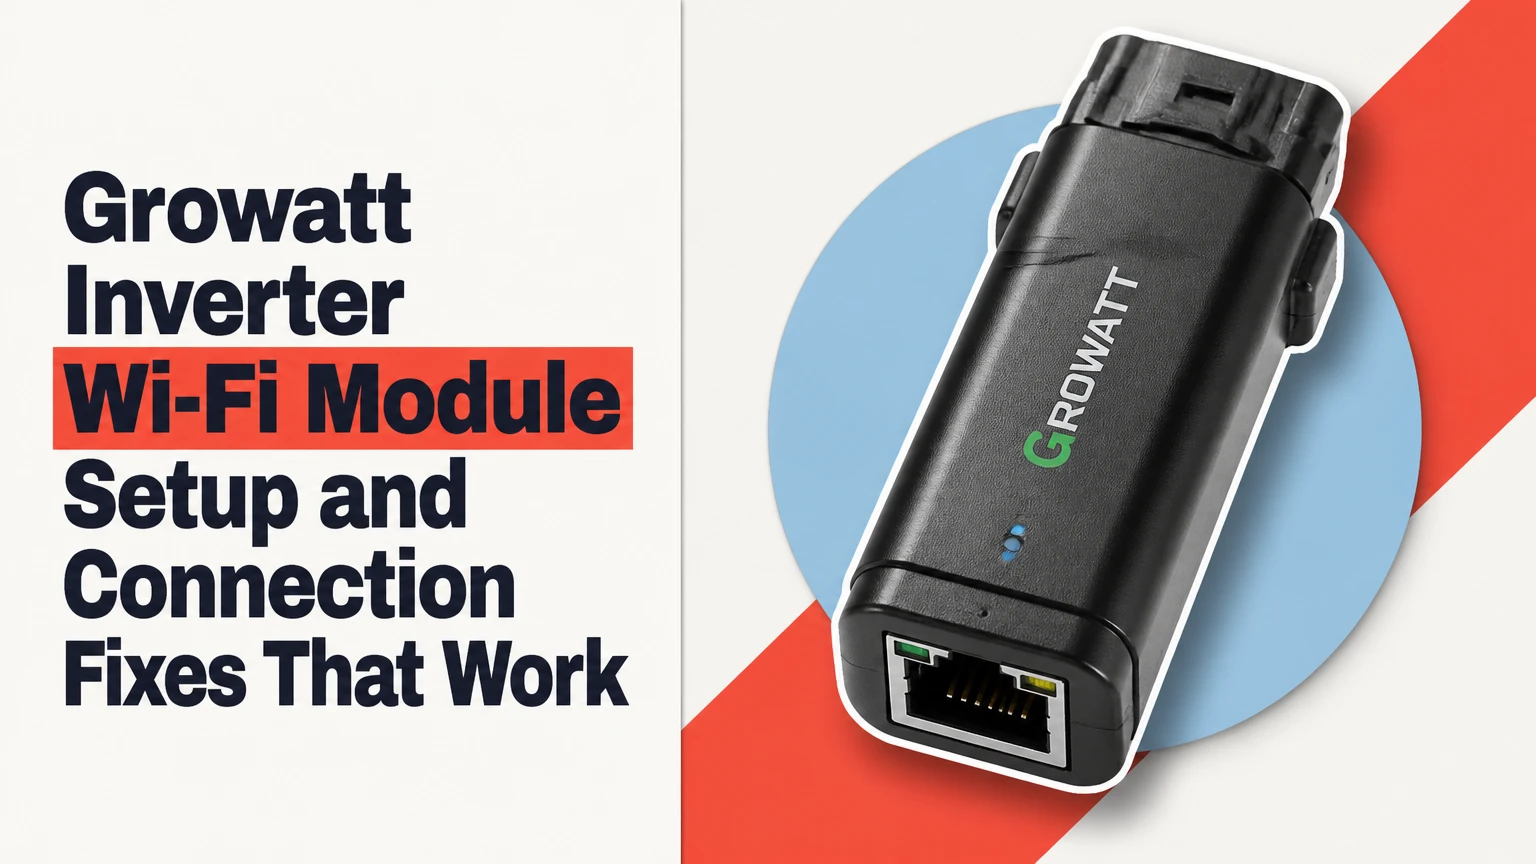
A Growatt inverter Wi-Fi module, usually a ShineWiFi data logger, connects the inverter to a home router and Growatt’s monitoring platform. Successful setup requires the correct dongle, a reachable 2.4 GHz network, accurate logger registration, and a cloud connection; the inverter can continue producing power even when monitoring is offline.
Key Facts at a Glance
- Growatt ShineWiFi-S and many ShineWiFi-X installations require a 2.4 GHz Wi-Fi network during provisioning.
- The dongle serial number and check code belong to the logger, not the inverter’s large chassis label.
- A flashing red LED usually means the logger has power but lacks a working router connection.
- AP mode credentials, hotspot names, IP addresses, and reset behavior vary by dongle firmware.
- ShinePhone data commonly appears within 5-10 minutes after successful cloud registration, but delayed historical data can take longer.
- Opening inbound router ports is normally unnecessary and should not be a first-line connection fix.
What Is a Growatt Wi-Fi Module?
A Growatt Wi-Fi module is an external data logger that reads operating values from a compatible inverter and sends them through a local wireless network to Growatt’s monitoring service. The logger does not create solar power, regulate battery charging, or replace the inverter’s control functions. It provides telemetry.
The physical connection is commonly RS232 on older ShineWiFi-S units or USB on newer ShineWiFi-X hardware. Inside the logger, inverter readings are collected through the inverter communication interface, converted into network packets, and transmitted to a router. Growatt’s ShineServer then makes the data available through ShinePhone or a web portal. Growatt’s published WIFI-X and WIFI-S instructions describe the logger as a device for inverter data communication and network configuration.
The monitoring path has four separate points:
- Inverter to logger: the port, cable, pin contacts, and serial communication must work.
- Logger to router: the SSID, password, frequency band, encryption, and DHCP service must work.
- Router to internet: DNS, outbound traffic, and internet access must work.
- Cloud to account: the logger serial number must be attached to the correct plant.
That separation matters. A dark logger indicates a power or physical connection issue, while a blue or green status can indicate a network or cloud problem. Solar generation may remain normal while the monitoring path fails.
How Does the Growatt Connection Work?
The Growatt monitoring chain is inverter, logger, 2.4 GHz router, internet service, Growatt cloud, and ShinePhone. A failure at any link can produce missing data even when the inverter display shows normal generation.
The logger generally polls inverter parameters such as daily yield, total yield, power, voltage, battery state, and fault records. The exact values depend on the inverter family and firmware. The Wi-Fi module then uploads readings to Growatt’s remote platform at regular intervals rather than providing a guaranteed second-by-second local feed.
Many data loggers retain some readings during an internet outage, but the storage duration is model and firmware dependent. Claims of 30-40 days should be treated as a typical specification for certain modules, not a guarantee for every ShineWiFi device. A long outage, logger reset, firmware fault, or storage failure can reduce recovery.
Where Can the Connection Fail?
| Failure point | Typical symptom | First test | Likely remedy |
|---|---|---|---|
| Inverter port to logger | Dark LED or no logger serial number | Reseat the module with inverter isolated safely | Inspect contacts or replace logger |
| Logger to router | Flashing red LED | Check 2.4 GHz SSID visibility | Reconfigure SSID and password |
| Router to internet | Blue or connected state, no cloud data | Test another device on the same network | Check DNS, firewall, and internet service |
| Cloud to plant | Logger online but empty dashboard | Compare logger S/N with plant registration | Remove duplicate or incorrect logger entry |
Which Growatt Wi-Fi Module Fits Your Inverter?
The correct module is determined by the inverter’s physical communication port and the logger family specified for that inverter. Do not select a dongle solely because its connector appears similar. Growatt inverter generations use different electrical interfaces, firmware, and mounting arrangements.
| Logger family | Physical interface | Common use | Network note |
|---|---|---|---|
| ShineWiFi-S | RS232 or model-specific serial connector | Older TL, MTL, and TL3-S families | Usually 2.4 GHz only |
| ShineWiFi-X | USB-style connector with locking ring | Many MIN TL-X, MOD, MID, and MAX models | Confirm exact inverter compatibility |
| ShineWiFi-X2 | USB-style connector with wireless commissioning features | Selected newer inverter and battery systems | Bluetooth availability depends on hardware |
| ShineLink or other family logger | Dedicated manufacturer interface | Selected multi-device or specialty systems | Not interchangeable with every USB logger |
Growatt product naming is not perfectly uniform across regions. A reseller may list a logger as compatible with a series while the inverter’s local manual specifies a narrower revision. Check the inverter model, connector shape, firmware generation, and Growatt documentation before buying. The official WIFI-X and WIFI-S manual is the safest starting point.
What Should You Check Before Buying?
Read the inverter model from its rating label, then compare it with the logger compatibility list. Record whether the port is USB, RS232, or a proprietary socket, and check whether the logger requires a locking nut or retaining screw.
A replacement logger normally costs about $30-$65 USD or €30-€60 as a typical retail range, excluding shipping and installation. A correct replacement is cheaper than repeated configuration attempts with an electrically incompatible unit.
What Network Should You Prepare?
Prepare a visible 2.4 GHz SSID with WPA2-Personal security, DHCP enabled, and a password that the logger firmware accepts. Many older Growatt loggers cannot join a 5 GHz-only network, and some fail when a router combines 2.4 GHz and 5 GHz under aggressive band steering.
Before setup, temporarily simplify the network:
- Create a dedicated 2.4 GHz SSID if the router permits it.
- Use WPA2-Personal rather than WPA3-only mode.
- Disable guest-network client isolation.
- Keep the phone and logger close to the inverter.
- Turn off VPN software and mobile-data switching during provisioning.
- Avoid captive-portal networks, hotel Wi-Fi, mesh onboarding networks, and enterprise authentication.
- Confirm the router broadcasts an SSID rather than hiding it.
- Use a normal channel between 1 and 11 when regional settings allow it.
The supported 2.4 GHz range is commonly described as 2.412-2.484 GHz, corresponding to channels 1-13 depending on country. Channel 12 or 13 may not be available to hardware configured for North American regulatory settings. Growatt’s manual should control where regional behavior differs.
Does ShineWiFi Support 5 GHz?
Most ShineWiFi-S and ShineWiFi-X installations should be treated as 2.4 GHz devices unless the exact product manual explicitly states otherwise. A router may advertise one combined network name while the logger still requires a 2.4 GHz radio. Do not assume a dual-band router makes a 5 GHz-only logger compatible.
Before You Start
| Requirement | Typical value | Why it matters |
|---|---|---|
| Setup time | 10-20 minutes | Includes app pairing and first cloud check |
| AP-mode time | 15-30 minutes | Adds local hotspot and browser configuration |
| Network band | 2.4 GHz | Required by many ShineWiFi-S and X units |
| Phone distance | 0.5-2 metres | Reduces provisioning dropouts |
| Required identifiers | Logger S/N and C/C | Registers the correct data device |
| Typical replacement cost | $30-$65 USD | Excludes labor and delivery |
You need the Growatt ShinePhone app, the home Wi-Fi password, the logger QR label, and access to the router’s 2.4 GHz settings. The inverter should be powered according to the manufacturer’s normal operating procedure. Do not remove covers or work on AC, DC, or grid wiring to configure Wi-Fi.
How Do You Set Up a Growatt Wi-Fi Module?
The standard setup takes about 10-20 minutes and has five stages: install the logger, prepare the phone, register the device, send router credentials, and verify cloud data. The factor that most often determines success is a clean 2.4 GHz WPA2 network rather than the distance between the app and the cloud.
Step 1: Identify and Seat the Logger
Match the logger connector to the inverter communication port. Insert the logger fully, then tighten the retaining ring or screw only as specified by the hardware design.
Do not force a USB-style connector at an angle. Do not use a serial adapter unless Growatt specifies that adapter for the inverter. After seating the module, allow the inverter and logger to complete their normal startup sequence.
Success checkpoint: the logger LED illuminates or begins a startup pattern.
Common mistake: scanning the inverter’s chassis barcode instead of the logger’s QR code and serial label.
Step 2: Prepare the Phone and Router
Connect the phone to the intended 2.4 GHz home network. Disable VPN access, automatic mobile-data fallback, and any setting that changes networks when Wi-Fi appears to lack internet access.
Open the router settings and confirm that the SSID is visible, DHCP is active, and WPA2-Personal is available. If the router uses one name for both bands, create separate names temporarily, such as Home-24, to prevent band-selection ambiguity.
Success checkpoint: the phone remains connected to the 2.4 GHz SSID beside the inverter.
Common mistake: entering a 5 GHz SSID into the app because it is the stronger network shown on the phone.
Step 3: Register the Logger in ShinePhone
Open ShinePhone and sign in. Depending on the app version and account role, open the plant or data-logger area, select the add function, and scan the logger QR code. Enter the logger serial number and check code manually if the camera scan fails.
The correct serial number should match the label on the physical dongle. If the logger already belongs to another plant or installer account, registration may fail even when Wi-Fi configuration is correct.
Success checkpoint: ShinePhone accepts the logger identifier and displays the device in the intended plant.
Common mistake: creating a second plant when the actual problem is an unregistered or duplicate logger.
Step 4: Configure the Module in ShinePhone
Select the standard configuration mode when the app offers it. Enter the exact 2.4 GHz SSID and password, then start configuration while keeping the phone within approximately 2 metres of the logger.
The app may request location, Bluetooth, local-network, or camera permission. Those permissions can be necessary for scanning and nearby-device communication. Follow the app’s current prompts because menu names change between ShinePhone releases and hardware generations.
Success checkpoint: the logger leaves provisioning mode, joins the router, and reports a connected state.
Common mistake: copying a trailing space into the password or using a router security mode unsupported by the logger.
Step 5: Wait for the Cloud Confirmation
Leave the inverter and logger powered normally after configuration. Allow 5-10 minutes for new live values to appear, then refresh the plant dashboard. Historical graphs may populate later because the cloud must validate the logger and process uploaded records.
Compare the inverter’s local generation display with the first cloud reading. A small timing difference is normal because the app refreshes periodically and the inverter records values at its own intervals.
Success checkpoint: ShinePhone shows a recent timestamp, current power, or a new daily-yield value.
Common mistake: resetting the logger after two minutes because the dashboard has not refreshed.
How Do You Use AP Mode?
AP mode configures the logger through its temporary local hotspot when standard app provisioning cannot transfer router credentials. The procedure commonly involves pressing the logger’s KEY button, joining a device hotspot, opening a local address such as 192.168.10.100, and saving the home network settings.
Exact hotspot names, passwords, administrator credentials, and addresses vary by logger revision. Some instructions list a hotspot password such as 12345678 and administrator credentials such as admin, but those values are not universal and should be confirmed in the manual for the specific unit.
- Press the logger’s KEY button briefly, or follow the model-specific AP instruction.
- Wait for the AP indicator pattern.
- On the phone, join the logger hotspot, often identified by its serial number or an AP-style name.
- Open a browser without adding
https://unless the local page requires it. - Enter the gateway address shown by the manual or app, commonly 192.168.10.100 on some units.
- Select the home 2.4 GHz SSID.
- Enter the Wi-Fi password exactly and save the configuration.
- Allow the logger to restart before reconnecting the phone to home Wi-Fi.
Success checkpoint: the logger hotspot disappears and the device obtains a router IP address.
Common mistake: staying connected to the logger hotspot and concluding that the logger has failed when the phone simply has no internet route during local setup.
What Do Growatt Wi-Fi LED Patterns Mean?
LED meanings are hardware-specific, so the manual for the exact ShineWiFi generation takes priority. In general, red indicates that the logger is not connected to the configured router, blue can indicate AP mode or an intermediate network state, and a green or cloud-related state usually indicates better connectivity.
| LED state | Common interpretation | Immediate test | Correct action |
|---|---|---|---|
| Dark | No logger power or failed board | Check inverter display and connector seating | Reseat safely, then escalate hardware fault |
| Flashing red | Logger has power but lacks router connection | Check SSID, band, and password | Reconfigure on 2.4 GHz |
| Solid blue | Local AP mode on some revisions | Look for logger hotspot | Open the model-specific local page |
| Flashing blue | Router link or transitional state on some revisions | Check router client list and internet | Verify DHCP and outbound internet |
| Flashing green | Connected state on selected legacy units | Check last-upload timestamp | Investigate cloud registration if data is absent |
LED color alone cannot prove that the cloud account is working. The strongest confirmation is a recent upload timestamp and current inverter value inside ShinePhone.
What Does a Flashing Red Light Mean?
A flashing red Growatt Wi-Fi logger usually has power but cannot join its configured wireless network. The most productive fix is to reconfigure the module against a visible 2.4 GHz WPA2 SSID, then verify the password and router DHCP service.
If the network was renamed, the internet provider changed the router, or the password changed, the logger still holds the old credentials. Reset or re-enter the network settings. If red continues after a confirmed 2.4 GHz configuration, test the logger beside a simple phone hotspot configured for 2.4 GHz, where permitted by the phone and local settings.
Common Connection Fixes
Most Growatt Wi-Fi failures come from network compatibility, incorrect registration, or a physical logger connection. Work from the inverter outward rather than changing several settings at once, because each LED state narrows the fault domain.
| Symptom | Probable cause | Fix | Verification |
|---|---|---|---|
| LED remains dark | No power, poor seating, damaged contacts | Isolate equipment as required, reseat, inspect externally | LED startup sequence appears |
| Red after router replacement | Old SSID or password stored | Reset and configure the new 2.4 GHz SSID | Router client list shows logger |
| AP hotspot missing | Wrong button procedure or logger fault | Follow exact manual timing and restart inverter | Hotspot appears for setup |
| Router sees logger, app has no data | Wrong plant or serial registration | Match logger S/N and check code | Recent upload timestamp |
| Data stopped overnight | Internet outage or cloud delay | Check router uptime and logger LED | Historical data resumes |
| App cannot scan QR code | Camera permission or damaged label | Enable camera, enter S/N manually | Device accepted by ShinePhone |
Fix WPA3, Band Steering, and Guest Isolation
Temporarily select WPA2-Personal, separate the radio bands, and avoid a guest SSID with client isolation. Older embedded Wi-Fi chipsets may fail during WPA3 negotiation or may join the router but lose access to required internet services.
After successful commissioning, restore stronger network settings one change at a time. If the logger disconnects after enabling WPA3-only mode, the logger firmware or radio may not support that setting. A dedicated 2.4 GHz IoT network is often a safer permanent arrangement.
Fix a Logger That Reaches Wi-Fi but Not ShineServer
A router association does not prove that the logger can reach Growatt’s cloud. Check the router’s connected-client list, assigned IP address, DNS availability, firewall logs, and any outbound filtering applied to IoT devices.
Do not open inbound TCP port 5279 as a routine fix. Some third-party guides mention port 5279, but inbound exposure is a security risk and is not normally needed for a device that initiates outbound connections. Ask Growatt or the installer for current endpoint and firewall requirements before changing port rules.
Fix a Correctly Connected Logger With Missing Plant Data
Confirm that the physical logger serial number matches the logger registered in ShinePhone. A logger can have valid Wi-Fi credentials but remain attached to a different plant, installer account, or duplicate device record.
Also check the inverter’s local date and time, because incorrect time settings can place new readings outside the expected daily graph. If the logger shows a recent upload but the plant remains empty, the issue is account association or cloud processing rather than home Wi-Fi.
How Do You Reset a Growatt Wi-Fi Module?
A factory reset clears stored network credentials and returns the logger to a provisioning state, but the button duration differs by model. A common procedure is holding KEY for approximately 6-10 seconds until the LED pattern changes, then releasing it and waiting for flashing red or AP mode.
| Reset situation | Preferred action | Expected result | Risk |
|---|---|---|---|
| Router SSID changed | Reconfigure network first | New credentials saved | Low |
| Password forgotten | Use AP mode or documented reset | Old credentials cleared | Moderate |
| Repeated provisioning failure | Factory reset, then clean setup | Logger returns to pairing state | Moderate |
| Suspected hardware failure | Test seating and support process | No reset may be needed | Data loss possible |
Resetting may erase locally cached unsent data. Record the logger serial number and current plant details before resetting. Never open the inverter enclosure to access a Wi-Fi reset function.
How Long Does Growatt Data Take to Appear?
New Growatt ShinePhone data typically appears within 5-10 minutes after the logger joins Wi-Fi and the cloud accepts its registration. A first installation can take longer when the plant record, logger serial number, or cloud account requires validation.
| Event | Typical interval | What to check |
|---|---|---|
| Logger startup | 30-120 seconds | LED pattern |
| Router association | 1-5 minutes | Router client list |
| First cloud upload | 5-10 minutes | ShinePhone timestamp |
| Historical backfill | 10 minutes to several hours | Date-range graphs |
| Recovery after long outage | Variable by cache and firmware | Missing intervals |
A monitoring gap does not automatically mean lost solar production. The inverter’s local records and the logger’s cache are separate from the cloud chart. However, no logger can guarantee recovery after a reset, storage failure, or prolonged power loss.
ShineWiFi Versus Wired Monitoring Alternatives
A Growatt Wi-Fi module is the simplest option for standard cloud monitoring, while a wired RS485 or USB-to-RS485 arrangement can provide more predictable local access. Wired alternatives require electrical compatibility, protocol knowledge, and a host device such as a Raspberry Pi, so they are not automatic replacements.
| Option | Typical cost | Update behavior | Best use |
|---|---|---|---|
| ShineWiFi-S replacement | $30-$60 | Cloud intervals, model-dependent | Older single inverter |
| ShineWiFi-X or X2 | $40-$65 | Cloud intervals, model-dependent | Compatible newer inverter |
| USB-to-RS485 adapter | $15-$40 | Local polling, software-dependent | Technical users |
| SolarAssistant or similar host | $100-$250 typical system cost | Local dashboards, often faster | Local energy monitoring |
| Home Assistant via MQTT | Software plus host cost | Automation-dependent | Advanced smart homes |
A wired system can be better for local dashboards, privacy, and automation because it does not depend entirely on cloud availability. It is not a good choice when the user cannot verify RS485 wiring, inverter protocol settings, electrical isolation, or software compatibility. Home Assistant community implementations demonstrate that Growatt local integrations exist, but compatibility varies by inverter and adapter.
When Should You Contact the Installer?
Contact the installer when the logger stays dark after correct seating, the inverter communication port appears damaged, a replacement logger is rejected by the inverter, or the cloud account cannot be corrected without installer access. A Wi-Fi problem should not lead to removing covers or disturbing live solar wiring.
Prepare these details before contacting support:
- Inverter model and serial number.
- Logger model, serial number, and check code.
- ShinePhone account email or plant identifier.
- LED color and flash pattern.
- Router band and security mode.
- Approximate time monitoring stopped.
- Photos of the external connector and logger label.
- Whether the inverter itself still displays generation.
This evidence reduces repeated resets and helps separate a network fault from an inverter communication fault.
FAQ
Can the inverter produce electricity without the Wi-Fi dongle?
Yes. The Growatt inverter’s generation and grid or battery control functions normally operate independently of the monitoring logger. Removing a faulty logger may stop remote data, but it should not be treated as a substitute for electrical fault diagnosis. Follow the installer’s isolation procedure before removing any connected hardware.
Can I connect a Growatt logger to a phone hotspot?
Sometimes, but compatibility depends on the phone’s 2.4 GHz hotspot behavior, security mode, timeout settings, and whether the hotspot allows the logger to reach the internet. A hotspot is useful as a diagnostic test, not always as a stable permanent network. Keep the phone near the inverter during the test.
Why does ShinePhone show the inverter offline after I changed routers?
The logger still has the old SSID or password, or the new router uses an incompatible band or security mode. Create a temporary 2.4 GHz WPA2 network, reset or reconfigure the logger through standard or AP mode, and then verify the logger’s serial number remains linked to the original plant.
Will a factory reset delete my solar generation history?
A logger reset can erase locally cached readings that have not reached Growatt’s cloud, but it does not normally erase generation records already stored in the cloud or inverter. Record the plant and logger identifiers first, because registering the reset device under a new plant can make existing history appear to be missing.
Is a flashing blue LED proof that the internet works?
No. A flashing blue state can represent AP mode, router association, or an intermediate status depending on the logger revision. Confirm internet and cloud operation through the last-upload timestamp and current data in ShinePhone. Router association alone does not prove that Growatt’s server has received the inverter readings.
The Bottom Line
Growatt Inverter Wi-Fi Module Setup and Connection Fixes are easiest when the fault is isolated in order: physical port, 2.4 GHz network, logger registration, internet path, and ShinePhone plant association. Use the model-specific manual for LED meanings, AP credentials, and reset timing. Start with a separated WPA2 2.4 GHz SSID, register the logger’s own serial label, wait at least 10 minutes for cloud confirmation, and avoid opening inbound router ports as a default remedy.