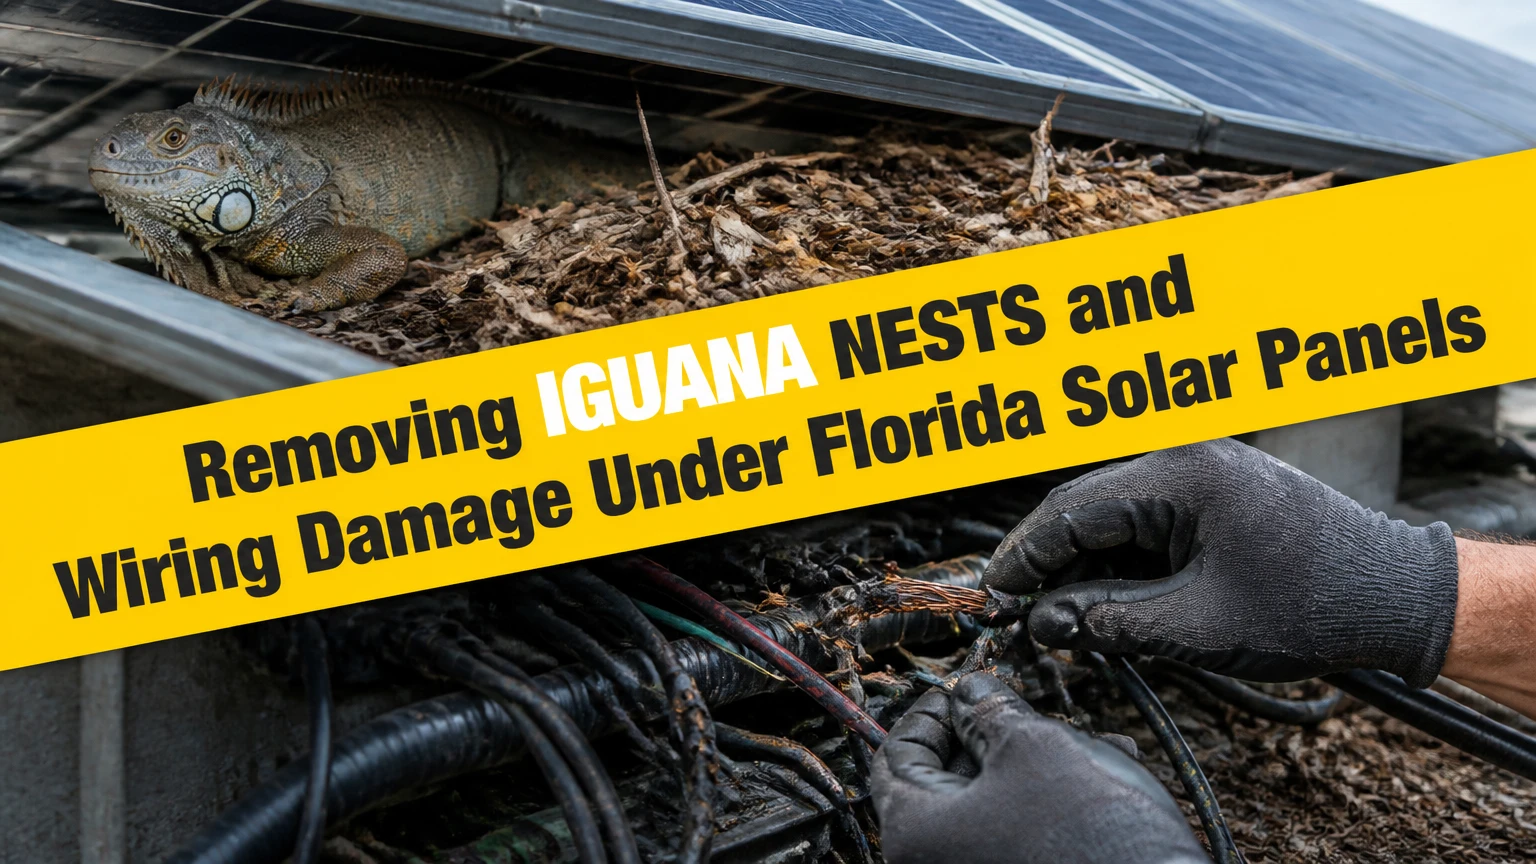
Removing iguana nests and wiring damage under Florida solar panels requires electrical isolation, controlled debris removal, professional conductor repair, sanitation, and perimeter exclusion. Do not reach beneath energized modules or pressure-wash the array. A solar technician and, when live iguanas or eggs are present, a qualified Florida wildlife professional should coordinate the work.
Key Facts at a Glance
- Green iguanas are invasive in Florida and commonly use the shaded gap beneath elevated photovoltaic modules as shelter.
- Solar modules can continue producing DC voltage in daylight after an inverter shutdown, so shutdown is not the same as zero-energy verification.
- Chewed insulation can expose energized conductors and create ground faults, arc faults, corrosion, and inverter shutdowns.
- Critter guards should attach to the module racking or frame without drilling through roofing, flashing, or waterproof membranes.
- Typical residential remediation takes 2-3 hours when panels do not require removal; damaged connectors or inaccessible wiring can extend the visit.
- Typical combined costs range from $400-$1,000 for cleaning, minor repair, and exclusion, while panel removal or roof repairs can raise the price substantially.
What does iguana damage under solar panels include?
Iguana damage under solar panels includes sheltering, nest debris, eggs, feces, urine, chewed insulation, displaced cables, broken clips, and roof contamination. The biological mess and electrical defect are related but distinct problems, so cleaning alone cannot correct a damaged conductor, and wiring repair alone leaves the access route open.
Florida’s green iguana, Iguana iguana, is not native to the state. The Florida Fish and Wildlife Conservation Commission describes green iguanas as an invasive species and regulates how wildlife may be captured, transported, or relocated. A homeowner should not assume that a visible reptile can be moved to another neighborhood.
Iguanas usually seek the space under modules because it provides shade, protection from predators, and a dry route across the roof. Leaves and twigs accumulate against clamps and cable pathways, while droppings can retain moisture and contaminate roof surfaces. Eggs may be present even when no adult is visible.
Which damage requires immediate attention?
A burning odor, visible copper, melted insulation, repeated inverter shutdowns, an arc-fault warning, or a ground-fault warning requires immediate electrical isolation and a qualified solar inspection. A loose cable that touches a roof edge or metal racking can create a fault even when the photovoltaic system still produces power.
| Symptom or finding | Likely mechanism | Immediate response | Typical urgency |
|---|---|---|---|
| Red arc-fault alert | Damaged or loose DC connection | Shut down according to system procedure and call a solar technician | Same day |
| Ground-fault alert | Current leaking to frame, roof, or ground | Keep system offline until tested | Same day |
| Exposed copper conductor | Chewed insulation | Do not touch; photograph from a safe location | Same day |
| Leaves and guano only | Contamination without confirmed electrical damage | Schedule controlled cleaning and inspection | Within 1-7 days |
| Broken roof tile or punctured membrane | Iguana traffic or poor guard attachment | Isolate leak area and contact a roofer | Within 24-48 hours |
| Live adult or eggs | Wildlife handling issue | Stop work and contact a qualified wildlife professional | Before removal |
How should Florida solar-panel iguana damage be assessed?
A proper assessment combines wildlife evidence, roof inspection, module inspection, and electrical diagnostics before anyone removes debris. The technician should photograph cable routes, module serial numbers, damaged insulation, roof penetrations, inverter alerts, and the existing racking before cleaning changes the evidence.
Start from ground level. Record the inverter model, monitoring message, date of the first alert, recent storms, and whether production has fallen. A production decline does not prove iguana damage because shading, inverter failure, module degradation, and utility outages produce similar symptoms.
The solar professional then determines whether the affected circuit can be safely isolated and whether modules must be removed. The wildlife professional checks for adults, eggs, burrows, feces, and access routes. A roofer becomes necessary when water has entered the underlayment or when a guard has been attached through the roof.
What should the inspection report contain?
The report should identify each affected module, circuit, connector type, roof condition, contamination area, recommended repair, and post-repair test. Vague statements such as “wiring looks bad” are inadequate for warranty, insurance, and future maintenance decisions.
| Inspection item | Specific record | Why the record matters | Acceptable evidence |
|---|---|---|---|
| Electrical alert | Exact code and timestamp | Separates intermittent from persistent faults | Inverter screen or monitoring log |
| Conductor condition | Cable location and insulation length | Defines repair scope | Close photograph with scale |
| Connector identity | Manufacturer and model family | Prevents incompatible mating | Connector label or installer record |
| Roof condition | Tile, shingle, membrane, or metal panel | Assigns roofing responsibility | Roof photograph and moisture finding |
| Wildlife evidence | Droppings, eggs, entry gap, burrow | Determines removal method | Dated photographs |
| Guard condition | Mesh gauge, coating, clips, gaps | Predicts recurrence | Perimeter measurement |
Is it safe to remove an iguana nest yourself?
Removing an iguana nest beneath solar panels is not a safe DIY task when the array is energized, the roof is steep, wiring is damaged, or eggs are present. A homeowner may document the issue from the ground, shut down equipment according to the manufacturer’s instructions, and arrange qualified service, but should not lift modules or handle DC conductors.
The National Electrical Code requires photovoltaic systems to be installed and maintained with attention to shock, fire, and fault hazards, while OSHA’s electrical-work rules require qualified workers to control exposed energized parts. Solar modules can generate voltage whenever light reaches them. In practical terms, an inverter display reading zero does not establish that conductors under the modules are de-energized.
Do not use a hose, pressure washer, metal rake, improvised hook, pesticide, smoke, or chemical repellent beneath the array. Water can enter connectors, roof penetrations, and damaged insulation; metal tools can bridge conductors; and repellents may contaminate runoff or damage roofing materials.
Before work begins
| Requirement | Typical value | Responsible party | Failure if omitted |
|---|---|---|---|
| Site assessment | 30-60 minutes | Solar technician | Hidden cable or roof damage missed |
| Array shutdown | Manufacturer-specific | Qualified solar worker | DC hazard remains |
| PPE | Gloves, eye protection, respirator as risk requires | Service team | Guano exposure or cuts |
| Replacement cable | Same voltage, temperature, and wet-location rating | Solar electrician | Premature insulation failure |
| Guard material | UV-stable stainless or galvanized mesh | Installer | Corrosion or animal re-entry |
| Work area control | 10-20 feet around roof access | Property owner | Falling debris or unauthorized entry |
Step 1: Isolate the photovoltaic system
Follow the system-specific shutdown sequence and verify the work boundary before touching the array. A typical grid-tied system requires stopping loads, opening the AC disconnect, turning off the inverter, and opening the PV DC disconnect where installed, but the exact sequence depends on the equipment and rapid-shutdown design.
Qualified personnel should verify absence of hazardous voltage with appropriately rated test equipment. Rapid shutdown can reduce conductor voltage outside the array boundary, but module-level conductors and portions inside the controlled boundary may remain energized in sunlight.
You will know the step worked when: the service team has documented the disconnect positions, confirmed the inverter status, tested the relevant conductors, and established a safe access route.
Common mistake: treating a dark inverter screen as proof that every conductor is dead.
Step 2: Remove nests, guano, and roof debris
Remove loose debris with nonconductive tools only after electrical safety controls are complete. Technicians should work from accessible edges, avoid pulling on cable clips, and inspect beneath each module for eggs, trapped animals, chewed insulation, and sharp debris before sweeping material onto the roof.
Dry guano can create airborne particles, so controlled handling, eye protection, gloves, and suitable respiratory protection are appropriate when contamination is substantial. The Centers for Disease Control and Prevention recommends precautions when cleaning areas contaminated by animal droppings because dust can carry infectious organisms.
Do not drag branches across glass, place tools on modules, or push debris into gutters. Bag contaminated material according to local waste rules, and keep wash water away from storm drains unless the cleaning product label and local requirements permit discharge.
You will know the step worked when: the full module perimeter is visible, cables remain clipped and supported, no eggs or animals remain, and roof drains are clear.
Common mistake: cleaning only the front edge while leaving a compacted debris mat against the racking.
Step 3: Clean and disinfect compatible surfaces
Clean visible soil first, then apply an EPA-registered disinfectant only to surfaces identified on the product label. Cleaning removes organic material; disinfection requires the labeled concentration and contact time, and one step cannot reliably substitute for the other.
The technician should protect module backsheets, cable jackets, roof coatings, sealants, and metal hardware from incompatible solvents or concentrated bleach. Never spray electrical connectors directly. Use the least aggressive method that removes contamination, and follow the product’s ventilation, dilution, and disposal instructions.
Sanitation reduces odor and contamination, but it does not repel iguanas permanently. Reentry occurs when shade, roof access, food sources, or a remaining opening still exists.
You will know the step worked when: visible residue is removed, the treated surface remains compatible with its manufacturer’s instructions, and no liquid has entered connectors or roof assemblies.
Common mistake: using high-pressure water to force debris from beneath modules.
Step 4: Repair or replace damaged wiring
Replace photovoltaic cable or connectors when insulation is cut through, copper is visible, connector housings are cracked, terminals are loose, or heat damage has changed the cable shape. A qualified solar electrician must match conductor size, insulation rating, temperature rating, wet-location suitability, connector manufacturer, and system voltage rather than relying on a generic outdoor splice.
Small damaged sections are not automatically repairable with ordinary wire nuts or household electrical tape. PV connectors are listed systems, and mismatched connector brands can create resistance, heating, and failure even when they click together. The installer should use an approved replacement lead, listed connector, or a complete cable replacement according to the module and equipment manufacturer’s instructions.
Post-repair testing can include polarity, open-circuit voltage, operating current, insulation resistance where appropriate, connector seating, thermal inspection, and inverter fault clearance. The correct test sequence depends on the system design and the worker’s qualifications.
| Wiring condition | Corrective action | Prohibited shortcut | Verification |
|---|---|---|---|
| Light surface scuff, no jacket breach | Protect or monitor per manufacturer | Wrapping without inspection | Visual and insulation check |
| Jacket cut with copper intact | Replace affected cable or listed lead | Household tape or wire nut | Polarity and insulation test |
| Cracked connector housing | Replace matched connector pair | Mixing connector families | Firm lock and thermal check |
| Burned or discolored connector | Replace connector and inspect circuit | Reusing heat-damaged parts | Fault test and load observation |
| Cable pulled from clip | Re-route with approved clips | Leaving cable on roof | No roof contact or sharp bend |
| Multiple chewed sections | Replace full affected run | Several field splices | Circuit-level electrical test |
You will know the step worked when: the monitoring system clears its fault, measured values match equipment specifications, connectors are correctly matched, and cables are supported away from roof edges and standing water.
Common mistake: repairing the visible bite while failing to inspect the cable behind the next module.
Step 5: Install a perimeter critter guard
Install a continuous mesh barrier around accessible module edges, with clips attached to the racking or module frame as the approved system allows. A guard works by closing the physical gap, so a 2-inch opening at a corner, conduit transition, or roof obstruction can preserve the entire access route.
Typical professional products use UV-resistant stainless steel or galvanized steel mesh, corrosion-resistant clips, and a profile sized for the module frame. The installer must preserve drainage, avoid shading cells, maintain cable clearance, and avoid drilling through roofing or waterproof membranes.
A guard is not a structural restraint for loose panels. The array must first be correctly mounted, and roof defects must be repaired before exclusion work hides the area.
You will know the step worked when: the perimeter is continuous, corners and cable entries are sealed, the mesh does not contact conductors, and no roof penetration was added.
Common mistake: installing mesh only along the side where droppings are visible.
Which exclusion design works best?
| Exclusion option | Typical material | Installation feature | Best application |
|---|---|---|---|
| Clip-on perimeter guard | 304 stainless mesh | Frame-compatible clips | Coastal Florida homes |
| Galvanized mesh guard | Zinc-coated steel | Lower material cost | Inland residential arrays |
| Custom corner closure | Stainless sheet or mesh | Seals conduit and racking gaps | Complex roof layouts |
| Tree-access control | Smooth trunk wrap | Removes climbing route | Trees touching rooflines |
| Burrow management | Site-specific fill and grading | Addresses ground entry | Yards near foundations |
| Temporary deterrent | Sprinkler or reflective device | Changes animal behavior briefly | Short repair scheduling delay |
How much does iguana solar-panel remediation cost?
Typical Florida residential remediation costs $400-$1,000 for inspection, debris removal, minor wiring work, and perimeter exclusion, while a diagnostic visit alone often costs $100-$300. Panel removal, extensive cable replacement, roof repair, difficult access, commercial scale, and wildlife handling can move the total above that range.
These figures are typical service ranges, not regulated prices. A quote should separate labor, cleaning, replacement parts, guard material, roof repair, wildlife work, taxes, permits, and follow-up testing.
| Service scope | Typical price | Typical duration | Main cost driver |
|---|---|---|---|
| Diagnostic inspection | $100-$300 | 30-60 minutes | Roof access and electrical testing |
| Debris and guano cleaning | $150-$350 | 1-2 hours | Contamination and panel count |
| Minor cable or connector repair | $100-$600 | 1-3 hours | Number of damaged points |
| Critter-guard installation | $300-$900 | 2-4 hours | Array perimeter and roof complexity |
| Combined standard remediation | $400-$1,000 | 2-3 hours | Guard length and wiring scope |
| Panel removal and reinstallation | $500-$2,000 or more | 4-8 hours | Module count and racking |
| Roof or underlayment repair | $300-$2,500 or more | 1-2 days | Material and concealed damage |
The lowest quote is not necessarily the lowest total cost. A $250 cleaning that leaves a chewed connector and an open corner can produce a second visit, a failed inspection, or a larger electrical repair.
Professional service or DIY deterrent: which should you choose?
Professional remediation is the correct choice for damaged wiring, roof work, steep arrays, active nests, eggs, repeated inverter faults, and commercial systems. DIY deterrents such as reflective objects or motion sprinklers may temporarily alter yard behavior, but they do not remove contaminated debris, repair conductors, or close the gap under modules.
| Approach | Upfront cost | Electrical capability | Exclusion quality | Suitable situation |
|---|---|---|---|---|
| Ground-level observation | $0-$50 | None | None | Confirming activity before service |
| Reflective or noise device | $10-$80 | None | None | Temporary yard deterrence |
| Motion sprinkler | $30-$150 | None | None | Ground-level approach routes |
| Wildlife professional | $150-$600 typical | Usually none | Access advice | Live animals or eggs |
| Solar technician | $100-$1,000 typical | Inspection and repair | Often available | Faults and damaged conductors |
| Solar plus wildlife team | $500-$2,000 or more | Coordinated | Full remediation | Active infestation and wiring damage |
A wildlife professional may be necessary for capture or removal, but wildlife service alone may not be qualified to open a photovoltaic circuit. Conversely, a solar electrician may repair the system without being authorized or equipped to handle live reptiles or eggs. Coordinated scope matters.
What should commercial and condominium owners do?
Commercial and condominium owners should create a written access, shutdown, roof-safety, and responsibility plan before remediation begins. Shared arrays add tenant notification, fall protection, insurance, monitoring access, and questions about whether the owner, association, installer, or maintenance contractor pays.
The facility manager should preserve monitoring records, issue a work permit, identify the disconnects, and confirm whether the array has battery storage. Battery systems add another energy source that the PV shutdown procedure may not isolate.
For a condominium, obtain approval before changing the array perimeter or roof assembly. The installer should document that the guard does not invalidate equipment listings, obstruct drainage, breach the roof, or interfere with required clearances.
Which mistakes cause repeat damage?
The most common repeat failures are incomplete perimeter sealing, incompatible connector replacement, roof penetration by guard installers, and cleaning without electrical inspection. These mistakes appear inexpensive because they address the visible symptom, but each leaves a mechanism for recurrence or a concealed hazard.
Leaving one access gap
Iguanas can reenter through corners, conduit transitions, and irregular roof-to-module spaces. Inspect the entire perimeter, not only the side where droppings are concentrated.
Using incompatible PV connectors
A connector that physically mates may not have the same contact geometry, sealing system, or listing. Match the connector family and follow the module or inverter manufacturer’s requirements.
Attaching guards through the roof
Roof screws can create leaks and may damage underlayment or warranty coverage. Use an approved frame or racking attachment method, and refer roof penetrations to a qualified roofer.
Treating alerts as nuisance messages
A recurring ground-fault or arc-fault alert is not a maintenance reminder. It is a possible electrical safety event that warrants isolation and diagnosis.
Relying on repellents beneath the array
Repellents do not correct shade, shelter, food, or a protected nesting space. Physical exclusion works better when the animal has been removed and the habitat pressure has been reduced.
What prevention measures reduce future access?
Prevention combines panel exclusion, tree trimming, food-source control, roof inspection, and monitoring. Keep branches from contacting the roof or creating a climbing bridge, secure loose roof materials, remove accessible food sources, and inspect guards after major storms.
Florida residents should use current guidance from the Florida Fish and Wildlife Conservation Commission and UF/IFAS rather than relocating animals without checking applicable rules. Green iguanas can damage landscape plants, seawalls, roofs, and infrastructure beyond the solar array.
A practical schedule is:
- Inspect the array perimeter every 3-6 months.
- Recheck guards after hurricanes and high-wind events.
- Review inverter alerts weekly through the monitoring application.
- Trim roof-access branches before they touch the structure.
- Photograph the system after every service visit.
- Reinspect repaired wiring after 24 hours of operation and again after 30 days.
Troubleshooting after remediation
A solar system that still reports an arc fault or ground fault after cleaning and repair should remain under professional diagnosis. The remaining fault may be in a hidden module lead, combiner box, inverter, connector, rapid-shutdown device, or another circuit that was not visibly damaged.
| Post-service symptom | Possible cause | Next action | Do not do |
|---|---|---|---|
| Alert clears, then returns in rain | Moisture ingress or insulation defect | Insulation and connector testing | Do not spray the array |
| Production remains low | Shading, inverter, or module issue | Compare circuit and historical data | Do not assume iguana damage |
| New droppings appear | Guard gap or nearby access route | Perimeter reinspection | Do not add random chemicals |
| Roof leaks after guard work | Fastener or flashing damage | Call roofer and document timing | Do not caulk blindly |
| One module is offline | Connector, optimizer, or module fault | Module-level diagnostic | Do not bypass the device |
| Burning smell or heat mark | Active electrical heating | Isolate and call emergency service | Do not restart repeatedly |
FAQ
Can iguanas actually chew through solar wires?
Yes. Iguanas can damage cable insulation, clips, and connector areas through chewing, movement, or repeated contact with sharp hardware. Exposed copper is the visible endpoint, but shallow jacket cuts can also admit moisture and produce intermittent faults. A technician should inspect the full cable run rather than only the most obvious bite mark.
Will critter guards stop every iguana?
No. Critter guards block access beneath the modules, but they cannot stop iguanas that reach the roof from trees, walls, ladders, or adjacent structures. Effective prevention requires a continuous perimeter barrier plus access-route management. Guards also fail when corners, conduit entries, and damaged roof sections remain open.
Can I leave the solar system running while someone cleans under the panels?
No. Cleaning under photovoltaic modules while the system is operating exposes the worker to DC shock, arc, and equipment damage hazards. Daylight can keep modules energized even after the inverter stops. A qualified solar worker should define the shutdown boundary and verify the required electrical condition before work begins.
Does homeowners insurance pay for iguana solar damage?
Coverage depends on the policy, cause classification, exclusions, maintenance language, and whether roof and electrical damage are treated differently. Photograph the animal evidence, alerts, wiring, roof condition, and service invoices before repairs. Ask the insurer whether wildlife damage, solar equipment, consequential water damage, and exclusion installation have separate coverage rules.
How often should solar-panel critter guards be inspected?
Inspect residential guards at least every 3-6 months and after hurricanes, strong wind, roof work, or landscaping changes. Check for lifted clips, corrosion, bent mesh, cable contact, open corners, and new droppings. Coastal salt exposure can accelerate corrosion, so waterfront properties may need more frequent visual checks.
Should I remove iguana eggs myself?
No. Eggs indicate an active nesting situation, and handling, relocation, or destruction may involve wildlife-management requirements. Stop work, keep people and pets away, and contact a qualified Florida wildlife professional for the lawful removal procedure. A solar technician should separately address electrical isolation and equipment access.
Conclusion
Removing Iguana Nests and Wiring Damage Under Florida Solar Panels is a coordinated electrical, wildlife, sanitation, roof, and exclusion job. Isolate and test the photovoltaic system, remove contamination without disturbing conductors, replace damaged wiring with compatible listed components, repair roof defects, and install a continuous frame-mounted critter guard. Monitor the system after repair and inspect the barrier every 3-6 months.