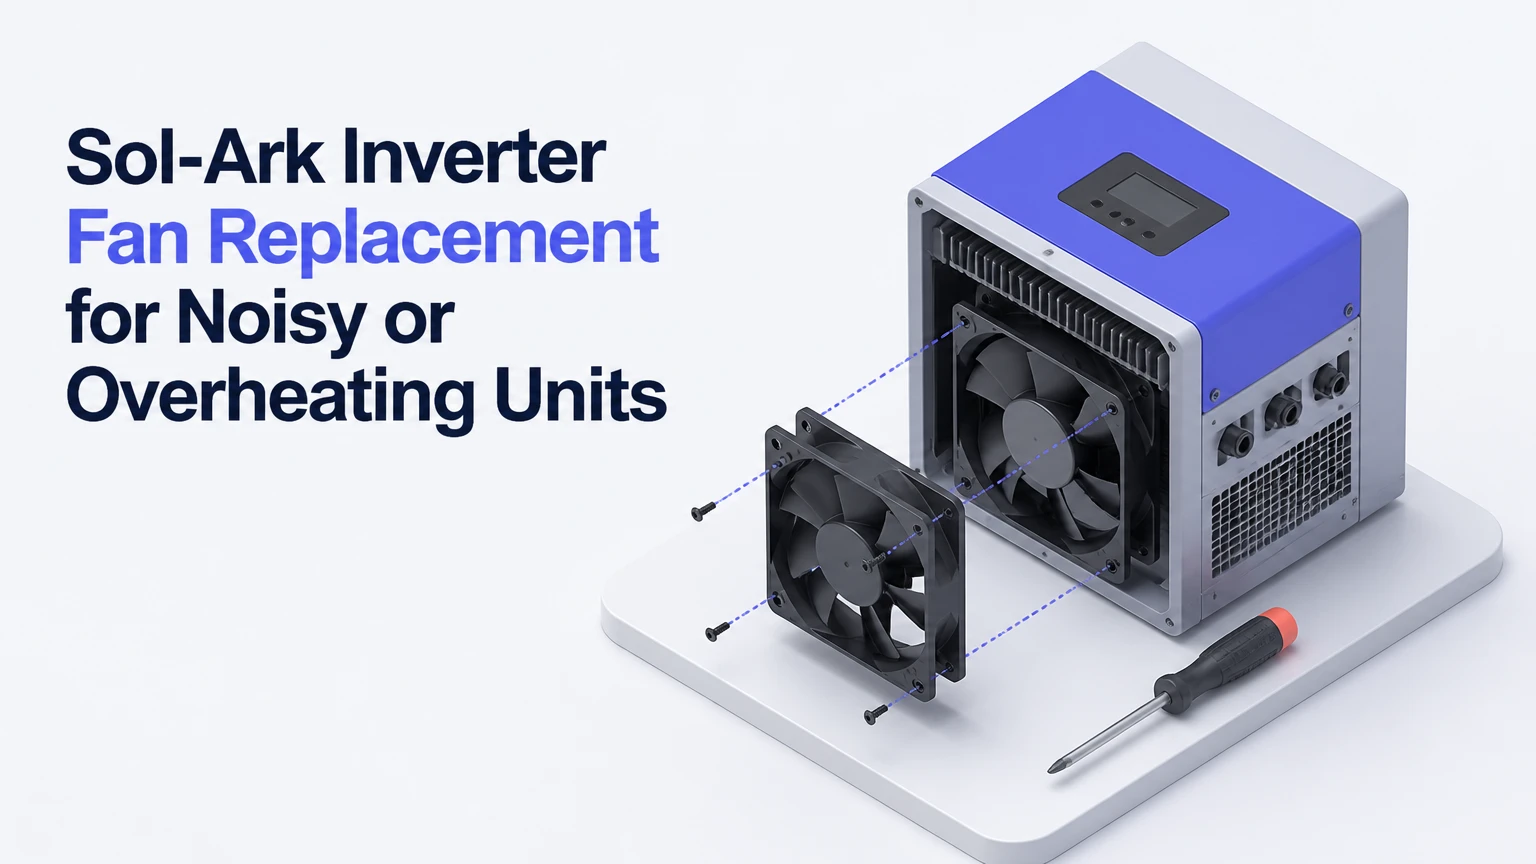
Sol-Ark inverter fan replacement usually involves removing an external fan assembly, not opening the main inverter chassis, on models such as the 8K, 12K, and 15K. The safe process takes about 30-60 minutes after shutdown, but the replacement fan must match the original assembly’s voltage, connector, dimensions, airflow, control signal, and environmental rating.
Key Facts at a Glance
- Sol-Ark inverter fans are temperature-controlled and may increase speed during battery charging, heavy loads, or high ambient temperatures.
- A replacement fan must match the original fan’s electrical rating and connector, not the inverter’s AC output voltage.
- Grinding or rattling usually indicates mechanical fan damage, while a steady high-speed fan can indicate heat, obstruction, sensor, or control problems.
- External fan replacement is different from opening the inverter enclosure, but photovoltaic and battery systems still contain lethal electrical energy after shutdown.
- Typical installed replacement cost is about $100-$350, depending on the fan assembly, diagnosis, travel, and labor.
- A fan that has stopped during a hot or heavily loaded period should be treated as an overheating risk, not as a minor noise problem.
Why Sol-Ark Inverter Fans Matter
A Sol-Ark inverter fan moves heat from power semiconductors, inductors, transformers, and heat sinks into the surrounding air. Those components produce more heat as the inverter converts higher power, charges batteries, or supplies large motor and heating loads.
Thermal control is a chain, not a single fan. The fan moves air, the heat sink transfers heat from electronic components, temperature sensors report conditions, and firmware adjusts fan speed or limits output. Failure at any point can cause derating, alarms, or protective shutdown.
Sol-Ark installation manuals specify clearance, ventilation, wiring, and operating conditions for each model. The 12K manual, for example, warns that installation must account for ventilation and surrounding temperature rather than treating the inverter as a sealed, heat-free appliance.
A fan that runs briefly at high speed is not automatically defective. A fan that grinds, stalls, starts intermittently, or remains at maximum speed in a cool, lightly loaded installation requires diagnosis.
What normal fan behavior sounds like
Normal operation produces a smooth airflow sound that changes with inverter load and temperature. A short ramp from quiet to loud during battery charging can be expected, especially in a warm utility room or when the inverter is near its continuous output limit.
Mechanical noise has a different pattern. Bearing wear often creates a dry scrape or growl that changes with fan speed, while a loose grille or mounting screw creates a vibration at one repeatable speed. A ticking sound can indicate blade contact with debris or a distorted guard.
Where Are Sol-Ark Inverter Fans Located?
Sol-Ark 8K, 12K, and 15K configurations can use external fan assemblies, but the exact location, connector, and fastener arrangement depend on the model revision and production batch. On commonly documented Sol-Ark 12K installations, the fan assembly is mounted on the left side of the unit.
Do not rely on a photograph from another revision. Confirm the location in the owner’s manual, installation documentation, or a service-confirmed parts diagram before removing covers or disconnecting wiring.
| Model or family | Common fan arrangement | What to verify before work |
|---|---|---|
| Sol-Ark 8K | External cooling assembly on documented installations | Side location, plug type, assembly dimensions |
| Sol-Ark 12K | External left-side fan assembly on commonly documented units | Revision, screw count, connector polarity |
| Sol-Ark 15K | External cooling assembly with model-specific control wiring | Exact replacement part and airflow direction |
| Unknown revision | Cannot be safely inferred from model name alone | Serial number, manual, service confirmation |
Which replacement fan specifications matter?
The replacement fan must match the original fan’s nominal voltage, current, dimensions, airflow, static pressure, connector, wire count, tachometer or PWM function, and temperature rating. The AI Overview’s recommendation to match the inverter’s output voltage is unsafe: a 120/240-volt inverter output does not mean the cooling fan operates at 120 or 240 volts.
Use the original label or an authorized Sol-Ark part number as the controlling reference. A fan with a compatible-looking plug can still fail if its signal output, startup current, speed-control method, or airflow direction differs.
| Specification | Match or decision rule | Why it matters | Typical evidence |
|---|---|---|---|
| Nominal fan voltage | Match original label exactly | Incorrect voltage can prevent starting or damage control electronics | Fan label, service part number |
| Current draw | Equal to or below approved specification | Excess current can stress the driver circuit | Original label and manual |
| Dimensions | Match width, height, depth, and mounting holes | Incorrect size may not seal or fit | Millimeter measurements |
| Airflow and pressure | Equal to approved replacement specification | Lower cooling capacity can cause thermal alarms | Datasheet, OEM specification |
| Connector and wires | Match plug, pinout, tachometer, and PWM functions | Wrong signal wiring can create fan faults | Connector inspection and wiring diagram |
| Bearing and rating | Use a sealed, temperature-rated bearing | Heat and dust shorten unsuitable fan life | Manufacturer datasheet |
CFM alone is not enough. A fan’s airflow is measured under particular pressure conditions, and a lower-CFM replacement may perform worse when pushing air through a restrictive heat sink or grille. Conversely, a substantially higher-current fan can overload the control circuit even if its airflow looks attractive.
Why Is a Sol-Ark Fan Noisy?
A noisy Sol-Ark fan is most often caused by worn bearings, blade damage, debris, vibration, or a loose mounting assembly. Noise that rises and falls with fan speed points toward the fan or its mount; noise that appears only during a thermal event may be normal high-speed operation or an airflow restriction.
| Noise pattern | Likely cause | Safe check | Usual remedy |
|---|---|---|---|
| Grinding or dry growl | Worn sleeve or ball bearing | Listen at low and high speed | Replace fan assembly |
| Rattle at one speed | Loose screw, grille, or bracket | Inspect external fasteners | Tighten or replace damaged hardware |
| Repeating tick | Blade contact or insect debris | Isolate power, inspect grille | Remove obstruction or replace fan |
| Smooth but loud airflow | High speed from heat or load | Check power, ambient temperature, vents | Improve cooling or diagnose sensor |
| Buzz without airflow | Stall, driver fault, or seized bearing | Do not repeatedly restart | Stop operation and service |
| Intermittent start and stop | Failing motor or connector | Inspect plug only when de-energized | Replace fan or connector |
Do not lubricate a sealed fan as a permanent repair. Oil can migrate into the motor, collect dust, and temporarily mask bearing failure while the fan continues to lose starting torque.
What causes overheating besides a failed fan?
Overheating can result from blocked airflow, insufficient clearance, direct sun, high room temperature, dust, excessive continuous load, battery charging demand, or a temperature-sensor fault. Fan replacement will not solve an installation that places the inverter in a hot closet with restricted exhaust.
Sol-Ark manuals provide model-specific environmental and clearance requirements. The installation manual should take priority over generic advice such as a universal “0.5-meter” spacing rule, because clearance needs vary by model, orientation, local code, and manufacturer instructions.
| Overheating condition | Observable evidence | Corrective action | Fan replacement likely? |
|---|---|---|---|
| Blocked intake or exhaust | Dust mat, insect nest, obstructed grille | Clean external path and restore clearance | Only if fan is damaged |
| Direct afternoon sun | Alarm correlates with solar exposure | Add approved shade without blocking airflow | Usually no |
| High continuous load | Alarm occurs near sustained output limit | Reduce load or balance circuits | Maybe |
| Hot enclosure or closet | Room temperature exceeds equipment rating | Ventilate or relocate equipment | Usually no |
| Fan does not start | No airflow during a commanded event | Isolate and inspect fan circuit | Often |
| Sensor or controller fault | Fan runs full speed when cool | Technician diagnostic required | Not necessarily |
Sol-Ark Inverter Fan Replacement: Step-by-Step
Sol-Ark inverter fan replacement requires electrical isolation, model confirmation, external assembly removal, correct reconnection, and a controlled operational test. Allocate 30-60 minutes for a straightforward external assembly and more time if the system contains multiple PV strings, batteries, generators, or difficult access.
Before You Start
| Item | Typical requirement | Verification |
|---|---|---|
| Time | 30-60 minutes for replacement; 60-120 minutes with diagnosis | Allow extra time for shutdown and restart |
| Difficulty | Moderate for electrical isolation; low for fastener removal | Use a qualified technician when uncertain |
| Replacement | One model-approved fan or assembly | Match serial number and part number |
| Tools | Insulated screwdriver, nut driver, flashlight, camera | Tool size depends on fasteners |
| Cleaning | Soft brush, vacuum with nozzle, lint-free cloth | Avoid forcing debris into the enclosure |
| Safety | Lockout label, PPE, system shutdown procedure | Follow manual and local electrical rules |
A non-contact voltage tester is not sufficient proof that a battery or PV circuit is safe. Sol-Ark systems can contain hazardous DC energy, and capacitors may remain energized after shutdown. Sol-Ark documentation requires qualified installation and service practices.
Step 1: Record the System and Confirm the Fault
Photograph the inverter label, fan assembly, connector orientation, error message, and wiring before touching the unit. Record whether the noise occurs at startup, during charging, under load, or continuously.
Check the display and monitoring system for events such as fan abnormal, fan alarm, over-temperature, or related thermal protection. Terminology can differ by firmware and model, so record the exact displayed wording rather than translating it from memory.
You will know the diagnosis is useful when the noise or alarm correlates with a repeatable operating condition. A common mistake is ordering a fan before confirming that the fan itself is the failed component.
Step 2: Shut Down Every Energy Source
Follow the Sol-Ark model manual’s shutdown sequence. Typically, this includes removing loads as appropriate, stopping grid or generator input, opening AC disconnects, disconnecting PV and battery sources, and waiting the specified discharge period.
Use lockout and tagout procedures when other people can restore power. A battery disconnect alone does not remove PV voltage, and an AC disconnect alone does not remove battery voltage.
You will know the shutdown is complete only after the prescribed wait time and voltage verification confirm de-energization. Stop immediately if the procedure, disconnect labels, or system wiring do not match the documentation.
Step 3: Remove the External Fan Assembly
Remove only the screws that secure the external fan cover or assembly. Keep fasteners in a container and photograph the airflow direction before lifting the assembly away.
Do not open the main chassis to reach internal electronics. External fan access does not authorize contact with circuit boards, capacitors, busbars, or internal terminals.
You will know the assembly is ready to disconnect when it moves without pulling its wires. A common mistake is allowing the fan to hang from its harness, which can loosen the connector or damage conductors.
Step 4: Disconnect and Compare the Replacement
Release the quick connector without pulling the wires, then compare the old and replacement assemblies side by side. Check voltage, current, dimensions, connector keying, number of conductors, airflow arrow, mounting holes, and any tachometer or PWM lead.
Do not force a connector that appears similar. If the replacement lacks a control or feedback wire present on the original, pause and obtain an approved part or written technical confirmation.
You will know the part is suitable when every controlling attribute matches the approved specification. A common mistake is selecting a computer fan based only on size and noise rating.
Step 5: Clean the Air Path
Remove loose dust from the external grille, fan housing, and accessible duct entrance with a soft brush and vacuum. Prevent the vacuum nozzle from striking the fan blades, and do not blast compressed air into the inverter where debris can move deeper into the enclosure.
Cleaning is useful when dust restricts airflow, but cleaning cannot restore a seized bearing or broken blade. A fan that spins roughly by hand, when safely disconnected and accessible, should be replaced rather than rehabilitated.
You will know the air path is clean when the grille is open, the fan blades are unobstructed, and no debris falls into the duct. The common mistake is using high-pressure air that drives contamination toward circuit boards.
Step 6: Install, Secure, and Test
Connect the replacement fan with the same orientation and route the harness away from the blades. Secure the assembly evenly, reinstall the grille, and confirm that the gasket or sealing surface is seated as designed.
Restore power in the documented sequence, then observe startup, charging, and a moderate load. Listen for smooth airflow, confirm that the fan starts when commanded, and monitor temperature and alarms for at least 15-30 minutes.
You will know the repair worked when the fan runs without grinding, the alarm clears according to the manual, airflow follows operating demand, and the inverter does not derate or shut down. A common mistake is declaring success immediately after a quiet no-load startup.
Can a Higher-CFM Fan Substitute?
A higher-CFM fan is not automatically a safer substitute for a Sol-Ark inverter fan. A replacement with greater airflow can draw more current, produce excessive noise, disrupt pressure balance, fail the control signal, or physically overload the mounting and driver circuit.
| Replacement choice | Typical price | Main advantage | Main risk |
|---|---|---|---|
| Sol-Ark approved assembly | $70-$220 | Correct fit and control compatibility | Higher parts cost |
| Authorized equivalent | $35-$150 | Lower cost with documented specifications | Pinout or warranty mismatch |
| Generic same-size fan | $15-$60 | Easy availability | Wrong voltage, airflow, or feedback |
| Oversized industrial fan | $60-$250 | High airflow potential | Excess current, noise, poor fit |
| External room exhaust fan | $40-$180 | Lowers room temperature | Does not repair inverter airflow |
The correct rule is equivalence, not maximum airflow. Use a higher-CFM component only when Sol-Ark or the qualified service provider confirms current draw, static pressure, control method, connector pinout, and mechanical fit.
How Should Fan Alarms Be Diagnosed?
A Sol-Ark fan alarm should be treated as a cooling-system fault until the fan starts correctly and the alarm remains cleared under load. Diagnosis begins with the event log and operating conditions, then moves to external inspection, connector inspection, and professional electrical testing.
Do not copy board-level test values from an online video into a live inverter. Measurements such as approximately 310 V, 15 V, or a control signal around 7 V may apply to a particular design and test point, but they are not universal Sol-Ark specifications or safe DIY checks.
When should a technician do the work?
Use a qualified technician when the fan does not receive a confirmed command, an alarm returns after replacement, the inverter has internal heat damage, DC voltage cannot be verified as absent, or the unit must be opened. Service is also the safer choice for systems with high-voltage battery banks, inaccessible disconnects, generator interlocks, or unclear modifications.
An external fan swap may avoid opening the chassis, but it does not eliminate arc-flash, shock, stored-energy, or unexpected backfeed hazards. Warranty terms also depend on the unit, installer, part, and work performed, so obtain Sol-Ark or installer guidance before modifying a warrantied system.
What Does Replacement Cost?
Typical Sol-Ark fan replacement costs range from $100-$350 installed, with the lower end representing a straightforward external fan swap and the upper end covering diagnosis, travel, difficult access, or an assembly rather than a bare fan.
| Cost component | Typical range | Time involved | Cost driver |
|---|---|---|---|
| Generic fan only | $15-$60 | 1-3 days shipping | Compatibility risk |
| Approved fan assembly | $70-$220 | 2-10 days availability | Model and revision |
| Diagnostic visit | $75-$175 | 30-90 minutes | Region and qualifications |
| Installation labor | $75-$250 | 30-90 minutes | Access and shutdown complexity |
| Full service call | $150-$350 | 1-3 hours | Travel, testing, documentation |
Prices are typical field ranges, not Sol-Ark list prices. A quote should identify the part number, diagnostic scope, labor, travel, warranty on the repair, and whether thermal testing is included.
Maintenance Schedule for Noisy or Hot Units
Inspect the external fan grille monthly in dusty, agricultural, coastal, or insect-prone locations, and inspect it at least every three months in cleaner indoor installations. Clean the surrounding air path before dust becomes a visible mat.
| Interval | Task | Acceptance condition | Escalation |
|---|---|---|---|
| Monthly in dusty areas | Inspect grille and listen during operation | Smooth airflow, no obstruction | Schedule service for bearing noise |
| Every three months | Check clearance and shading | Manufacturer clearance maintained | Correct installation condition |
| Every six months | Vacuum accessible vents and inspect mounting | No dust blockage or loose hardware | Replace damaged assembly |
| After an alarm | Save event log and operating data | Cause identified before reset | Technician if alarm returns |
| Annually | Review load, temperature, and fan behavior | No recurring derating | Professional preventive inspection |
The best maintenance improvement is often environmental. Shading the inverter, reducing radiant heat, keeping vents clear, and ventilating a hot equipment room can extend fan life more effectively than installing a louder substitute fan.
Repair, Replace, or Relocate the Inverter?
Replace the fan when the inverter is otherwise healthy, the fan fault is isolated, and the approved part is available. Repairing the fan is usually more economical than replacing a functioning inverter, especially when the unit has no repeated thermal alarms after service.
Relocate or correct the installation when overheating follows room temperature, direct sun, blocked clearance, or dust exposure. A replacement fan cannot compensate for a room that routinely exceeds the inverter’s operating environment.
Consider inverter replacement only when thermal events have caused repeated shutdowns, power electronics show damage, service parts are unavailable, or repair cost approaches the value of a newer compliant system. Keep the diagnostic record because repeated fan failure may indicate an underlying control or environmental problem.
Situations That Change the Procedure
Outdoor inverter in direct sun
Add shade that preserves the manufacturer’s required air gap and does not trap hot air around the enclosure. Do not wrap the inverter, cover its vents, or place an exhaust fan so close that it recirculates its own hot discharge air.
Dusty workshop or agricultural site
Use a more frequent grille inspection and keep sawdust, grain dust, and soil away from the intake. Dust can combine with moisture to form a conductive or insulating layer, so recurring contamination warrants an installation review.
Fan is loud only during battery charging
Check battery charge power, ambient temperature, and concurrent AC loads before replacing the fan. A smooth fan ramp under high thermal demand can be normal; replacement is justified when the fan grinds, stalls, or remains abnormal after the load ends.
Fan alarm returns after replacement
Stop repeated resets. Confirm the part number and pinout, then have a technician test the fan command, feedback signal, supply circuit, temperature sensors, and controller because the original fan may have been a symptom rather than the cause.
Expert Rules That Prevent Repeat Failures
- Match the control system, not just the motor. A three-wire fan may provide a speed signal that a two-wire substitute cannot reproduce, even when both fans share the same voltage and dimensions.
- Diagnose under the condition that creates the alarm. A no-load bench test can miss a fan that fails only after 20 minutes of charging, when motor temperature and bearing resistance increase.
- Treat repeated fan failure as environmental evidence. Two failed fans in a short interval often indicate dust, excessive ambient temperature, restricted clearance, voltage instability, or a controller problem.
- Do not use “quiet” as the primary selection criterion. Lower noise often comes from lower speed or lower airflow, which can shift heat into electronics and trigger derating.
FAQ
Can I run a Sol-Ark inverter without its cooling fan?
No. A Sol-Ark inverter should not be operated under normal load with a failed or disconnected cooling fan. The inverter may derate or shut down, but protective behavior is not a substitute for airflow. Shut down the affected system according to the manual and arrange diagnosis before returning it to service.
Why does my Sol-Ark fan run constantly at low load?
Constant fan operation can result from high ambient temperature, restricted airflow, a recent thermal event, firmware behavior, a sensor fault, or a control and feedback problem. Check room temperature, clearance, event history, and airflow first. If the fan remains at maximum speed while the unit is cool, obtain qualified service.
Can I buy a Sol-Ark replacement fan online?
You can buy a replacement online, but the listing must identify the exact Sol-Ark model, revision or serial range, voltage, current, dimensions, connector, control wires, airflow direction, and approved part relationship. A generic listing that says “compatible with 12K” without specifications is not adequate evidence.
How long does a Sol-Ark inverter fan last?
There is no single reliable service-life number because temperature, dust, runtime, bearing design, and fan speed vary substantially. A fan in a clean, cool room may last years, while a dusty high-temperature installation can fail much sooner. Use noise, startup behavior, airflow, and alarm history as condition indicators.
Does a fan replacement clear an over-temperature alarm?
Fan replacement clears an over-temperature alarm only when the fan caused inadequate cooling and the inverter has returned to a safe operating temperature. Blocked airflow, direct sun, excessive load, high room temperature, or a failed sensor can keep the alarm active after a new fan is installed.
The Bottom Line
Sol-Ark inverter fan replacement is usually a practical external-assembly repair for a noisy or overheating 8K, 12K, or 15K unit, but the part must match the original electrical, mechanical, airflow, connector, and control specifications. Isolate PV, battery, AC, and generator sources before work, avoid opening the chassis, test under real operating conditions, and use a qualified technician for uncertain isolation or board-level faults. Do not choose a fan solely by CFM or by the inverter’s AC output voltage. Correct diagnosis protects the inverter, the replacement part, and the people servicing the system.