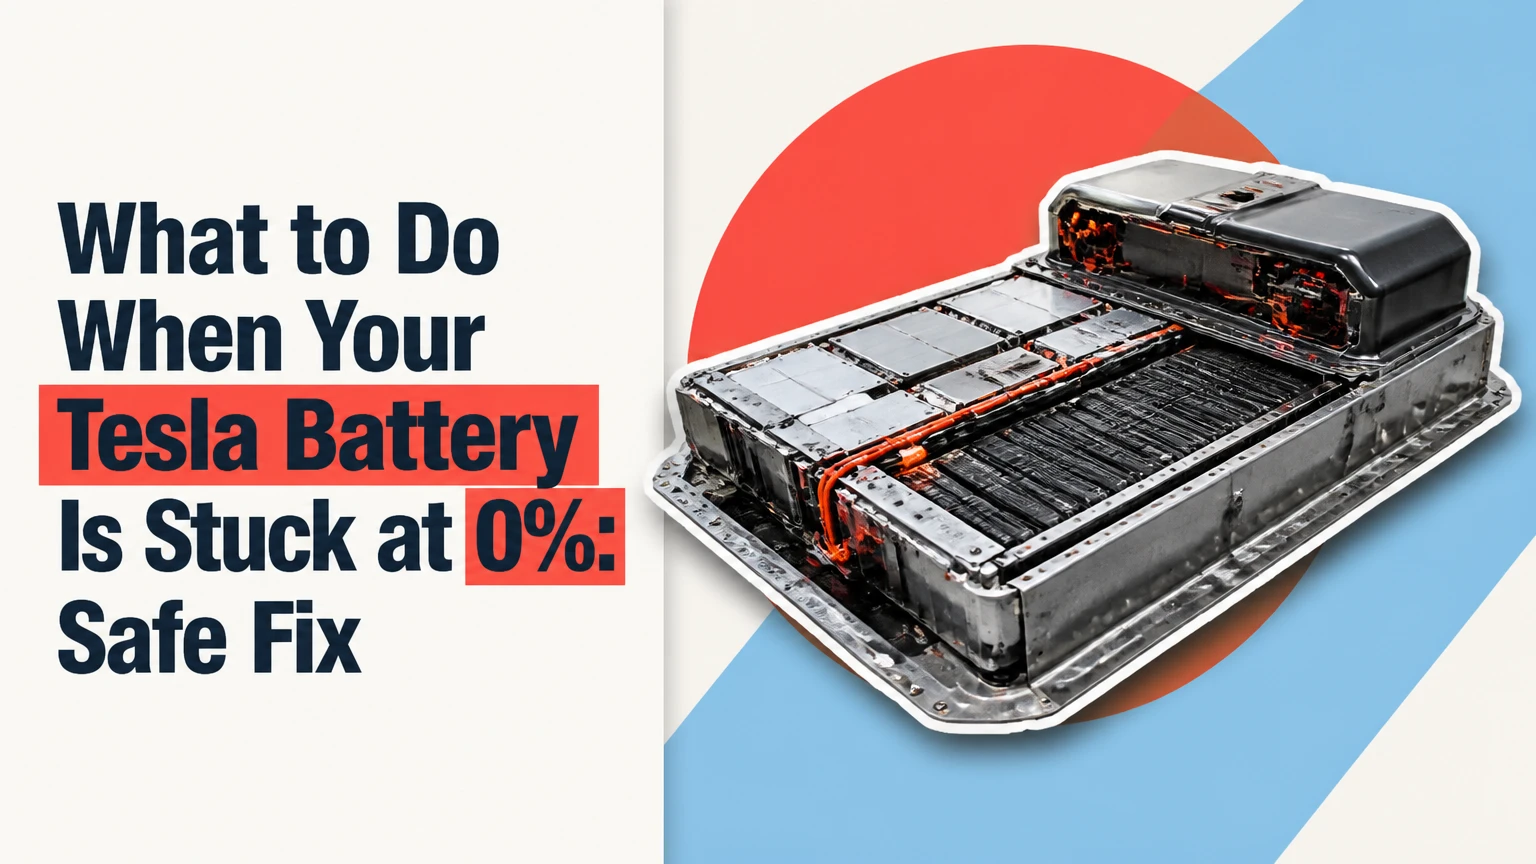
When a Tesla battery is stuck at 0% and will not charge, first determine whether the vehicle has a low-voltage power failure, a charging-equipment problem, or a high-voltage battery fault. Stop repeated charging attempts, inspect the Tesla app and touchscreen, connect only the charging equipment approved for your model, and request Tesla Roadside Assistance when the car remains unresponsive or displays a high-voltage alert.
Key Facts at a Glance
A Tesla showing 0% does not prove that every battery cell has reached absolute zero or that the pyrofuse has fired.
The low-voltage battery powers the computers, contactors, displays, locks, and battery-management communication needed to begin charging.
Tesla low-voltage systems differ by model and year, including 12V lead-acid, 12V lithium-ion, and 16V lithium-ion batteries.
A touchscreen reboot can restore software communication, but it cannot repair a low-voltage battery that cannot hold voltage.
AC charging at home is useful for testing a healthy charging path; it is not a guaranteed cure for a high-voltage fault.
Never open the high-voltage pack or connect power to unidentified terminals. Tesla specifies model-specific procedures and warnings in its owner’s manuals.
What Does 0% Mean on a Tesla?
A Tesla’s displayed 0% means the vehicle’s battery-management system has reached its permitted lower operating threshold, not necessarily that every cell is chemically empty. Tesla reserves a small operating margin, but prolonged parking at a very low state of charge can still lower the pack voltage, disable charging authorization, and damage the battery if the vehicle remains unattended.
The charging system requires several systems to agree before current enters the traction battery. The charge port, onboard charger, battery-management system, contactors, temperature sensors, insulation monitoring, and low-voltage computers all participate in that decision.
A pyrofuse is a separate safety component that can disconnect high-voltage power after a severe crash, overcurrent event, or detected electrical fault. A Tesla at 0% does not automatically have a failed pyrofuse. Diagnosing a pyrofuse requires vehicle-specific service equipment.
Why can a low-voltage failure stop high-voltage charging?
The low-voltage battery supplies the computers that control the high-voltage system. When that battery is discharged or unstable, the vehicle may not wake fully, close its high-voltage contactors, unlock the charge port, or communicate correctly with a wall connector or Supercharger.
The symptom can look like a traction-battery failure even when the high-voltage pack remains serviceable. A dark screen, missing app connection, failed electronic locks, clicking relays, or a frunk that will not open point toward low-voltage trouble.
Before You Start
Use the following limits before attempting any hands-on check. A Tesla owner should perform only the external, model-approved steps described in the owner’s manual.
| Item | Typical requirement | Why it matters |
|---|---|---|
| Initial inspection time | 5-10 minutes | Identifies charger, app, and vehicle symptoms |
| AC charging test | 30-60 minutes | Allows the car to wake and report an error |
| Compatible external power source | Model-specific 12V or 16V support | Prevents low-voltage system damage |
| Digital multimeter | Low-voltage circuits only | Helps identify severe voltage loss |
| Personal protection | Insulated gloves, dry conditions | Reduces shock and short-circuit risk |
| Towing method | Flatbed or approved wheel-lift procedure | Prevents drivetrain and motor damage |
Do not work on a Tesla that has collision damage, exposed orange high-voltage cables, flooding, smoke, a burning smell, or a hot battery enclosure. Move away from the vehicle and contact emergency services or Tesla Roadside Assistance in those situations.
The vehicle identification number, model year, battery type, current location, charger type, and exact dashboard message will help Tesla diagnose the event. Photograph the message before disconnecting anything.
Step 1: Confirm the Charging Equipment
Confirm the outlet, charging connector, circuit breaker, and vehicle charge port before touching the low-voltage system. A Tesla that charges normally from another known-good AC source has a charging-equipment problem rather than proof of a failed traction battery.
Perform these checks:
- Check whether the wall connector or Mobile Connector shows a red fault light.
- Reset a tripped breaker once, provided the outlet and cable show no heat or damage.
- Remove and firmly reconnect the vehicle connector.
- Try a different known-good AC outlet or Tesla destination charger.
- Check the Tesla app for a charging error, scheduled charging setting, or vehicle sleep status.
- Inspect the charge-port area for ice, water, debris, bent pins, or physical damage.
You will know the step worked when the charge-port light changes to the normal charging color and the app reports current flowing. If the port remains dark and the screen is also unavailable, proceed to low-voltage diagnosis.
A common mistake is repeatedly resetting a faulty circuit breaker. Repeated trips indicate an electrical problem, not a Tesla setting.
Step 2: Restore Access to the Frunk Safely
Use the model-specific emergency frunk procedure in the owner’s manual when the Tesla has no usable low-voltage power. Tesla’s emergency leads and access instructions vary by vehicle generation, so universal instructions about wire color, polarity, or bumper position are unsafe.
Tesla manuals commonly describe an emergency power connection behind the front tow-eye cover, but the procedure is intended to release the frunk latch, not to charge the traction battery. The external source must be connected exactly as Tesla specifies for that model.
After opening the frunk, remove only the approved upper trim or maintenance panel. Do not remove orange cables, battery covers, service disconnects, or high-voltage components.
You will know the step worked when the frunk opens without forcing the latch. The next goal is identifying the low-voltage battery and its approved terminals.
The most serious mistake is applying power to unidentified wires. Reverse polarity or an incorrect source can damage the vehicle’s low-voltage converter, control modules, or wiring.
Step 3: Support the Low-Voltage System
Connect a compatible low-voltage charger or power supply only to the terminals and battery type specified by Tesla. Older vehicles may use a 12V lead-acid battery, some newer vehicles use 12V lithium-ion hardware, and many recent Model 3 and Model Y vehicles use a 16V lithium-ion low-voltage battery.
Tesla’s model-specific service instructions determine whether a conventional jump pack is appropriate. A generic 12V lead-acid jump pack should not be assumed safe for a 16V lithium-ion system. A service center or EV technician can identify the battery from the vehicle configuration and label.
| Low-voltage system | Common application pattern | Safe general assumption | Typical failure symptom |
|---|---|---|---|
| 12V lead-acid | Earlier Tesla configurations | Use an automotive-compatible 12V support source | Dim display, clicking, dead locks |
| 12V lithium-ion | Certain newer replacement systems | Follow battery-label and Tesla instructions | App offline, intermittent wake-up |
| 16V lithium-ion | Many newer Model 3 and Model Y vehicles | Use a compatible service power supply | No wake-up, repeated relay activity |
| Unknown configuration | Used, modified, or undocumented vehicle | Do not connect a generic jump pack | Risk of converter or module damage |
If a qualified technician verifies the battery type and connects the correct source, leave the support power connected while the car wakes. A low-voltage battery that immediately drops voltage after the source is removed usually needs replacement or professional testing.
You will know the step worked when the screen, interior systems, locks, and Tesla app begin responding. That does not yet prove that the high-voltage battery can accept charge.
Step 4: Reboot the Vehicle Computers
Reboot the touchscreen only after the low-voltage system has stable support and the vehicle is stationary. On many Tesla vehicles, holding both steering-wheel scroll buttons until the touchscreen restarts reboots the display computer, but the exact reset behavior differs by model and software version.
A screen reboot does not reset a mechanical high-voltage isolation fault, restore a failed contactor, or revive a low-voltage battery with an open cell. It is a communication test.
After the display restarts, review all alerts and open the charging screen. Record messages such as “Unable to Charge,” “12V battery must be replaced,” “High Voltage Battery Disabled,” “Charging equipment not ready,” or “Vehicle may not restart.”
You will know the step worked when the display returns and provides a stable charge status. If the screen remains black despite verified low-voltage power, stop DIY work and arrange service.
A common mistake is performing repeated reboots while ignoring a low-voltage battery that cannot hold voltage. Software cannot compensate for voltage sag.
Step 5: Test AC Charging at Home
Test a known-good Level 1 or Level 2 AC source after the vehicle wakes and reports no immediate high-voltage safety alert. AC charging gives the vehicle time to run its normal checks, but Tesla’s battery-management system decides whether charging begins and at what power.
Connect the charger, confirm the connector is fully seated, and monitor the app for at least 10 minutes. If charging begins, leave the vehicle undisturbed and monitor temperature, charge current, and error messages.
A 120V Level 1 connection may add only a few miles of range per hour, while a 240V Level 2 connection commonly supplies substantially more power, depending on circuit amperage, vehicle configuration, and temperature. The first visible percentage increase can take time when the displayed state of charge is extremely low.
| Charging method | Typical input | Typical use | Diagnostic value |
|---|---|---|---|
| Level 1 household outlet | 120V, about 1.2-1.8 kW | Emergency overnight charging | Tests basic AC acceptance |
| Level 2 home charging | 208-240V, about 5-11.5 kW | Normal home charging | Tests wall connector and onboard charger |
| Destination charging | About 5-11.5 kW | Public or workplace AC charging | Provides a second AC location |
| Supercharger DC | Tesla site-specific output | Fast charging and recovery | Not ideal for unresolved vehicle faults |
Do not assume that leaving a jump pack connected for 30-60 minutes will revive the high-voltage pack. That procedure is not a universal Tesla recovery instruction. External low-voltage support may be useful during diagnosis, but an untrained owner should not improvise a combined jump-and-charge setup.
Which Charging Source Should You Use?
Use a known-good AC charger for a responsive Tesla with no high-voltage warning, and use Tesla Roadside Assistance for an unresponsive vehicle or a persistent charging fault. A Supercharger is not automatically harmful at 0%, because the vehicle controls current acceptance, but it cannot bypass a disabled BMS, contactor, isolation, or low-voltage system.
| Option | Typical time to begin diagnosis | Typical direct cost | Best use | Main limitation |
|---|---|---|---|---|
| Level 1 home charging | 10 minutes to several hours | $0-$1,000 equipment-dependent | Vehicle wakes and has no HV alert | Very slow energy delivery |
| Level 2 AC charging | 5-60 minutes | Existing equipment or session fee | Known-good charging test | Requires working supply and inlet |
| Supercharger | 5-30 minutes if accepted | Location-dependent session price | Healthy vehicle needing rapid energy | Cannot resolve a locked-out system |
| Tesla Roadside flatbed | 1-4 hours typical locally | Warranty-dependent or location-dependent | Unresponsive or unsafe vehicle | Wait time and regional availability |
Tesla’s charging system is designed to reject unsafe conditions rather than accept uncontrolled current. The practical reason to avoid driving directly to a Supercharger is different: a Tesla with no reserve range may not reach the site, and a locked-out vehicle still requires transport.
How Long and How Much Will Recovery Take?
A simple low-voltage or charger problem may be identified within 30-90 minutes, while a high-voltage diagnostic event can require one to several days. Typical out-of-warranty costs range from approximately $100-$400 for local transport or basic diagnosis, while high-voltage pack replacement can reach several thousand to more than $20,000 depending on model, pack, labor, and parts availability.
| Recovery path | Typical timeframe | Typical cost range | Likely outcome |
|---|---|---|---|
| Charger or breaker correction | 5-30 minutes | $0-$100 | Normal charging resumes |
| Low-voltage battery service | 1-3 hours | $150-$600 | Vehicle wakes and accepts charge |
| Roadside transport | 1-4 hours | $0 under some coverage, otherwise $100-$500 | Vehicle reaches service facility |
| HV diagnosis and repair | 1-5 business days | $200-$2,000 diagnostic or component work | Fault isolated before replacement |
| HV battery replacement | 3-14 days | About $8,000-$22,000 typical retail range | Pack replaced if confirmed defective |
These are typical planning ranges, not Tesla price quotes. Warranty coverage, country, vehicle age, battery warranty terms, labor rates, remanufactured parts, and damage history can change the result substantially.
An expert rule is to authorize diagnosis before authorizing a battery replacement. “Unable to Charge” is a symptom, not a parts order.
What If the Screen Works but Charging Fails?
A working touchscreen with “Unable to Charge” usually indicates that the vehicle can communicate but has rejected the charging session. The fault may involve the wall connector, charge-port lock, onboard charger, temperature sensor, low-voltage stability, contactors, or battery-management system.
Use the message to narrow the next action:
| Observed symptom | More likely area | Safe next action | Escalation trigger |
|---|---|---|---|
| Charge port light stays dark | Low voltage, inlet, or latch | Recheck vehicle wake-up and connector | Dark port after stable LV power |
| “Charging equipment not ready” | Outlet, cable, or wall connector | Test another known-good AC source | Fault follows the vehicle |
| “Unable to Charge” | Vehicle authorization or hardware fault | Save alert and request service | Message repeats on two AC sources |
| Repeated clicking | Low-voltage voltage sag or contactors | Stop cycling and test LV battery | Clicking continues with stable support |
| High-voltage alert | HV isolation, contactor, or battery fault | Do not continue charging attempts | Any orange cable, heat, smoke, or crash damage |
If the same error appears at two independent AC chargers, the vehicle becomes more likely than the original charger. Tesla diagnostic software can read fault codes that are not visible in the owner-facing display.
When Is Battery Replacement Necessary?
A Tesla needs high-voltage battery replacement only after diagnostic testing confirms a pack-level failure that cannot be repaired economically or safely. A 0% display, a dead screen, or one failed charging session alone does not justify replacement.
Possible repair paths include low-voltage battery replacement, charge-port repair, onboard-charger repair, contactor or fuse service, cooling-system repair, isolation-fault diagnosis, or battery-module work where supported. Tesla’s available repair path varies by model and service center.
The high-voltage battery warranty commonly covers eight years, with mileage limits that vary by model and configuration. Tesla lists different coverage terms for different vehicles, so owners should verify the exact warranty in their Tesla account and local warranty documentation rather than rely on a single mileage figure.
Tesla’s official emergency guidance also warns owners not to touch high-voltage components or orange cables. That limitation matters: DIY access may reduce a towing bill, but a mistake can damage expensive electronics and create a serious shock or fire hazard.
Variations for Cold, Damage, and Charger Failure
What should you do if the Tesla is at 0% in freezing weather?
Move the Tesla to a safe AC charging location and request service if the vehicle will not wake. Cold temperatures reduce available power and can cause the battery-management system to limit charging until the pack reaches a suitable temperature.
Do not heat the battery with a torch, space heater, hot water, or improvised electrical equipment. A cold-soaked battery may need time connected to approved charging equipment, but a completely unresponsive vehicle still needs low-voltage and diagnostic assessment.
What if the Tesla has accident or water damage?
Do not charge or jump a Tesla with crash damage, submerged components, smoke, an orange-cable fault, or a hot or swollen battery area. Keep people away from the vehicle and tell the tow operator that the vehicle is an electric car with possible high-voltage damage.
A flatbed is the normal conservative choice. Tesla’s towing instructions differ by model, so the operator should use the vehicle’s manual and approved transport equipment.
What if the home charger is the failure?
Test another known-good AC location before blaming the Tesla. A tripped breaker, failed contactor inside the wall connector, damaged cable, poor outlet connection, or scheduled charging setting can mimic a vehicle fault.
If another charger works, repair or replace the original charging equipment. Do not increase breaker size or bypass protective devices to force charging.
Common Mistakes and How to Fix Them
- Treating every 0% display as a destroyed HV pack.
Check low-voltage operation, charger status, and exact alerts first. The displayed percentage is not a component diagnosis. - Using a generic jump pack on an unknown Tesla battery.
Identify whether the vehicle uses 12V or 16V hardware and follow the manual. If the configuration is uncertain, use Tesla Roadside Assistance. - Connecting to emergency frunk leads as though they charge the car.
Emergency leads are for releasing the latch on applicable vehicles. The low-voltage battery and traction battery have separate functions and procedures. - Repeating Supercharger attempts after a high-voltage alert.
Save the alert, stop charging attempts, and arrange diagnosis. A faster charger cannot clear a safety lockout. - Authorizing a replacement pack before testing the low-voltage battery.
Voltage stability and fault-code retrieval should precede an expensive pack decision. - Towing with drive wheels rolling improperly.
Tell the operator the Tesla is electric and request a flatbed or Tesla-approved transport method. Incorrect towing can damage drive units.
How to Prevent Another Deep-Discharge Event
Keep a Tesla connected when it will sit for extended periods, particularly in cold weather or when sentry, cabin overheat protection, or third-party monitoring can consume energy. Tesla recommends maintaining a charge limit suited to the battery type and daily use rather than routinely waiting for 0%.
For daily driving, many owners use a moderate charge limit and reserve higher limits for trips, following the vehicle’s in-car recommendation. LFP-equipped vehicles have different calibration guidance from other lithium-ion chemistries, so follow the charging instructions displayed by the car.
Avoid parking for days at a displayed 0%. If range becomes critically low, reduce accessory loads, drive to a safe charging location, and request assistance before the vehicle shuts down completely.
The practitioner rule is simple: treat 0% as an emergency charging threshold, not as a normal parking level. Early intervention preserves options and reduces the chance that a low-voltage failure and traction-battery depletion occur together.
FAQ
Can a Tesla recover after sitting at 0% overnight?
A Tesla can often recover after sitting at 0% overnight if the battery-management system remains healthy and the vehicle accepts AC charging. Connect a known-good AC charger, check the app and screen, and monitor for 30-60 minutes. If the vehicle stays offline or reports a high-voltage alert, stop and arrange service.
How do I know whether the Tesla 12V battery is dead?
A dead or failing low-voltage battery commonly causes a dark touchscreen, offline Tesla app, inoperative electronic locks, failed frunk release, repeated clicking, or charging that never begins. Those symptoms do not identify the exact battery type. Tesla or a qualified EV technician should test voltage stability and battery condition.
Can I charge a Tesla from a regular wall outlet?
A Tesla can charge from a suitable household outlet with the correct Mobile Connector and regional adapter. Level 1 charging is slow, commonly around 1.2-1.8 kW, and the outlet must be properly grounded and capable of continuous load. Stop if the plug or outlet becomes hot, discolored, or loose.
Will Tesla Roadside Assistance cover a battery at 0%?
Tesla Roadside Assistance coverage depends on the vehicle’s warranty, service plan, country, and reason for the call. The Tesla app can show available assistance and initiate a tow request. Ask specifically for an electric-vehicle flatbed and disclose whether the vehicle is unresponsive or has accident damage.
Does a Tesla battery at 0% need a new battery pack?
A Tesla battery at 0% does not automatically need replacement. Low-voltage failure, a faulty charger, an onboard-charger problem, temperature limits, contactor faults, and software or isolation alerts can produce the same symptom. Replace the high-voltage pack only after Tesla or a qualified EV facility confirms pack-level failure.
The Bottom Line
When a Tesla battery is stuck at 0% and will not charge, verify the charging source, preserve the dashboard error, and determine whether the low-voltage system is awake before considering high-voltage repair. Use only model-approved low-voltage procedures, test AC charging when the vehicle is responsive, and choose Tesla Roadside Assistance for persistent faults, unsafe conditions, or an unresponsive car. The safest recovery path is diagnosis first, battery replacement last.