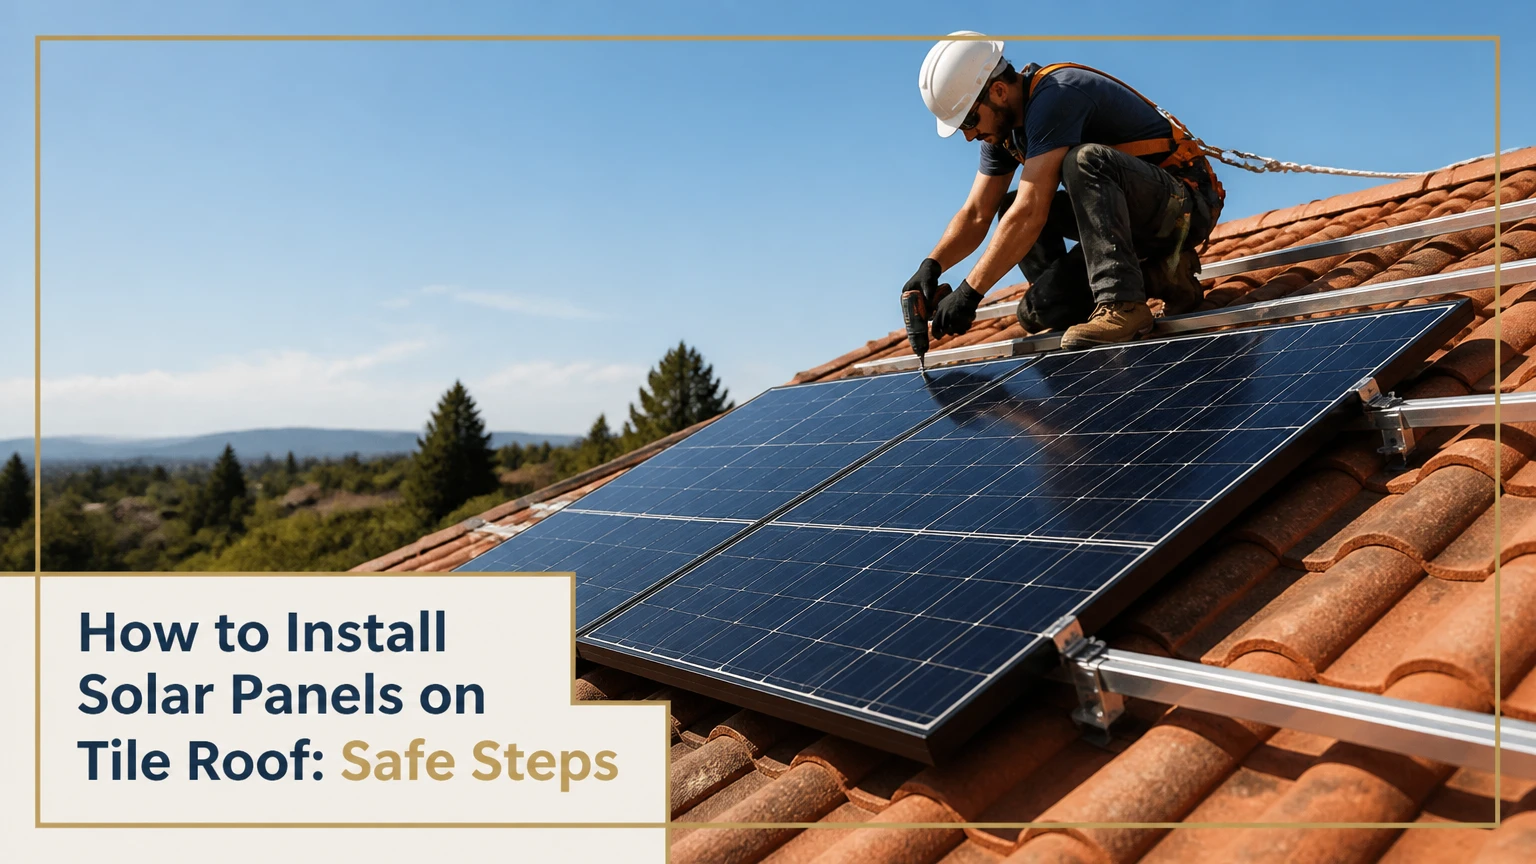
To install solar panels on a tile roof, a qualified solar contractor maps the roof framing, removes or lifts selected tiles, anchors engineered mounts to rafters, installs waterproof flashing, and attaches rails and photovoltaic modules. A typical residential project takes 2-3 site days, but structural review, permits, utility approval, and roof condition determine the real schedule.
Key Facts at a Glance
Solar panels attach to roof framing, not to clay or concrete tile alone.
Tile hooks, tile-replacement mounts, and comp-out systems are the main mounting approaches.
Sealant around a lag screw does not replace properly integrated flashing.
A roof with aging underlayment may need repair or replacement before solar installation.
Typical planning cost for an 8 kW tile-roof system is approximately $19,500-$29,500 before local incentives.
Roof work requires fall protection, electrical controls, permits, and equipment-specific installation instructions.
Can Solar Panels Go on a Tile Roof?
Yes, solar panels can be installed on most structurally sound clay, concrete, and composite tile roofs. The photovoltaic array is supported by rafters or engineered structural members beneath the tile, while the tile remains a weather-shedding surface around each attachment.
Roof suitability depends on more than tile type. Installers must assess rafter spacing, roof slope, wind exposure, snow load, tile condition, underlayment age, electrical service capacity, and available unshaded roof area. The U.S. Department of Energy identifies roof orientation, shading, roof condition, and local climate as important factors in solar system planning.
Tile itself is brittle and irregular. It is not a structural anchor. A mounting system that transfers panel weight and wind uplift into the roof framing protects the tile from carrying loads it was never designed to resist.
A tile roof is a poor candidate when widespread tiles are already cracked, the underlayment is failing, rafters are damaged, or the roof will require replacement before the solar array reaches its expected service life. Installing panels first can turn a routine reroof into a costly solar removal and reinstallation project.
How Does a Tile-Roof Solar System Work?
A tile-roof solar system creates a load path from the panel frame through aluminum rails, roof attachments, lag screws, and rafters. Waterproofing occurs at the roof penetration and underlayment layers, not at the solar panel surface.
The layers normally work in this order:
- Solar module: Converts sunlight into direct-current electricity.
- Clamps: Secure module frames to the racking rails.
- Aluminum rails: Distribute panel loads between attachment points.
- Tile-roof attachment: Uses a hook, replacement flashing mount, or other approved bracket.
- Flashing and underlayment: Redirect water around the penetration.
- Rafter or engineered framing member: Receives structural loads.
- Interior electrical equipment: Includes an inverter, disconnects, overcurrent protection, and required shutdown equipment.
The attachment manufacturer specifies allowable rail spans, fastener type, embedment, tile clearance, flashing configuration, and maximum cantilever. Those values cannot be safely replaced with a generic rule such as one hook every four feet, because wind uplift and rafter spacing vary by location and array geometry.
Racking manuals from IronRidge and Unirac require installers to follow the listed roof attachment, flashing, rail, and clamp specifications for the particular product combination.
Which Tile Roof Mounting Method Is Best?
Tile-replacement mounts are usually the best leak-control choice for flat or high-value tile when a compatible product exists. Tile hooks preserve more original tile and can cost less, while comp-out systems simplify panel-area access but create a visible transition between roofing materials.
| Mounting method | Typical material cost per attachment | Tile work | Best application | Main limitation |
|---|---|---|---|---|
| Tile hook | $8-$20 | Lift and notch selected tile | Standard concrete or clay tile | Notching must preserve water shedding |
| Tile-replacement mount | $30-$75 | Replace tile with engineered flashing unit | Flat, S, W, or premium tile profiles | Exact profile and dimensions must match |
| Comp-out section | $8-$18 for standard mount hardware, excluding roofing | Remove array footprint and install shingles or membrane | Roofs suitable for a planned mixed-material section | Lower visual consistency |
| Specialty elevated mount | $40-$120 | Minimal tile alteration, higher stand-off | Uneven, fragile, or difficult tile layouts | More wind exposure and structural demand |
Tile hook method
A tile hook slides beneath an existing tile and extends through a controlled gap to support the rail. The tile may require a carefully cut relief so it lies flat without pressing against the metal bracket.
Tile hooks are practical when replacement hardware is unavailable or the tile profile is common. They become risky when the installer grinds a large opening, forces the tile into position, or places the hook against a vulnerable tile edge.
Tile-replacement mount
A tile-replacement mount replaces one roof tile with a shaped metal or polymer unit that incorporates flashing and a mounting post. The replacement unit must match the tile’s profile, headlap, side lock, exposure, and color closely enough to preserve drainage.
This method avoids grinding original tiles and can provide a cleaner flashing transition. It does not eliminate structural design, however. The post still needs a correctly located rafter attachment and the product still needs approval for the site’s wind and snow conditions.
Comp-out installation
A comp-out removes tile only beneath the planned panel rectangle and installs another roofing material in that area. Standard shingle-roof attachments can then be used, with tiles terminating around the perimeter.
Comp-out is useful when the tile field is difficult to penetrate or when long-term panel servicing matters more than a uniform roof appearance. It is not automatically cheaper, because tile removal, perimeter transitions, underlayment detailing, and replacement roofing can consume substantial labor.
What Should You Check Before Installation?
Before installing solar panels on a tile roof, verify roof life, structural capacity, electrical readiness, array geometry, permits, and safe roof access. A contractor should document these conditions before ordering panels or drilling any attachment.
| Pre-installation check | Typical target or question | Evidence to request | Consequence if ignored |
|---|---|---|---|
| Roof age | Underlayment life remaining exceeds solar project plan | Roofing inspection and repair estimate | Array removal during reroofing |
| Framing | Rafters accept specified fastener embedment | Structural plan or framing verification | Weak attachment or uplift failure |
| Tile condition | No widespread cracks, spalling, or loose units | Tile count and replacement allowance | Water entry and service delays |
| Electrical service | Main panel and conductors support system design | One-line diagram and load review | Service upgrade or redesign |
| Shading | Annual shade modeled for trees and obstructions | PVWatts or equivalent production model | Lower-than-expected generation |
| Code and permits | Local building, electrical, and fire rules confirmed | Approved permit set | Inspection failure or utility delay |
| Access | Fall-protection plan and material handling route | Site safety plan | Injury risk and tile damage |
The National Renewable Energy Laboratory’s PVWatts Calculator estimates photovoltaic production from location, system size, orientation, tilt, and losses, making it useful for checking whether the usable tile roof can support the desired annual output.
When should you replace the roof first?
Replace or repair the roof first when underlayment, flashing, decking, or framing has a likely service life shorter than the solar array’s financing or warranty period. A 20-year-old roof may still be sound, but an inspection should distinguish cosmetic tile age from hidden underlayment deterioration.
A reroof before solar also allows the roofing contractor to install continuous waterproofing details without working around rails and modules. The avoided solar removal charge is often more significant than the initial tile-roof mounting premium.
How to Install Solar Panels on Tile Roof
Professional installation normally follows eight controlled steps: design the array, map the framing, establish safety controls, install flashed attachments, restore tile, build the rails, connect electrical equipment, and complete inspection. The factor that most determines success is accurate attachment placement combined with a waterproof flashing detail approved for the roof system.
Before You Start
| Requirement | Typical planning value | Practical specification |
|---|---|---|
| On-site installation time | 2-3 days | Longer for steep, fragile, or complex roofs |
| Total project time | 6-12 weeks | Includes design, permits, inspection, and interconnection |
| Crew | 2-4 trained workers | Licensed electrical supervision where required |
| Replacement tiles | 5-15% of accessible roof tiles | More for brittle or discontinued profiles |
| Mounting attachments | 10-25 per 8 kW array | Final quantity comes from engineering |
| Core equipment | Rails, flashed mounts, clamps, inverter, disconnects | Use one compatible racking system |
| Safety equipment | Harnesses, anchors, guardrails, ladders | OSHA fall protection applies in the United States |
Do not begin by walking across the tile field or removing random tiles to search for rafters. A roof plan, attic inspection, framing measurements, and selective verification reduce damage and prevent a visually neat array from being structurally misaligned.
Step 1: Design the Array and Obtain Approvals
Create the panel layout around roof edges, ridges, valleys, vents, skylights, chimneys, and required fire-access pathways. Confirm module dimensions, rail orientation, inverter configuration, conductor lengths, rapid-shutdown equipment, and the utility interconnection method before physical work begins.
The permit set should identify attachment locations, structural calculations, equipment ratings, conductor sizes, grounding, disconnects, and roof-access clearances. Local authorities may impose requirements beyond the International Residential Code or National Electrical Code, so the permitting authority has the final interpretation.
Success checkpoint: The approved drawings identify every attachment and show no panel occupying a prohibited setback.
Common mistake: Designing the array first and discovering that vents, fire pathways, or rafter locations make the layout impossible.
Step 2: Map Rafters and Inspect the Roof
Locate rafter centerlines from the attic, framing plans, measurements, and non-destructive probing. Verify each proposed attachment in the field before drilling, because rafter spacing can change around valleys, hips, dormers, and additions.
Inspect the underlayment and roof deck through selected access points. Confirm that the proposed lag screw has the required wood embedment without hitting electrical cables, plumbing, or the interior ceiling.
Success checkpoint: Every attachment location has a documented structural member and sufficient sound wood for the specified fastener.
Common mistake: Relying on a stud finder through thick tile and battens without confirming the result from the attic or a controlled opening.
Step 3: Establish Fall Protection and Tile Handling
Install roof anchors, guardrails, scaffolding, or another compliant fall-protection system before moving across the roof. OSHA 29 CFR 1926.501(b)(1) states, “Each employee on a walking or working surface with an unprotected side or edge which is 6 feet or more above a lower level shall be protected.”
Use roof boards, crawling ladders, or designated footholds that distribute weight and avoid unsupported tile centers. Stage modules and rails with a hoist or controlled lift rather than dragging equipment over the tile surface.
Success checkpoint: Workers can reach every attachment without stepping on fragile tile crowns or carrying panels while climbing.
Common mistake: Treating tile handling as a minor roofing issue. One cracked tile can allow water beneath the array, while a fall can cause severe injury.
Step 4: Install Flashed Roof Attachments
Lift or remove the selected tile, expose the underlayment, and install the roof attachment over the verified rafter. Use the fastener, washer, seal, flashing, and embedment specified by the attachment manufacturer, then integrate the flashing with the existing water-shedding layers.
A bead of exterior sealant may be part of a product detail, but sealant alone is not a durable flashing system. The National Roofing Contractors Association places roof penetration design and flashing integration at the center of watertight roof work, while manufacturer instructions define the tested attachment assembly.
Keep penetrations away from tile edges and avoid crushing the underlayment. Fastener holes that are oversized, split, or located outside the rafter require correction, not extra sealant.
Success checkpoint: Water can flow around the flashing without pooling against the lag or mount base.
Common mistake: Driving a lag through tile and sealing the head. That approach leaves brittle tile under load and does not create a proper underlayment transition.
Step 5: Restore or Replace the Tile
For tile hooks, notch only the minimum material needed for the hook to pass without lifting the tile above its neighboring courses. For replacement mounts, install the correctly profiled unit with the required headlap and side overlap.
Replace cracked tiles immediately. Keep spare units on site because older clay and concrete profiles may be discontinued or difficult to source after panels cover the roof.
Success checkpoint: Each tile sits flush, maintains its intended overlap, and does not contact the metal bracket under normal movement.
Common mistake: Removing too much tile. A large opening increases wind-driven rain exposure and may leave the upper tile unsupported.
Step 6: Build and Level the Racking
Attach rails to the roof mounts using the specified hardware, then set rail spacing to the module manufacturer’s clamp zones. Align rail ends, maintain maximum cantilever limits, and leave expansion or thermal-movement allowances required by the racking system.
Leveling matters for module fit and drainage, but a perfectly level rail does not compensate for a structurally incorrect attachment. Torque every connection with a calibrated wrench at the value printed in the equipment manual.
Success checkpoint: Rails form a consistent plane, clamps land inside approved module zones, and no attachment exceeds its span or cantilever limit.
Common mistake: Substituting hardware or adding improvised spacers to correct height differences. Use approved shims or attachment adjustment features instead.
Step 7: Install Inverters, Conductors, and Grounding
Mount microinverters or DC optimizers only where their environmental and temperature ratings permit. Route photovoltaic conductors in supported loops, secure them with listed clips, maintain connector compatibility, and prevent cables from resting on tile or roof surfaces.
Install equipment grounding and bonding according to the racking instructions and the electrical code adopted locally. Grid-connected systems commonly require rapid-shutdown equipment, labels, disconnects, overcurrent protection, and an approved inverter configuration. The National Fire Protection Association identifies NEC Article 690 as the principal code section for photovoltaic systems, with local editions and amendments controlling the installation.
Success checkpoint: Conductors are supported, connectors are fully engaged, polarity is verified, and required shutdown functions pass testing.
Common mistake: Mixing connectors that look similar but are not listed as compatible. A connection can appear engaged while creating resistance, heat, or arcing.
Step 8: Place, Clamp, and Inspect the Modules
Lift modules onto the rails without sliding them across tile or racking. Install end clamps at the array perimeter and mid-clamps between modules in the manufacturer’s approved clamp zones, then torque each connection to specification.
Complete a mechanical inspection before energizing the system. Check tile clearance, attachment flashing, rail bonding, conductor routing, module serial numbers, labels, disconnect accessibility, and roof penetrations from both exterior and interior locations.
Success checkpoint: Every module is restrained, every clamp is torqued, and inspection records match the approved plan.
Common mistake: Tightening clamps by feel. Over-torque can damage frames, while under-torque can allow movement during wind events.
How Much Does Tile-Roof Solar Cost?
A typical 8 kW tile-roof solar installation costs approximately $19,500-$29,500 before incentives in the United States, with tile complexity commonly adding $1,500-$4,500 compared with a straightforward asphalt-shingle roof. Local labor rates, electrical upgrades, roof repairs, battery storage, and permitting can move the final price substantially.
| Cost component | Typical range for an 8 kW system | Main price driver |
|---|---|---|
| PV modules | $5,500-$9,000 | Wattage, efficiency, manufacturer |
| Inverter and electrical balance of system | $3,000-$6,500 | String inverter, microinverters, service equipment |
| Tile-roof mounting premium | $1,500-$4,500 | Tile handling, flashing, replacement units |
| Labor and installation | $6,000-$10,000 | Roof access, array complexity, local wages |
| Permits and engineering | $500-$2,000 | Jurisdiction and structural review |
| Roof repairs or reroofing | $1,000-$20,000+ | Underlayment, decking, tile availability |
These are planning figures, not a quotation. Obtain separate line items for tile replacement, roof repair, structural engineering, electrical upgrades, battery storage, removal, and future reinstallation.
How Long Does Installation Take?
Physical installation usually takes 2-3 site days for an uncomplicated residential tile roof, while the complete project often takes 6-12 weeks because design, permitting, inspection, and utility interconnection occur before and after construction.
| Project phase | Typical duration | Common delay |
|---|---|---|
| Site survey and energy design | 2-7 days | Incomplete roof or utility data |
| Structural and permit review | 2-6 weeks | Jurisdiction workload or revisions |
| Equipment procurement | 1-6 weeks | Module, inverter, or tile-mount shortages |
| Roof and solar installation | 2-3 days | Steep roof, fragile tile, weather |
| Building and electrical inspection | 1-14 days | Correction notice or scheduling |
| Utility interconnection | 2-6 weeks | Utility queue or meter requirements |
What Are the Main Failure Modes?
The most expensive tile-roof solar failures usually begin with an incorrect attachment, incomplete flashing, or a roof that should have been repaired first. Cosmetic tile damage is visible immediately, but underlayment deterioration can remain hidden until months after installation.
| Failure mode | Likely cause | Corrective action | Prevention |
|---|---|---|---|
| Leak below array | Failed flashing or cracked tile | Remove affected modules and repair roof layers | Use approved flashing and replace damaged tile |
| Cracked tile field | Foot traffic or forced hardware | Replace tile and inspect adjacent courses | Use crawling boards and controlled handling |
| Rail movement | Loose or incorrect hardware | Re-torque or replace connection after inspection | Follow rail span and torque tables |
| Low energy output | Shading, wiring fault, or soiling | Compare inverter data with production model | Shade analysis and commissioning tests |
| Hot connector or arc fault | Incompatible or incomplete connector | De-energize and replace listed connection | Use matching listed connectors |
| Roof replacement conflict | Old underlayment beneath array | Remove array, reroof, and reinstall | Synchronize roof and solar life cycles |
If water appears inside the building, de-energize equipment only when safe, document the leak location, and contact the installer and a qualified roofing professional. Do not apply surface sealant around a panel edge as a permanent repair.
Which Situations Need a Different Approach?
Historic or high-value clay tile
Use tile-replacement mounts or a carefully engineered specialty system when preserving original tile matters. Require color and profile matching, a written replacement-tile allowance, and a plan for obtaining discontinued units.
Steep or heavily shaded roofs
Consider a ground-mounted array when roof access is unsafe, usable roof area is small, or shading makes the roof financially unattractive. Ground mounts cost additional trenching and foundation work, but they simplify maintenance and avoid tile penetrations.
Roofs older than 15 years
Commission a roofing inspection before solar design. If underlayment life is uncertain, reroof first or obtain a written estimate for future solar removal and reinstallation.
Homes needing battery storage
Reserve wall space, ventilation clearances, conduit routes, and service capacity during the initial design. Adding a battery later can require new disconnects, a service-panel change, and additional permitting.
FAQ
Can I install solar panels on tile without removing the tiles?
Installers can sometimes lift tiles and use hooks, but the attachment point still requires access to the roof structure and proper flashing. Solar panels should not be anchored only through tile, because tile cannot reliably resist wind uplift or carry concentrated fastener loads.
Do solar panels damage tile roofs?
Properly designed systems do not inherently damage tile roofs, but tile can crack during foot traffic, cutting, lifting, or later maintenance. The risk is highest when workers step on unsupported tile centers or force a hook and tile into the same space.
Is a tile roof stronger than a shingle roof for solar?
Tile is not automatically stronger for solar. The relevant capacity comes from rafters, trusses, decking, fasteners, roof slope, wind exposure, and snow load; tile mainly changes attachment access, waterproofing details, labor, and breakage risk.
Can solar panels be installed over Spanish tile?
Solar panels can be installed over Spanish or S-shaped tile when the mounting hardware matches the profile and the roof framing supports the design. Replacement mounts often produce a cleaner result than heavily notched hooks, especially on brittle clay tile.
Should solar panels be installed before a roof replacement?
Solar panels should generally be installed after a planned roof replacement, not before it. Removing and reinstalling an array adds labor, creates handling risk, and may require replacement of unavailable tiles, while a new roof provides a better waterproofing base.
How often should a tile-roof solar system be inspected?
Inspect the roof and array at least annually, and after severe wind, hail, or nearby construction. The inspection should check cracked tiles, flashing, cable support, animal damage, inverter alerts, rail movement, and water stains inside the attic.
The Bottom Line
Learning how to install solar panels on tile roof begins with the roof, not the panels. Confirm the underlayment and framing, select a tile-compatible attachment, integrate tested flashing, protect the tile during access, and complete the electrical work under the applicable permit and code requirements. Tile hooks, replacement mounts, and comp-out systems each work in suitable conditions, but none compensates for a failing roof or an attachment that misses the rafter.