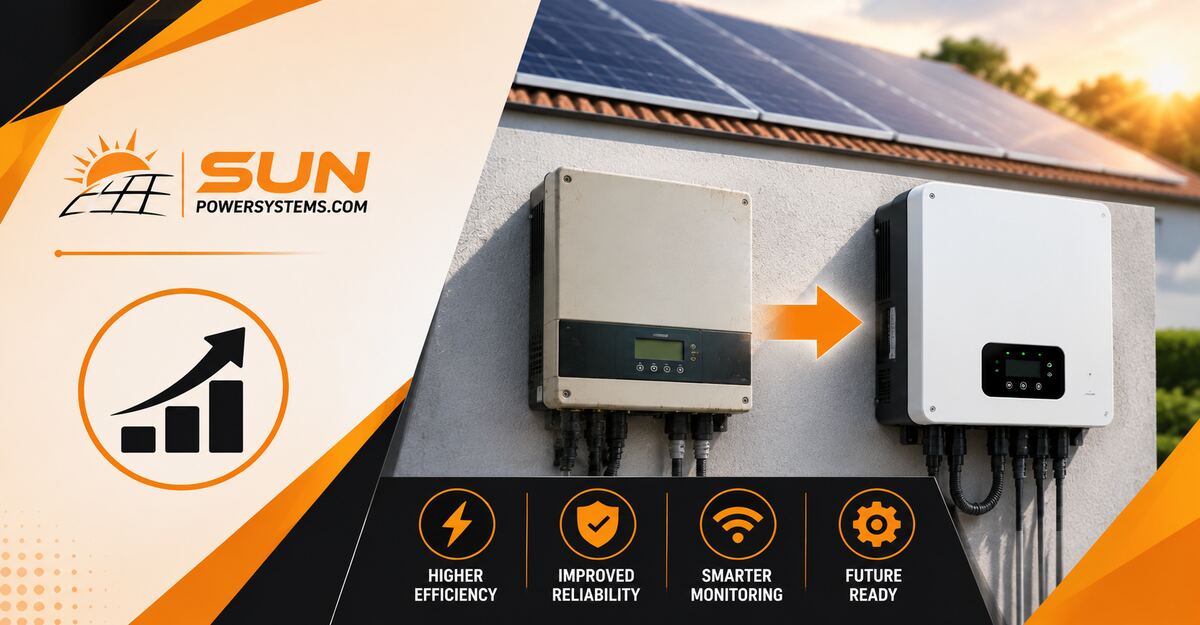
Upgrading your solar inverter becomes necessary when confirmed internal failure, obsolete equipment, repeated shutdowns, poor compatibility, or new battery and expansion goals make continued repair uneconomical. Age alone is not proof that an inverter needs replacement, so the correct decision starts with electrical testing, production analysis, warranty review, and compatibility planning.
Key Facts at a Glance
- A residential string inverter commonly operates for about 10 to 15 years, although heat, ventilation, loading, and surge exposure can shorten or extend that period.
- A persistent production decline does not prove inverter failure until weather, shading, soiling, module faults, and grid conditions have been excluded.
- Replacing a functioning inverter will not correct utility overvoltage, damaged roof wiring, failed optimizers, or poor solar-panel performance.
- A replacement inverter must match the array’s voltage, current, power, grounding, shutdown, communications, and utility-interconnection requirements.
- A standard residential inverter replacement commonly falls around $1,000 to $3,000, while platform conversions and battery-ready upgrades can cost substantially more.
- The best time to consider an upgrade is often when the system needs major repair, a reroof, battery storage, panel expansion, or replacement of discontinued equipment.
What Does a Solar Inverter Do?
A solar inverter converts the direct-current electricity produced by photovoltaic modules into alternating-current electricity compatible with a home and the utility grid. It also controls array operation, protects the electrical system, records production, and disconnects generation when grid conditions become unsafe.
Solar modules do not produce one fixed voltage or current. Their output changes with irradiance, cell temperature, shading, module mismatch, and electrical loading.
The inverter performs several functions:
- Maximum power point tracking: The inverter adjusts operating voltage and current to extract the most useful power available from the array.
- DC-to-AC conversion: Semiconductor switches create a controlled alternating waveform from the modules’ direct-current input.
- Filtering: Capacitors and inductors reduce switching ripple and produce grid-quality output.
- Grid synchronization: The inverter matches local voltage, frequency, and phase requirements before exporting power.
- Anti-islanding protection: The inverter stops energizing the grid during an outage unless it is part of an approved backup system.
- System protection: The inverter detects abnormal voltage, frequency, insulation resistance, temperature, current, and arc conditions.
- Monitoring: Modern units record energy, operating status, faults, communications, and sometimes panel-level data.
Modern smart inverters may also provide voltage-reactive-power control, power-factor control, ride-through functions, and other grid-support capabilities required by interconnection rules. IEEE 1547-2018 includes functions such as Volt-VAR behavior for distributed energy resources.
When Should You Upgrade Your Solar Inverter?
You should upgrade a solar inverter when testing shows that the inverter is unreliable, irreparable, incompatible with your plans, or too expensive to maintain relative to its remaining value. Replacement is also reasonable when an obsolete platform prevents monitoring, battery integration, code compliance, or dependable access to spare parts.
1. The Inverter Has Confirmed Internal Failure
A confirmed inverter failure means the fault remains after the technician has tested the PV array, AC supply, disconnects, wiring, grounding, communications, and utility voltage.
Internal failures can involve:
- Power transistors or switching modules
- Electrolytic capacitors
- Control boards
- Relays and contactors
- Cooling fans
- Internal power supplies
- Display or communications boards
- Burned terminals or damaged bus connections
- Corroded internal components
- Failed insulation-monitoring circuits
The error message alone is not enough. For example, an isolation fault may originate in wet connectors or damaged roof wiring rather than inside the inverter.
2. Repairs Are Becoming Repetitive
Repeated faults indicate that repairing one component may no longer restore dependable operation. A technician might replace a fan or communications board, only for capacitors, relays, or power electronics to fail later.
A practical rule is to compare the proposed repair cost with:
- The price of a complete replacement
- The inverter’s age
- Remaining warranty coverage
- Parts availability
- Expected service life after repair
- Value of energy lost during future outages
A repair costing 15% to 30% of replacement may make sense for a relatively new, supported inverter. A repair approaching 40% to 50% of replacement is harder to justify when the unit is already near the common 10-to-15-year service-life range.
3. Production Has Declined Without Another Explanation
A sustained energy-yield decline can justify inverter investigation, but production data must be normalized before drawing conclusions. Seasonal sunlight, unusual weather, module temperature, tree growth, dirt, utility outages, and changed household consumption can all create misleading comparisons.
Use these checks:
- Compare the same months in different years.
- Adjust for unusually cloudy or hot periods.
- Compare each string’s current under similar conditions.
- Inspect modules for new shade, debris, damage, or degradation.
- Review inverter clipping and curtailment records.
- Check utility-voltage events.
- Compare actual production with a current site model.
A decline of 15% or more deserves investigation, but it does not automatically justify replacement. A failing MPPT channel may reduce one string’s output, while a whole-system decline may originate elsewhere.
4. The Manufacturer No Longer Supports the Unit
An operational inverter can still become a service risk when its manufacturer has left the market, ended product support, discontinued replacement boards, or retired its monitoring platform.
Obsolescence matters when:
- No compatible replacement is available
- Installer software is unavailable
- Firmware cannot be updated
- Cloud monitoring has ended
- Cellular communication no longer works
- Proprietary optimizers cannot pair with new hardware
- Warranty service is unavailable
- Qualified technicians will not service the platform
A planned upgrade is usually less disruptive than waiting for an obsolete inverter to fail during a high-production season.
5. You Want to Add Battery Backup
A hybrid or multimode system may be appropriate when you want energy storage, outage backup, time-of-use control, or increased self-consumption. However, replacing a grid-tied inverter with a hybrid inverter does not by itself make the home capable of operating during an outage.
Backup operation may also require:
- A compatible battery
- Automatic transfer equipment
- A backup gateway or system controller
- A protected-loads panel
- Updated grounding and bonding
- Communications wiring
- Utility approval
- Battery permits
- Fire-code clearances
- Load-management equipment
The AI Overview’s claim that hybrid inverters generally last only 8 to 12 years is too absolute. Some manufacturers and industry sources place well-designed hybrid and string products in a similar 10-to-15-year service-life range, with temperature, workload, component quality, and warranty terms creating more variation than the “hybrid” label alone.
6. You Are Expanding the Solar Array
An inverter upgrade may be required when additional modules would exceed the existing unit’s input current, voltage, MPPT capacity, permitted AC output, or approved DC-to-AC ratio.
Expansion requires more than matching wattage. The designer must confirm:
- Maximum open-circuit string voltage
- Minimum MPPT operating voltage
- Maximum input current per MPPT
- Maximum short-circuit current
- Number of strings and trackers
- Module temperature coefficients
- Cold-weather voltage
- Roof orientation and shade
- AC service capacity
- Utility export limits
- Existing optimizer compatibility
A larger inverter is not always better. An oversized unit may spend more time below its efficient operating range, while an undersized unit may clip energy during peak conditions.
7. Your System Needs Modern Safety Functions
An inverter replacement can trigger requirements that did not apply to the original installation. The exact obligation depends on the adopted electrical code, the scope of work, the local authority having jurisdiction, and utility rules.
Possible upgrades include:
- Rapid shutdown equipment
- Arc-fault protection
- Updated disconnect labeling
- New grounding or bonding
- Accessible AC or DC isolation
- Revised conductor protection
- Utility-visible disconnects
- New grid-support settings
Rapid shutdown requirements can involve voltage reduction within the array boundary after shutdown is initiated. Any replacement affecting the shutdown chain should be tested as part of commissioning.
How Long Do Solar Inverters Last?
A residential string inverter commonly lasts about 10 to 15 years, while many microinverters carry 20-to-25-year warranties and may remain in service for a similar period. These figures are planning ranges, not guaranteed failure dates.
| Inverter architecture | Typical planning range | Common failure impact | Important limitation |
|---|---|---|---|
| String inverter | 10-15 years | Most or all production stops | One central failure point |
| String inverter with optimizers | 10-15 years for wall unit | Production may stop at the central inverter | Roof optimizers add separate failure points |
| Microinverters | 15-25 years | Usually one module loses production | Replacement requires roof access |
| Hybrid inverter | Often 10-15 years, product dependent | Solar, battery, or backup functions may be affected | More configuration and compatibility requirements |
| Off-grid inverter-charger | Highly usage dependent | Loss of primary AC supply | Heavy cycling and surge loads affect life |
Why Do Inverters Wear Out Before Solar Panels?
Inverters contain temperature-sensitive electronics, switching devices, relays, capacitors, communication hardware, and cooling components. Solar modules contain fewer active electronic components, so their aging process is generally slower.
The major inverter stressors are:
- Thermal cycling: Daily heating and cooling stress solder joints, seals, boards, and connections.
- Capacitor aging: Heat accelerates electrolyte loss and reduces filtering performance.
- High loading: Frequent operation near maximum output increases internal temperature.
- Poor ventilation: Blocked clearances and enclosed spaces trap heat.
- Direct sun: Exterior wall temperatures can exceed ambient air temperature substantially.
- Moisture and salt exposure: Corrosion can damage terminals, boards, and enclosures.
- Voltage surges: Lightning and utility disturbances can damage power electronics.
- Dust and pests: Contamination can obstruct airflow or compromise wiring.
- Mechanical wear: Fans, relays, and contactors have finite operating lives.
- Firmware and communications obsolescence: A functioning power stage can become difficult to manage when software support ends.
An honest limitation is that lifespan averages cannot predict an individual unit’s remaining life. A shaded, ventilated 14-year-old inverter may be healthier than a heavily loaded 7-year-old inverter installed in direct afternoon sun.
Which Inverter Type Is Best for an Upgrade?
The best replacement architecture is usually the one that meets your new objective with the least unnecessary redesign. A like-for-like string replacement is normally the economical choice for a simple, unshaded array, while microinverters, optimizers, and hybrid equipment solve more specific problems.
| Decision factor | String inverter | Optimizers plus inverter | Microinverters | Hybrid inverter |
|---|---|---|---|---|
| Upfront replacement cost | Lowest | Moderate | Highest for full retrofit | Moderate to high |
| Shade management | Limited by design | Panel-level optimization | Panel-level conversion | Depends on PV architecture |
| Panel-level monitoring | Usually no | Yes | Yes | Product dependent |
| Battery integration | Separate equipment often needed | Platform dependent | Usually AC-coupled battery | Primary strength |
| Single failure impact | High | High at central inverter | Low | Potentially affects several energy functions |
| Roof electronics | Minimal | One optimizer per module | One inverter per module | Usually minimal |
| Retrofit complexity | Low | Moderate to high | High | Moderate to high |
| Best application | Simple array and low budget | Uneven roofs or partial shade | Complex roofs and module independence | Battery, backup, and energy management |
When Is a String Inverter the Best Choice?
A string inverter is usually the best replacement for a uniform, unshaded array when the homeowner wants the lowest practical cost and easy ground-level service access. Modern string units can reach high conversion efficiency and may include several MPPT channels for different roof orientations.
A string inverter is less suitable when modules experience significantly different shade patterns or when panel-level monitoring is essential.
When Are Optimizers Worth Adding?
Power optimizers are useful when individual panels operate under different conditions but the homeowner still wants a central inverter architecture. They can provide panel-level monitoring, module-level MPPT, and rapid-shutdown functions.
A full optimizer retrofit may require lifting every module, adding substantial labor, and committing the system to a proprietary ecosystem. Optimizers should not be added automatically to solve a problem that tree trimming, string redesign, or a simple inverter replacement would correct more economically.
Should You Convert to Microinverters?
A microinverter conversion can improve module independence and panel-level monitoring, but it is one of the most invasive replacement paths. Technicians generally must access each module, remove old DC string wiring from active use, install roof-mounted conversion equipment, and create an AC branch-circuit architecture.
Choose microinverters when roof complexity, multiple orientations, partial shade, modular expansion, or fault isolation justifies the extra cost. Skip a full conversion when the existing string layout performs well and the central inverter is the only failed component.
When Is a Hybrid Inverter the Better Upgrade?
A hybrid inverter is the better upgrade when battery storage is a near-term objective and the selected battery, backup equipment, solar array, and utility program are compatible. It can reduce duplicated conversion equipment and centralize energy management.
A hybrid inverter is not automatically the best “future-proof” option. Proprietary battery compatibility, limited backup power, communications dependence, changing battery products, and local interconnection rules can make a premature hybrid purchase less flexible than expected.
Can a New Inverter Work With Old Solar Panels?
A new inverter can work with older solar panels when the array’s electrical characteristics fall within the new inverter’s allowable operating range. Panel age and brand are less important than voltage, current, string configuration, insulation condition, connectors, grounding, and shutdown compatibility.
The installer should verify:
- Module model numbers and electrical data
- Number of modules per string
- Open-circuit voltage at the lowest expected temperature
- Operating voltage in hot conditions
- Current per string and per MPPT
- Polarity and insulation resistance
- Connector type and condition
- Grounding method
- Optimizer or rapid-shutdown compatibility
- Existing AC conductor and breaker ratings
Mixing connector brands can create poor contact even when the connectors appear mechanically compatible. The correct replacement may require approved transition connectors or replacement of damaged connector pairs.
What Warning Signs Actually Matter?
The most important warning signs are repeated shutdowns, verified loss of one or more MPPT channels, internal hardware faults, abnormal noise or heat, burned connections, and faults that remain after external causes have been excluded.
Repeated Isolation or Ground Faults
An isolation-resistance fault indicates unwanted current leakage between energized PV conductors and ground. Common causes include damaged cable insulation, wet junction boxes, failed module backsheets, pinched conductors, contaminated connectors, and animal damage.
The inverter may be correctly protecting the system. Replacing it before locating the leakage path can leave the new inverter displaying the same fault.
Frequent Grid-Voltage Trips
Grid overvoltage and undervoltage faults often indicate utility conditions, undersized AC conductors, excessive voltage rise, loose connections, or incorrect grid settings. A new inverter may have improved ride-through capabilities, but it cannot independently correct a persistently high utility-service voltage.
A technician should record voltage at the inverter and service connection while the system exports power. The result helps distinguish utility voltage from voltage rise within the customer’s wiring.
Over-Temperature Derating
An inverter that becomes too hot may intentionally reduce output. Corrective actions include restoring required clearances, cleaning approved ventilation areas, testing fans, removing obstructions, inspecting filters where fitted, and reducing direct solar heating without trapping exhaust air.
Never cover an inverter with a tightly enclosed cabinet. A shade structure must preserve the manufacturer’s ventilation and service-clearance requirements.
Communication Failure
A monitoring outage does not necessarily mean the inverter has stopped producing power. Failed Wi-Fi credentials, routers, gateways, antennas, cellular service, cloud servers, or communications boards can interrupt reporting while AC generation continues.
Check the utility meter, inverter display, local interface, and electrical output before assuming a power-stage failure.
Arc-Fault or Connector Faults
Arc-fault events require urgent professional inspection because loose or damaged DC connections can create a fire hazard. Resetting the inverter repeatedly without finding the cause is not an acceptable repair strategy.
Is Harmonic Distortion a Homeowner Replacement Test?
Total harmonic distortion is not normally a practical homeowner test for deciding whether to replace a solar inverter. Harmonic compliance requires suitable power-quality instruments, defined test conditions, and interpretation under the applicable interconnection standard.
IEEE 1547-2018 uses harmonic limits for distributed-energy interconnection, including an overall current distortion limit expressed through the standard’s prescribed measurement method. A simple monitoring-app value above or below 5% should not be treated as stand-alone proof that old filtering components have failed.
For a typical residential diagnosis, error logs, current balance, insulation resistance, thermal behavior, voltage measurements, and verified AC output provide more actionable evidence.
How Much Does Solar Inverter Replacement Cost?
A standard residential inverter replacement in the United States commonly costs about $1,000 to $3,000, although equipment type, system size, location, permits, platform changes, and roof work can move the total outside that range. A 2026 national cost guide reports an average near $2,000.
| Replacement project | Typical planning range |
|---|---|
| Like-for-like string inverter replacement | $1,500-$3,500 |
| Warranty inverter with owner-paid labor | $500-$1,500 |
| Optimized-system wall inverter replacement | $1,500-$3,500 |
| Hybrid inverter upgrade without battery | $3,000-$7,000 |
| Full microinverter retrofit | $4,000-$9,000+ |
| Diagnostics or service visit | $150-$500 |
| Monitoring or communications repair | $200-$1,000 |
| Code, disconnect, or shutdown modifications | Highly site dependent |
These are planning ranges rather than quotes. Costs rise when the project requires difficult roof access, extensive rewiring, service-panel work, engineering, a new system controller, discontinued proprietary hardware, or utility reapproval.
What Does the Price Include?
A complete estimate should identify:
- Inverter hardware
- Mounting equipment
- Freight and warranty shipping
- Removal and disposal
- Electrical labor
- Roof labor
- Conduit and conductors
- Breakers and disconnects
- Rapid shutdown equipment
- Permits and inspections
- Utility paperwork
- Monitoring setup
- Firmware updates
- Commissioning tests
- Workmanship warranty
- Taxes
A low quote that excludes commissioning, utility paperwork, or monitoring restoration may not represent a complete operational replacement.
Does an Inverter Warranty Cover Replacement Labor?
Many inverter warranties cover eligible equipment but exclude diagnosis, removal, installation, roof access, shipping, travel, lost production, and permit costs. Warranty terms vary by manufacturer, model, installation date, registration status, country, and whether the product was installed by an authorized contractor.
Before purchasing a replacement, collect:
- Original proposal and invoice
- Commissioning date
- Inverter serial number
- Product-registration confirmation
- Warranty certificate
- Error logs
- Installation photographs
- Installer records
- Proof of property ownership
- Transfer documentation, if applicable
An orphaned solar system can still have valid manufacturer coverage even when the original installer has closed. The homeowner may need to hire another qualified contractor to diagnose the fault and complete the return-material-authorization process.
How Long Does Replacement Take?
A straightforward wall-mounted inverter swap can often be completed in three to six hours after the correct equipment and approvals are available. The total project may take several days or weeks because diagnosis, warranty authorization, equipment procurement, permits, inspections, and utility approval occur outside the physical installation window.
Typical stages include:
- Diagnostic visit: One to three hours
- Warranty or compatibility review: One day to several weeks
- Equipment procurement: Several days to several months for discontinued products
- Permit and utility processing: A few days to several weeks
- Physical installation: Half a day for a simple swap
- Roof retrofit: One to three days for module-level work
- Inspection and permission to operate: Jurisdiction dependent
A like-for-like warranty replacement generally moves faster than a change in inverter type, AC capacity, battery capability, or export settings.
What Happens During Professional Replacement?
Professional inverter replacement follows a controlled process of diagnosis, electrical isolation, compatibility verification, installation, programming, testing, and documentation. High-voltage DC can remain present whenever modules receive light, so this work is not equivalent to replacing a household appliance.
Step 1: Confirm the Failure
The technician reviews production history, fault logs, string readings, grid voltage, insulation resistance, communications, and visible wiring condition. The goal is to prove which component failed before ordering hardware.
Step 2: Engineer the Replacement
The contractor checks array voltage, current, string design, AC capacity, shutdown equipment, grounding, utility requirements, mounting clearances, communications, and manufacturer compatibility.
Step 3: Obtain Approvals and Equipment
The installer handles warranty authorization, equipment procurement, permits, engineering documents, and utility submissions where required.
Step 4: Isolate the System
The technician follows the manufacturer’s shutdown procedure, locks or controls disconnecting means where appropriate, allows stored energy to discharge, and verifies the electrical state with suitable test equipment.
Step 5: Remove and Install the Hardware
The old inverter is disconnected and removed. The new unit is mounted with required environmental protection, working space, ventilation, conductor routing, strain relief, grounding, and overcurrent protection.
Step 6: Configure and Commission the System
The installer selects the approved grid profile, updates firmware, configures MPPTs, establishes monitoring, tests shutdown functions, verifies production, checks fault history, and documents final readings.
Step 7: Close Out the Project
The homeowner should receive model and serial numbers, warranty information, updated diagrams, permit records, monitoring access, test results, operating instructions, and contractor contact details.
Should You Repair or Replace the Inverter?
Repair is generally preferable when the inverter is relatively new, supported by the manufacturer, economically repairable, and expected to provide several more years of reliable service. Replacement is preferable when repair costs are high, failures are repetitive, parts are unavailable, or the replacement creates meaningful operational value.
| Situation | Better decision |
|---|---|
| Failed cooling fan on a supported unit | Repair |
| Communications failure while production continues | Repair communications first |
| Warranty-covered power-stage failure | Warranty replacement |
| Twelve-year-old unit with repeated internal faults | Replace |
| Discontinued inverter with no service parts | Replace |
| Utility overvoltage causing shutdowns | Correct voltage issue first |
| Roof cable insulation fault | Repair array wiring |
| Battery planned within one or two years | Evaluate hybrid upgrade |
| Major array expansion planned | Redesign inverter capacity |
| One failed microinverter | Replace the individual unit |
The Production-Recovery Calculation
Estimate the financial value of restored production before paying a premium for an upgrade.
For example, suppose an inverter problem causes a verified annual loss of 1,500 kWh and electricity is worth $0.18 per kWh. Restoring that energy saves about $270 per year.
A $4,000 premium upgrade justified only by that recovery would have a simple payback near 14.8 years:
$4,000 ÷ $270 = 14.8 years
The same upgrade may still make sense if it also provides battery compatibility, backup power, improved monitoring, expansion capacity, or avoids likely future failures.
Common Inverter Upgrade Mistakes
Replacing the Inverter Before Diagnosing the Array
Ground faults, broken conductors, damaged modules, failed optimizers, and wet connectors can reproduce the same shutdown after a new inverter is installed.
Selecting by Wattage Alone
Two inverters with the same AC rating may have different voltage windows, current limits, MPPT counts, grid certifications, and battery compatibility.
Assuming a Larger Inverter Creates More Energy
A larger inverter only recovers meaningful energy when the existing unit experiences material clipping or cannot accept planned array expansion. It cannot create sunlight or reverse module degradation.
Ignoring Proprietary Equipment
Optimizers, rapid-shutdown transmitters, gateways, batteries, meters, and monitoring platforms may only work within approved product families.
Forgetting the Warranty
Ordering a retail replacement before completing the manufacturer’s diagnostic and authorization process can sacrifice valid equipment coverage.
Treating Monitoring Loss as Generation Loss
Cloud or communications failures can hide production without stopping it. Electrical output should be verified independently.
Choosing a Battery-Ready Unit Without a Battery Plan
“Battery ready” does not mean universally compatible. Confirm the approved battery model, usable capacity, continuous power, surge capability, transfer equipment, backup architecture, and expected installation date.
Which Upgrade Strategy Fits Your Situation?
For an Unshaded System on a Tight Budget
Choose a compatible modern string inverter with strong local support, adequate MPPT capacity, current grid certification, and a clear warranty. Avoid a costly architecture conversion unless the existing design has a specific weakness.
For a Roof With New or Uneven Shade
Model the shading before selecting equipment. Tree management, string redesign, optimizers, or microinverters may each be appropriate depending on how many modules are affected and when the shade occurs.
For a Home Adding Battery Backup
Design the inverter, battery, transfer equipment, protected loads, and energy-management controls as one system. Start with the loads that must operate during an outage rather than choosing equipment solely by battery capacity.
For an Older Orphaned Solar System
Document every model and serial number, download available production records, contact the equipment manufacturer, and hire a contractor experienced with legacy systems. A platform change may be more practical than locating rare proprietary parts.
For a Planned Reroof
Coordinate solar removal, roof work, inverter replacement, module testing, and reinstallation under one scope. A reroof creates an economical opportunity to replace roof electronics, damaged wiring, old connectors, or an obsolete system architecture.
For Future EV Charging
An EV does not automatically require a hybrid inverter. Compare daytime solar charging, utility rates, service-panel capacity, charger controls, export limitations, battery goals, and vehicle-to-home compatibility before redesigning the PV system.
Questions to Ask an Inverter Contractor
Ask for written answers to these questions before approving the upgrade:
- What test confirms that the inverter, rather than the array or grid, has failed?
- Is the existing inverter still covered by a manufacturer warranty?
- Does the price include labor, permits, monitoring, commissioning, and utility paperwork?
- Will the new inverter work with every existing module, optimizer, shutdown device, and connector?
- Will changing the inverter affect the system’s original approval or export limit?
- What production increase, if any, should the upgrade deliver?
- Which battery products are officially compatible?
- Who provides future service if the original contractor closes?
- What workmanship warranty applies?
- Which documents will be provided after commissioning?
The Bottom Line
Upgrading your solar inverter is justified when diagnosis confirms internal failure, repeated repair no longer makes financial sense, the product has become unsupported, or a battery, expansion, safety, or monitoring objective requires a different platform. The best replacement is not necessarily the newest or largest inverter; it is the unit that safely matches the existing array, local grid rules, future plans, and realistic project budget.
A qualified contractor should prove the failure, check warranty coverage, engineer electrical compatibility, identify code implications, and document expected benefits before replacing equipment. That process prevents homeowners from paying for a new inverter that cannot correct an external wiring, module, shading, communications, or utility problem.
Frequently Asked Questions
Can I replace a solar inverter with a different brand?
A different brand can be used when the new inverter is electrically compatible with the modules, strings, AC system, grounding method, shutdown equipment, and utility requirements. Brand changes become difficult when the system contains proprietary optimizers, batteries, gateways, meters, or monitoring hardware that only communicate with one product family.
Will replacing my inverter increase solar production?
Replacing a defective, derating, or undersized inverter can restore lost energy, but replacing a healthy, correctly sized inverter usually creates little additional production. Meaningful gains require a confirmed limitation such as failed MPPT operation, severe clipping, poor shade management, outdated control behavior, or excessive downtime from recurring faults.
Can a solar system operate without an inverter?
A standard grid-connected home solar system cannot supply normal household AC loads or export compliant power without an operating inverter. The panels may continue producing DC voltage in sunlight, but that energy remains unusable by ordinary AC circuits. Some DC-coupled equipment may operate differently, but it still requires approved power-conversion and control hardware.
Do solar panels need replacement with the inverter?
Solar panels do not normally need replacement simply because the inverter has failed. The installer should test module condition, string voltage, current, insulation resistance, connectors, and visible damage. Panels may remain usable for many years after the first string inverter replacement if their performance and electrical safety remain acceptable.
Does inverter replacement require a permit?
Permit requirements depend on location and project scope. A like-for-like warranty swap may receive simplified treatment in some jurisdictions, while a change in capacity, inverter type, battery capability, wiring, rapid shutdown, or interconnection settings may require electrical permits, engineering documents, inspection, and utility approval.
Should I replace a working 15-year-old inverter preventively?
Preventive replacement is optional when a 15-year-old inverter remains stable, supported, efficient, and compatible with the homeowner’s plans. It becomes more reasonable when downtime would be costly, parts are unavailable, the warranty has expired, monitoring is failing, or replacement can be coordinated economically with a reroof, battery installation, or array expansion.